
Hand Tool Headlines
The Woodworking Blogs Aggregator
“Glory to God in the highest heaven, and on earth peace to those on whom his favor rests.” - Luke 2:14
Be sure to visit the Hand Tool Headlines section - scores of my favorite woodworking blogs in one place.
General Woodworking
a 19th century door with a local story
A non-woodworking post – but it has a hand-made 19th century door in it. Some friends & I often chat about the birds we see around the neighborhood and in one of those conversations recently they re-told me a story of a door in their house. It came out of an old house here in town about 50 years ago. Though I had heard the story, I hadn’t seen the door until this spring – of didn’t remember it anyway.
 19th century interior door
As far as that sort of thing goes it’s a nice, but pretty common, white pine door. Shiplapped boards, clinch-nailed battens. I like how some of the boards taper in width – that’s a nice feature. Its original configuration was from a house-to-a-shed. I don’t know what went on in that shed, but someone kept notes written on the door about the weather and comings and goings of nature –

Here’s what I can read from the middle of that section:
1890
Bluebirds Robins + Blackbirds
10th of March ______ _____ ___
First Crickets Aug 7, 1890
First frost of the Season Sept 25
Crickets on Oct 10 [Rainy? ???]
“ “ “ 16
First Snow flurry Nov 11 1890
These notes are scattered all across the top half of the door. Some legible, most less-than legible. There seems to be no rhyme or reason to the format – one year is here, the next is elsewhere.
On the top cleat are some notes from 1886 – then right under them 1891
 top cleat
I can’t quite make out the top line but just below that is:
“First white frost of [the season?] – with the date just past the nail head – “Sept [21?] 1886
Heavy freeze Oct 4 1886″
Then right below that a line setting off the next entries for 1891
“1891 Robins and blue birds Mar 15
Crickets heard first time on Aug 9″
It goes on – but that photo cuts it off right there…it spills onto the next photo. “Frogs Mar 20 Crickets….” [illegible]
So – if you’d like to help decipher what’s written on this door, I’m all ears. I shot large photo files – and if I’ve done it right you can view and/or download them – but you gotta have a dropbox account…
I wasn’t sure of a way to create downloadable files here on this blog – and I gave up trying.
Any of you with graphics wizardry might be able to improve the photos to bring out the writing. The earliest date I’ve seen is 1872, latest maybe 1894 or 5. I think this link will bring you to a folder of 30 or so photos. If you can transcribe stuff, key it to the photo’s number
I tinkered with the brightness & contrast on this section from the 1870s
 1870s
1870s
the bottom third I get:
“Crickets Aug 1st 1877
” heard distinctly on
Oct 15 1877 after a very Warm day”
Anything you have to add, leave a comment or send an email – PeterFollansbee7@gmail.com
cherry miniature chest pt VI...........
I went back to the shop after dinner last night intending to spend a few minutes checking out the base/chest rocking issues. Those few minutes morphed into almost 2 hours. One thing led into another and I lost track of time. Figuring out why things were going south on marrying the chest to base started to consume me. In the end I still didn't have a clue as to what was going on.
Instead of adding the pics from that session to tomorrow's post I am writing it up as a separate post for today. As soon as I post this I'll be returning to that headache and commence doing battle again.
 |
| the problem |
The base has a teeny bit of twist over the sticks both top and bottom. IMO it is no where close to causing the headache with the chest and base being married. I was starting out first by checking the base and the chest for twist.
 |
| the flatness check |
This is my preferred way to check for flatness and the chest ain't a rocking on either diagonal. I also checked with the sticks and they said no twist too.
 |
| hmm....... |
Thinking about this I thought that maybe there was a hump on one or more of the bearers. There wasn't, all four were flat and straight.
 |
| light assist |
I even shined a light behind the rule and no light peeked out on any of the four bearers.
 |
| hmm...... |
Thought I had found the problem. Two corners had one above the other and two were the rule hit. I evened the ends were they met but that didn't make the rocking go bye bye.
 |
| one of the high corners |
Both of the high corners were where I had the veneer. I really thought this was the fix boys and girls.
 |
| it wasn't easy |
Of course where I had to remove some wood was against the grain. One corner torn out and looked ugly.
 |
| sigh |
I had to shim the ugly torn out corner so the rule lay flat across corner to corner. Got zero joy when I put the chest on the base. If anything, the rocking was worse then before.
 |
| checking the offset |
Next check on the hit parade was checking the bearer offset from the top of the base to the bearer. It was off less than a frog hair 360 in a few spots.
 |
| hmm....... |
Clamped the chest to the base. The clamps pulled it flat and tight to all four bearers. I could see and feel them pull the twist out of base onto the chest.
 |
| no joy again |
The chest ain't rocking on the base but the base is rocking. It wasn't rocking as bad as the chest unclamped but enough to be annoying.
 |
| back to square one |
Starting over by checking and removing the twist on the base. I wanted to go forward from here with a known, good flat base.
 |
| the final check |
When doing this I saw that two of the bottom corners weren't square in one direction. Squared those, flipped it and kept at it until there was zero rocking on the tablesaw. Repeated it for the other side. Base was now flat and not rocking on either the top or bottom.
 |
| removed |
The bearers came off without any problems. I thought with them being glued that they wouldn't come off as cleanly as they did. The reason why I didn't extend the bearers from side to side was I didn't have any scraps long enough for the long side. When I replace the bearers again I will do that.
 |
| hmm..... |
Still surprised after seeing this pic how easily this cleaned up. I used a card scraper to remove the glue residue.
 |
| last check |
According to the straight edge the top of the base is flat, straight, and all in the same plane 360.
 |
| hmm....... |
This is not the look I was expecting. I put on a 2nd seal coat of shellac and once it was dry, I wiped on the ebony dye. I was hoping that it would be more dark and black. Maybe I can boost that happening with adding some black dye to the ebony?
accidental woodworker
cherry miniature chest pt V...........
 |
| I stuck to the plan |
After dinner I went back to the shop and glued up the 2nd base. It was twisted a bit so I clamped it flat to the workbench. I wasn't expecting it to do anything but when I took off the red handled clamps, the base stayed flat on the bench. Nothing moved or shifted when I did that. Sometimes you get lucky.
 |
| cleaning up the base |
It probably wasn't necessary but I planed and rasped the base cutout smooth.
 |
| it fits |
I had built in wiggle room, R/L and F/B. However, it seems I added a wee bit too much R/L - it was 3/16". But that is what the cove molding is for - to cover any gaps between the base and the chest.
 |
| blurry pic |
Just as well that this was blurry because the tails on this base have some of the ugliest gaps I have seen in many, many moons. This blurry corner had the worse looking ones.
 |
| the other end |
This corner looks better but it still ain't good IMO. I will use it and shim all the gaps.
 |
| the best corner |
This is what I was expecting to see on all four but that didn't happen boys and girls.
 |
| homemade putty |
Gathered up some cherry sawdust and mixed hide glue with it. I filled in all the small gaps with this that didn't need a shim.
 |
| bearers done |
I glued and screwed the bearers to the inside of the base. I will screw up through them into the bottom of the chest.
 |
| too high? |
The bearers are 5/16" down from the top of the base. That puts the plywood bottom a few frog hairs below the top edge. Not that matters much because the cove molding will hide it. In the pic it looks high to my eye, but in person it doesn't.
 |
| bottom on |
I nixed just screwing the bottom on and instead I glued and nailed it. Flushed the edges of it to the chest.
 |
| lid sized |
The lid is a 1/2" oversized on the front and sides. I may knocked that back to 3/8" because I'm not exactly in love with this amount of overhang.
 |
| needs shims |
I had 4 pin/tails to shim on this end. The other end I had to do 6. Overall I used 14 shims to close up gaps.
 |
| shim stock |
I picked through my cherry scraps and used those that closely matched the chest. The japanese dozuki did extremely well sawing the thin shims I needed.
 |
| more homemade putty |
I shimmed what I could but there were still a few gaps that looked ugly. 99.9% of them were on the tails. I only had to fill two spots on the short ends.
 |
| the cove molding |
The first step is to put a thin coat of shellac on so the dye doesn't end up splotchy. I put one spoonful of shellac into the container.
 |
| hmm....... |
I added 3 spoonfuls of the alcohol from the brush container into the spoonful of shellac. That should thin it so the dye goes on even. I don't think the cove molding is pine but it looks like poplar to me. I don't know if this molding will act like pine does when it is dyed.
 |
| two of the choices |
The plan is to dye it with red oak first. The right one didn't look like the cherry at all. After the red oak has dried I will apply another coat of shellac as a sealer. After that has dried I will apply the ebony as the 2nd dye.
 |
| happy with this |
The color came out more even then I expected. It also doesn't look that bad against the cherry. (BTW when I was at Lowes there wasn't a drop of cherry dye in the store.) After dinner this will be dry and I'll put on the ebony. I want this molding to stand out from the cherry and that is why I'm using a dark ebony as the top coat dye. I'm hoping that the red underneath will peek out too.
 |
| hmm........ |
The chest is rocking in the base. The chest isn't rocking sitting on the bench. I stacked up some veneer on the low corners until the chest stopped rocking on the base.
 |
| it went south |
Took the chest out of the base to super glue the veneer stack together. Put the veneer stacks on the bearers and put the chest in place. It was rocking again. Less than two minutes before it wasn't. WTF?
The chest lays flat on the tablesaw with zero rocking in any direction. Under the sticks it shows zero twist too. The bearers show a little twist but I don't think it is enough to cause the amount of rocking I'm seeing. I'll have to set this aside for now and think on it for a while.
 |
| back thing doo dad or doo hickey |
I have a book on furniture styles and the names of the parts of them. What I don't have is one thing that has anything like this. I like the look of it on the lid over leaving the lid flat and unpopulated. A back stop is what I came up with to call it.
accidental woodworker
cherry miniature chest pt IV...........
 |
| hmm....... |
In pine this would have been a nice looking, deep rosebud. In cherry I can't feel even a hint of a depression from the clamp head. I'm pretty confident that these will disappear once I plane and sand the chest.
 |
| making cove molding |
This is a 1/2" round nose bit and the cove molding it would make is too small. This is roughly about a 1/4 of being able to cover a 3/4" width.
 |
| a bigger size round nose bit |
The cove is bigger but still not big enough. I have a larger round nose bit but it is 1/2" shank and I don't have a router table for the plunge router. This road is a dead end.
 |
| hmm..... |
I have two small cove molding planes - both of them are 3/8". The profile looks to my eye to be a wee bit too big. But the headache is and was, trying to run the plane on cherry. First I had to fuss for a bazillion years trying to get the plane to take a good shaving - not too shallow and not too heavy. A kind of Goldilocks and the three bears story.
Got that sorted out but I couldn't get a consistent cove on the entire length. The lead in wouldn't develop the full profile no matter what I tried. Decided that was ok as long I added about 6 inches of extra length for the lead in. But when I checked my cherry scraps I didn't have anything long enough to do that. Sigh.
I tried both molding planes and I wasn't happy with what I made with either one of them. I know both work well and make good moldings in pine but with the cherry I have it was garbage. Another big hiccup was the available cherry I had wasn't straight grained. It was mostly cathedrals I would have to plow through. Nixed this and decided on buying and dyeing ready made cove moldings.
 |
| working on the base |
Molding problem solved so I moved on to making the base for the chest. I didn't know it here yet that I had a major brain dump that would bite me on the arse in the PM session.
 |
| not happy with this |
I can remove some of this defect when I saw the half pin but not all. Thinking that I will plane a chamfer on the outside edge to remove what is left over.
 |
| I like this |
If I flipped the board all this would disappear. The opposite face is 99% clear. I want this be facing out so I'll deal with the defect after the base is glued and cook. This is why the defect is on the outside face.
 |
| tails laid out |
I did two tails at the corners vice one big one. I didn't like the look of a single tail and two didn't look crowded or too small.
 |
| one of 3 that came today |
I saw these squares on a Fireball You Tube vid and pulled the trigger on the two pack. You can also get a 3 pack or buy the 3 sizes individually. I have a poor record with miters and I think these may help a wee bit.
 |
| hmm...... |
These 45's are substantial. They are made out of steel (?) and it is almost a 1/8" thick. They aren't flimsy feeling and have some heft/weight to them. Both sides have scales on them. I don't know if they offer them in metric. They are made for metal working but I can envision them working with wood with no problems.
 |
| I got half sizes |
The big square is twice the size of the smaller one. Both will layout 45's, 22 1/2, and 90 degrees. The inside corner is rounded but the flange was dead square when I checked it with my 6" square.
 |
| cove moldings from Lowe's |
I got lucky as there were only 4 of these left. I hope my estimation won't bite me on the arse. The plan is to stain these and I have a few ideas percolating in the brain bucket with that.
 |
| hinges and handles |
Bought a black oxide hinge for the chest from Horton Brasses. The bail handles I got from eBay for $42 including S/H. eBay is the cheapest price I've found this style of handles.
 |
| grandson's art |
Leo did the xmas tree when he was 3 years old. Miles's is on the right and he did his a couple of months ago. I hung them on my wall cabinets and snapped a pic of them. I sent it to their mother so she could show it to them. Both are waiting to see them hanging in the shop.
 |
| I'm learning |
Chiseled a relief on the tails before I tried to dry fit the base.
 |
| yikes |
This is not what I wanted to see at this point. Go back to the 5th pic and you'll see the boo boo that I totally missed. The long base pieces are short - they are on the inside of the short ends rather than out to the outside faces of them. Real big sigh.
 |
| one point for more |
Got the short sides correct - so I get one of the two points available.
 |
| 1 1/2" short |
There is no way to fix this mostly because you can't stretch cherry. I can't see repurposing this for something else neither.
 |
| hmm..... |
I got lucky finding enough wide scrap to get a new base from. This one is about a 1/4" higher and I'm keeping it as is.
 |
| tails laid out |
It was a strange feeling after finding my boo boo. I didn't have the urge to give it flying lessons. I'm getting better at dealing with my brain farts I guess.
 |
| stayed late |
Tails sawn and ready to chop out the center waste. I plan to return to the shop after dinner and get the tails/pins chopped, dry fitted, and glued up and cooking. I want to keep moving on this and get it done ASAP.
 |
| the store bought cove molding |
I like this look and the coverage it will have on the base. The molding definitely needs some help color wise. It is too stark of a difference between it and the cherry.
accidental woodworking
Repairing a J. B. Van Sciver Chair
I volunteer for an organization called the "Repair Cafe", whose purpose is to rebuff our throw-away culture by fixing things for people (for free) and thereby keeping stuff out of landfills. A client brought in an incredibly rickety chair that belonged to his mother. It wobbled excessively front to back and only a little less side to side. Usually we fix things right there at the repair event, but this one was going to need a workshop and some tools that I didn't have at the event, so I brought it home.
 |
| The Van Sciver chair |
This chair had an emblem on the underside of one rail indicating the J. B. Van Sciver Co., of Camden, NJ. A quick internet search found this company was in business from the late 1800s to about 1980. I'm not good at dating furniture, but it was all mortise and tenon construction and it used hide glue, so maybe it was made more than 50 or 70 years ago. The screws that held the seat to the rails were slot head screws, but they were clearly manufactured screws (not blacksmith-made).
 |
| J. B. Van Sciver |
I've seen several videos of furniture repair, but have only ever worked on a couple old pieces that needed some help. The first thing I did was to label all the parts so I could get them back in the right position during reassembly.
 |
| Parts labelled |
Almost all the joints in the chair were very loose, so it didn't take much to get the chair apart. Two "spreader" clamps helped with that. One complication was that the upper backrest rail was screwed to the legs (and probably glued), with plugs in the countersunk holes. Those joints were solid and I didn't want to take them apart, which meant I had to disassemble the chair in a certain order so as not to stress those joints.
Before I could do this, though, there were corner blocks under the seat that needed to be removed. And each had 5 or 6 small nails in addition to the glue holding them in place.
 |
| Arrrgh! Nails!! |
Some of the nails were proud and easy to remove, but others were tough. I bought a tool called a "cat's paw" that helped to remove the nails. What a bummer, though - I had to chisel out some wood around the more stubborn nails and thought I might have to replace the corner blocks, but in the end they were still good enough to use.
 |
| Almost fully disassembled |
The builders used hide glue in the joints, but it was mostly gone and what was still there was extremely brittle. I tested it to make sure it was hide glue.
 |
| The water test to see if it was hide glue |
The weird thing about this chair was that the mortises were WAY longer than they needed to be for the size of the tenons. It's no wonder that the chair was racking so badly! So I added some wood to the sides of the tenons to get a better fit.
 |
| A poorly fitting mortise and tenon |
 |
| Gluing some wood onto the tenon with PVA glue |
All the seat rail mortises were way oversized and inconsistent - some were about 1 1/2" long, some 1 1/4". But the tenons were about 1" wide. The wood I added allowed me to get a far better fit to the mortises and this should help keep the chair from racking over time. The stretcher mortises fit much better, but I had to thicken the tenons by gluing on some shavings. Some of the seat rail tenons needed this, too.
 |
| Here's a dry-fit before glue-up |
Since my hide glue is about 5 years old, I did some testing before using it. It has been in the fridge all that time, and it performed perfectly.
 |
| Testing the hide glue on scrap with and edge joint and a face joint |
I glued up the chair with the hide glue and left it to cure overnight. Later, I glued and screwed the corner blocks back in place. I managed to find some slotted-head screws in my stash that matched very well the screws used to hold the seat to the seat rails.
 |
| Two new screws holding the block in place |
And that was it. The chair is now solid as a rock and should be good for another couple of generations of users.
 |
| The repaired chair |
I did not try to fix any dents, scrapes or finish problems. But I did scrape away some tiny paint droplets from the seat. This was a very interesting chair and the owners are thrilled to have it in good condition again.
cherry miniature chest pt III............
 |
| first end panel |
Starting chopping pin waste a little after 0800. It took me about the same amount time doing this as chopping the tail waste.
 |
| hmm....... |
It looks good. Only a couple of the pencil lines are still visible. The pin walls are plumb from the top edge. Batting next is checking the fit.
 |
| first corner |
It didn't go off the saw. It might have but I didn't want to risk trying it. I rasped the pins until the fit went together with gentle mallet taps. It took 3 trim and checks before I got this.
 |
| first corner tail side |
Got a gap across the board on the baseline. Wasn't sure what the headache was here yet. I just checking the fit before chopping the next set of pins.
 |
| starting on the 2nd corner |
It took me over an hour to chop and fit the first corner. I didn't think I would break that record on the 2nd corner .
 |
| not easy |
The pins initially seated and then stalled about a 1/4 of the way in. I could see which pins were tight and needed some rasping. I did those dance steps 5 times before the pins and tails mated.
 |
| I see a pattern developing |
The baseline gaps are actually better the previous two attempts to seat them. I was getting a little frustrated trying to get the left 3 to close up but couldn't.
 |
| finally got it |
Got all the baselines to go bye bye. It took a while but I finally managed to figure it out.
 |
| yikes |
I rasped the pins too many times. The baseline gaps are history but I now have gaps on the pins. Sigh.
 |
| the fix |
I rasped the pins too many times. I was chasing my tail here because the pins weren't the cause of the gaps. The baseline gaps are history but I now have gaps on the pins. Sigh. But chiseling a relief on the tails is what got the them to seat gap free.
 |
| #3 corner |
Some pins were tight and after rasping them once, I got this fit. I had already chiseled all of the tails. They seated gap free.
 |
| #4 corner |
I rarely if ever, chisel my tails. It is me being stubborn and thinking it isn't necessary. Well boys and girls, I am still capable of learning and saying I was wrong.
Happy with the fit of the box. Except for the over rasped pins, all the tail pin joints look good. The top/bottom corners are within a frog or less of being flush.
 |
| hmm....... |
I have my doubts that glue will swell these gaps shut. They might do one or two though and I'll deal with the ones that don't cooperate.
 |
| less than a 16th |
It is square and it isn't rocking neither. Both the top and bottom are laying flat.
 |
| lid |
I had forgotten that this lid is a two board glue up. It about 6" too long R/L and 2" F/B. I like the grain pattern in this a lot. No painting can match what nature does in wood.
 |
| hmm...... |
I found this blow out from chopping the waste. I'll glue it in when I glue up the chest. There is another blow up but that one is MIA.
 |
| some came |
My order from Blacksmith Bolt came but a few didn't make it. I had gotten a refund a couple of days ago but I thought it was from a price issue. Turns out it was screws that weren't in stock. The kicker? - The #6 screws I bought were too small. The screws in the handle are a #7 or metric?
 |
| I was ready |
Initially I was going to do the glue up in the AM but nixed it. Got the brush, water jug, and wet rag in standby.
 |
| hide glue |
I probably could have used yellow glue but I went with hide glue. I have never had a joint freeze on me with hide glue. Besides I didn't have to rush like an idiot to get the glue on and the chest together.
 |
| needed some help |
The tails would seat fully but they wouldn't stay. I clamped each tail on both ends. I had to clamp and unclamp this a couple of times because it kept going out of square. As soon as I clamped the top tail it would throw off the square. I had to start clamping from the bottom and work upwards for the chest to stay square as I clamped the tails.
 |
| quick Lowes run |
This plywood panel was $20 bucks. The same panel in birch was $30. No
brainer IMO. This panel felt just as stiff and strong as the birch
panel. This face has quarter sawn grain which I like an the other face
is white-ish.
 |
| the bottom is ready |
I think I'm going to just screw the bottom panel on vice glue and nails. At least that is what the game plan is as of this typing.
accidental woodworker
cherry miniature chest pt II...............
 |
| tail waste |
Took my time chopping the tails/pins and kept my strop set up in the sharpening bench vise. There isn't any technique differences working in pine vice cherry. In pine it take no time to chop tails or pins. In cherry it took me over 3 times as long. Albeit I was being cautious but it still took a long time.
 |
| cleaning up the tails |
I find sawing in hardwoods (cherry in this case) much easier to do. It takes a bit more effort than pine, but nonetheless easier then pine. I think because it is harder and slower, I am able to saw plumb better.
I normally don't check the tails for square in pine but with cherry not being as compressible I checked all the tails square to the face.
 |
| hmm....... |
For the most part the tails were square. The ones that were off were only about a frog hair. The tail slopes I sawed from the right were all square except for one. The tail slopes I sawed from the left were all a frog hair off square.
Initially I started correcting the tails for square with a chisel but that was slow going. Even though I only had to remove a frog hair, doing that with a chisel in cherry was going way too slow. I switched over to my modeler's rasp and knocked it out lickety split.
 |
| happy face on |
The molder's rasp worked better than I thought it would. I didn't go past square and see saw and it took 2 to 4 strokes to correct each out of square. I was being anal about this because cherry if not as forgiving as pine - the pins will be squared also. I want the tails and pins to mesh without binding or other headaches.
 |
| the 2nd long side |
This side came out the best sawing wise. Only 3 slopes were not square. One on the right and 2 on the left.
 |
| pin sawing |
Pine or cherry, I don't have headaches sawing the vertical walls of the pin sockets. When I do have an errant saw cut it is usually in the waste side.
 |
| pin sockets sawn |
This is as far as I got today with the chest. I had to go out twice in the AM session to run some errands. I think I should be able to get the pins chopped and do a dry fit up of the chest tomorrow.
accidental woodworker
repurposed box is done.......
I wasn't expecting to get the box done today but I'm calling it done. I will have to wait a week or so for the shellac to set before I put the tills in it. A wee bit of a surprise but I knew it would be done after an hour into the PM session. Actually started on the cherry chest too.
 |
| 2nd till done |
The plywood bottom isn't that same as what I used on the first till. This plywood isn't that light, crappy chinese crap I bought. This one is white on both faces but it has a solid feel to it and it isn't flimsy or floppy.
 |
| hmm...... |
The top of the 2nd till is a 16th above the bottom of the top till rail. Plenty of room to get my fingers underneath the 2nd till to get it out/in. I made this one a wee bit shorter then the first one.
 |
| they fit |
Both tills fit and the lid shuts flush. No hiccups, no complaints, and there is much joy and dancing in Mudville.
 |
| happy face on |
I really like how the hinges are installed on this box. I'll be doing it again on the next box like this I make.
 |
| hmm....... |
Feet for the box? Thought about after I had spilled my coffee mug on the bench. I whacked out 4 pieces of cherry for them.
 |
| chamfered |
I couldn't get four screws in the feet because the bottom plywood has two screws at the corners. I had to offset the screws in the feet to miss them.
 |
| done |
I used black screws because I like how they look against the cherry.
 |
| one more to go |
I got four coats of shellac on the bottom and sides. Two coats on the feet with two more to go.
 |
| another almost done |
The tills have 3 coats of shellac and that is all they are getting. I still have to put shellac on the top edges to call them done.
 |
| tails sawn |
While the shellac was drying, I jumped on the cherry chest. Sawed the tails individually. I usually gang saw the tails but nixed doing that because this is cherry and not pine.
 |
| hmm...... |
The tails line up pretty good.
 |
| the other end |
Did almost as good on this end. The 3rd and 4th ones from the left are a frog hair off.
 |
| pit stop |
Before I got to chopping the waste I sharpened/honed the four chisels I'll use. Yes, I still haven't rehandled the split handle on the 1" chisel.
 |
| handles came |
Amazon said they would come today but I wasn't expecting them. These only came in black and I would have preferred brass. The handles on these are spring loaded - they fall back down against the sides of the box. They came with screws too.
 |
| hmm...... |
The handles look good. IMO they look like sturdy toolbox handles. Would have been better if they were brass but I digress.
 |
| hmm...... |
Looks different with the feet. You can't really see them because they are inset about a 1/4" from each side.
 |
| one more |
The tills are done, I got 3 coats on the tops of both of them. I have two coats on the inside of the box with one more to go.
 |
| half pins |
Stopping here with the cherry chest. It was 1430 and I didn't want to start chopping and then stop a half hour later. I'll jump into this in the AM.
 |
| hinge template |
The width of the template is the width of the box. The top of the hinge plate is 3" down from the top of the box.
 |
| worked flawlessly |
I didn't screw things up and use the template upside down. But if I had, the handle plate would have hidden the four extra screw holes.
 |
| hmm...... |
Handles are done and I kind of like them. I had settled on these because all the brass ones looked like crappola IMO. I will use these again on another box. At $8 for two and no S/H from Amazon they are a bargain.
 |
| wow |
I don't ever remember having left over screws that came with hinges before. They are phillips heads that I don't like - tossed the extras in the catch all bin. I have black, slot head screws coming the Blacksmith Bolt later this week to replace them.
 |
| 1st glamour pic |
Both tills fit with no hiccups. The shellac needs to cure for a while before I can let the tills stay in the box.
 |
| 2nd glamour pic |
I'll pass this on to one of my nephews out in Indiana.
 |
| from the good hinge stash |
I have two sets of these hinges that I was going to use on the cherry chest. Both of them have ball ends which I like to use on doors but not lids. I ordered bail handles from eBay that are coming this week. I might as well buy a set of flat end hinges from Horton Brasses.
accidental woodworker
Back to silence.
When I started here this morning, the sun was shining in the East window. Now it's time to pack up my WW1 kit box, the sun is coming through the West window.

Axes, planes, chisels, gouges, holdfasts, bench hook, bench screw, brace and spoon bit roll....

Goodbye pulpit, goodbye box pews. This might just be my favourite church.

Sweep the floor. Close the door. Leave the church in perfect, cool silence.
Repairing an Old Table
Last weekend, my wife Anita bought this old side table at an antique mall. She loved the way it looked, but it was pretty wobbly and ready to fall apart. She asked me if I could stabilize it and I told her I could so she bought it.

The issue with the table was that it was coming loose in the back and the legs were wonky so she asked me to put a stretcher in the back to stanle everything.

A bigger problem with the table was actually its drawer. It was somewhat repaired back in the day but done improperly, so it really didn’t work at all. The one drawer bottom side was completely gone, so I had to deconstruct the drawer in order to fix it.


I grabbed a piece of scrap pine that matched well enough to use for the parts of the table I was going to fix. Then I cut and glued everything together.


I added a stretcher to back to stabilize the legs. I cut the piece to fit, and then I used my Festool Domino to cut the through tenon. There is nothing like using a 21st-century tool to repair a 19th-century table.


After the glue dried, I cut a Dao down the side of the drawer to fit the drawer bottom in. Then I nailed the bottom to drawer so that it would fit better and not fall in.


A couple of hours in the shop and the table is ready for another hundred years of service. I’m not going to do anything to the back stretcher to make it match the rest of the table. I doubt no one will even notice it.


repurposed box pt IV(?).......
 |
| first till |
Last night after dinner I had glued the bottom on the first till. This AM it was ready to be flushed up.
 |
| hmm........ |
The inside depth of the first till is 1 1/6". I put some tools in it that were on the bench to eyeball it. It passed with flying colors. This is deep enough for the tools I tossed in it. And tools can stick above the top of it too because there is wiggle room under the lid.
 |
| done |
Planed and sanded baby butt smooth. I am going to set the top of the till down from the top 1/8".
 |
| problem solved |
I had thought about how this till could be taken out of the box. I had to shorten it to allow for the chain lid stay. I added a couple extra frog hairs to get my fingers in here. No hiccups with lifting it out freely.
 |
| 2nd till rails |
Made a slight miscalculation with the second till rail. The inside vertical wall of the rabbet is directly in line with the top till rail. No wiggle room but I can still get the till in/out but it is awkward. There is zero wiggle room. I should have made the 'rabbet' wider than it was tall. That would have bumped it out toward the interior and given some wiggle room.
 |
| fixed |
I added a 1/8" thick piece of cherry to the outside of the 2nd till rails. The first till rails I nailed on but the 2nd one I glued on. I didn't want to because removing them if needed will be a bit of a PITA.
 |
| did better |
Did much better on the dovetailing with the 2nd till. All the tails/pins came out snug. I glued them and let them cook for an hour before gluing and nailing on the bottom. However, this till was twisted more than the first one. Didn't think to check the stock for twist before dovetailing them. I ignored it because the stock was short and not too wide.
 |
| tomorrow |
I hope to get going on the cherry chest in the AM or PM session. The box is essentially done woodworking wise. I ordered some hinges - black finish - from Amazon that I'll get tomorrow or maybe not. Tomorrow is Memorial Day. I filled a few voids in the tails with putty and I'll be ready to slap on shellac in the AM for sure. Fingers crossed on that happening as planned..
accidental woodworker
Trees, Wood, Carbon and Bugs
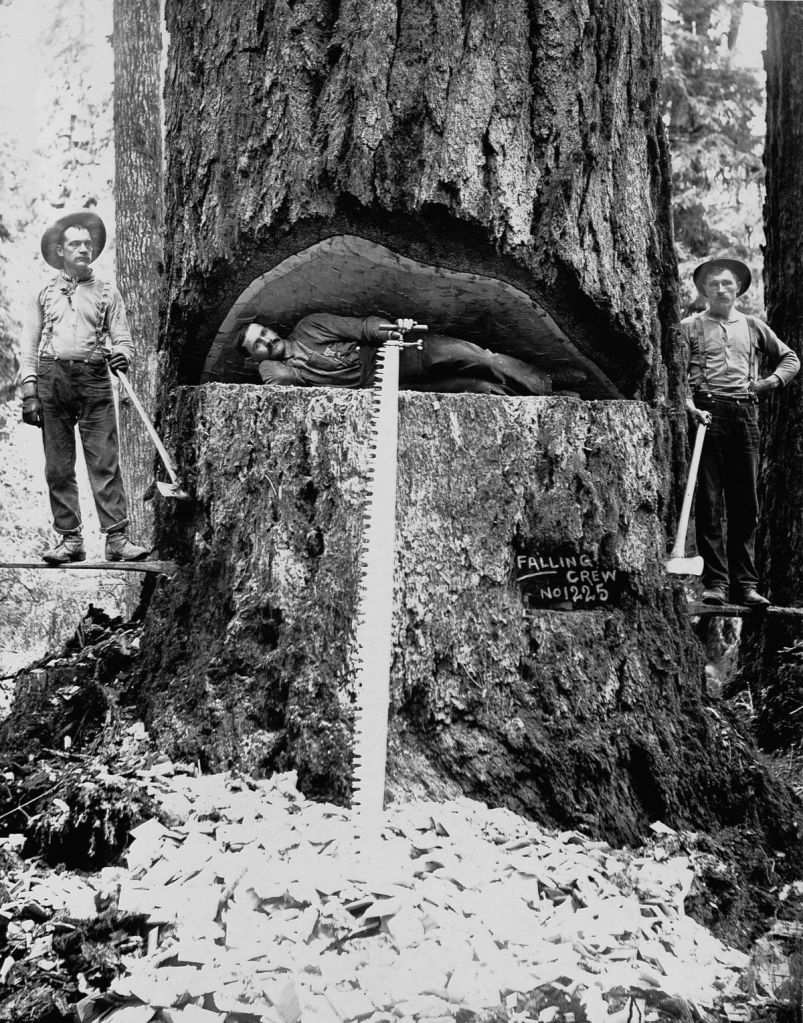 A giant California redwood tree located at the time of this photo near my former home in Forestville California. The gentlemen shown have done a marvelously clean bit of work up to this point using only a two-man saw and their axes. A serious job performed by serious men.
All that is gold does not glitter,
Not all those who wander are lost;
The old that is strong does not wither,
Deep roots are not reached by the frost.From the ashes a fire shall be woken,
A light from the shadows shall spring;
Renewed shall be blade that was broken,
The crownless again shall be king.J. R. R. Tolkien, The Fellowship of the Ring
Thank you for visiting our humble website, focused primarily on woodworking tools, especially those made by Japanese craftsmen for Japanese professional carpenters and woodworkers.
Consistent with the educational and contemplative nature of this website, in this article we will examine the nature of wood itself including the trees that produce it, two of their controversial by-products, and a couple of techniques for dealing with wood’s inherent weaknesses of which Gentle Reader may not be aware. It will a useful read without being boring, I swear by Grabthar’s Hammer!
The Miracle of Trees
As a matter of common sense, most people assume that trees, such as the California Redwood shown above which once grew very near my old house in Forestville, grow to such height, diameter and mass by extracting minerals from the ground at their roots. That huge mass must come from somewhere, right?
Of course trees do extract some minerals from the ground, along with many tons of water. But if it’s as simple as that, please consider why trees don’t create correspondingly huge depressions in the soil into which they are rooted, depleting minerals and biomass from the soil. Moreover, please consider how trees add biomass to the soil they’re rooted in instead of making a hole. You’ve heard of conservation of energy, no doubt, but is conservation of mass a thing?
Most people think plants and trees are made of minerals robbed from soil, but the fact about trees and plants so heavily hushed-up nowadays is that they are built almost entirely of carbon extracted directly and entirely from the atmosphere. Yes, from thin air.
Clearly, despite what the doom goblins wail on TV in order to shame and cooerce actors and politicians for support, to solicit clicks, and to extort donations, carbon dioxide is a useful substance critical to all plant life; it’s not the poison the smelly, screeching doom goblins claim it is. Consider what would happen to this planet and all creatures who live on it if carbon dioxide went away. Or if oxygen went away. Ah! Could it be there’s no money to be made by speaking the simple truth rather than inciting panic?
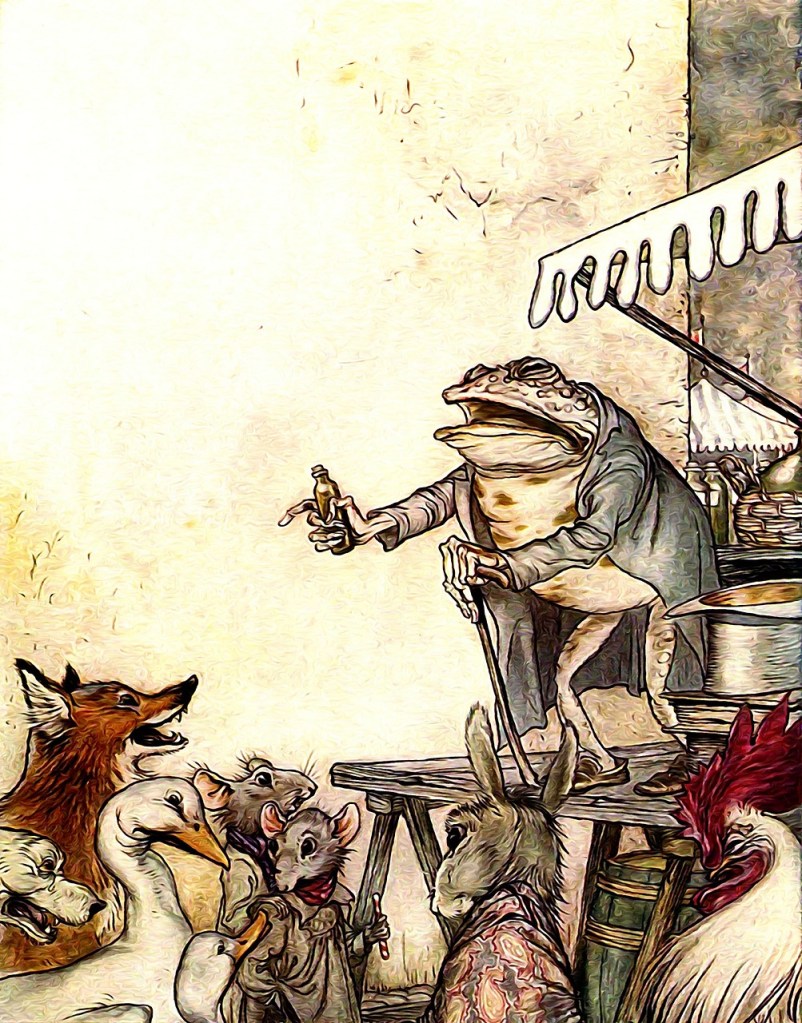 A climate scientist fleecing the ignorant (and gullible) masses. I wonder if he has any of my favorite Idiotbegone pills in his wagon?
Of course, plants do extract a few minerals from the soil along with great amounts of water. Powered only by sunlight, plants and trees remove carbon from the air and use it to create cellulose, a material very similar to sugar, BTW, and which many insects and animals, but not humans, can digest. Think grass and other plant matter.
Show me a single “scientist” that can replicate this miracle in a lab and I will bow down and kiss his bulging bunions. Good luck in your search for that miracle worker, but in the meantime, I won’t be needing any scientific kneepads.
Plants need free carbon dioxide in the atmosphere to grow, and animals, including me and thee, need both plants and oxygen. Indeed the greater the concentration of CO2 available, the more plants grow, the more CO2 they remove from the atmosphere, and the more oxygen they produce. Indeed, every molecule of oxygen surrounding planet earth was respirated by a plant. Hmm, sounds a lot like an endless, natural cycle, one that animals and humans rely on unconditionally. Imagine that…
Plants are marvelous sunlight-powered miracles. And don’t forget, except for the salt, every crumb of every ingredient in your peanut butter, humus and boiled mutton sandwich on rye originated with plants produced using sunlight, carbon, and water.
The Importance of Wood
Wood is a wonderful material, used by humankind since well before the archaeological record to produce heat, light, shelter, clothing, tools, weapons, food and water. Even today it remains the supreme catalyst.
Although computers, concrete and carbon fiber get all the attention nowadays, and those who evaluate the complicated “environmental” impacts of materials on this world carefully ignore it, there would simply be no human civilization without wood.
There are those who disagree with this statement, mostly highly edumacated individuals affiliated with supposedly serious organizations, many of whom are short-sighted, financially-conflicted souls with short attention spans that never exceed the news cycle, and who, despite clear evidence to the contrary, choose to equate the use of wood with the destruction and/or pollution of the natural environment for fun and profit.
Of course, they believe, or at least profess, that the carbon released by the combustion and decomposition of wood is wholly poisonous. These nitwit geniuses instead promote the supposedly “ecological” use of steel and concrete and petroleum products instead, all materials that require huge amounts of energy to fabricate, transport and recycle, all while while releasing millions of tons of truly (versus imagined) poisonous substances into the natural environment annually. Alas, the medicinal cure for idiocy your humble servant strongly advocates is apparently not yet widely available.
Wood contains a tremendous amount of energy, as Gentle Reader has observed in wood-fueled fires. The immutable laws of thermodynamics state, in essence, that all heat comes at a cost. Oil costs money to pump, transport and refine as well as special machinery to use it, but the heat given off by wood is simply the conversion of sunlight gathered by the plant while it was alive back into heat and light. A complete and pure circle.
Sure, the combustion and decomposition of wood releases carbon back into the ground and atmosphere, but every molecule of carbon released by wood was originally extracted directly from the atmosphere by many, many plants over many many cycles. Therefore, plants remove carbon from the atmosphere, and only release that carbon when they return to the big lumberyard in the sky. This is true “net zero,” without the production of an ounce of pollution, unlike steel, concrete, oil, coal and every other fuel and material used by mankind without exception.
I’m not suggesting the use of petroleum and coal and windpower, within limits, is irresponsible, but if the environment is important to you, as it should be, then using organic materials and fuels instead of oil, coal, steel, concrete and wind turbines should be a high priority.
Furniture Pests
Our Beloved Customers use our tools to make elegant, useful stuff out of wood. This wood is formed of cellulose, the most abundant organic compound on Earth, one very similar to but fundamentally different from the sugars we consume for energy. Many animals, including herbivores such as elephants, cows, rabbits and termites have the built-in ability to convert the cellulose in the plant matter they eat into energy by a process we cannot replicate. Humans can’t do this, nor have we figured out a way to accomplish this apparent magic without the intervention of animals, insects or fungus. Once again, puffed-up prideful science can’t do what every carpenter ant and every mushroom obediently does without even be asked to.
A part of the “carbon cycle” relies on such animals, bugs and micro-organisms. If left to their own devices bugs and fungus quickly recycle wooden objects, including houses, furniture and parts of our tools made from wood. You may not have noticed these pesky critters, but you’ve probably seen the holes they chew and the wood dust they excrete. Check an old tool handle, handplane body, or antique table leg for evidence of death watch beetles of powderpost beetles, two common varieties of bugs commonly called “furniture beetles.”
I don’t know about you, but I hate the very idea of icky bugs eating my furniture, tools and handiwork. But what to do?
There are plenty of chemicals manufactured to make wood taste yucky to bugs and fungus, but most of those are toxic and/or carcinogenic so you wouldn’t want to leave them in contact with your skin or lungs for any period of time. But what’s a safe way to keep bugs and fungus from chewing on your workbench, furniture, tool handles or plane bodies? And what can be done once some of them have taken up residence therein?
Termites are are problem bugs, too of course, but most of them prefer a higher moisture content in the wood they dine on than is typically found in houses and tools. That said, I’ve seen subterranean termites and Formosa termites in Guam swarm and eat interior furniture and wooden doors down to hollowed-out toilet paper tubes in front of my eyes. Scary stuff. This is precisely why people don’t build much of anything from wood on that island but spend lots of money on chemicals to prevent termites from turning cellulose into bug crap.
For example, while living on Guam, I had a neighbor in the US Airforce stationed there who’d imported some beautiful Amish furniture made of American Cherry wood from his home in Pennsylvania. Unfortunately, there was a crack in the concrete slab-on-grade floor underneath his beautiful dining table with a corresponding gap in the ceramic tile on top that allowed the local termites to access a single cabriole leg of that table unseen. The table collapsed into a pile of sticks and red termite crap after a year. I kid thee not. Vicious, voracious, vile bugs.
If Gentle Reader has ever frequented flea markets and antique shops, or even perused photos of antiques, you will have seen the many holes left by furniture beetles. I own several old hammers, axes and planes with their wooden components riddled with bugholes. But how can you prevent bugs from infesting your valuable wooden objects in the first place without using highly-toxic, corrosive, and expensive chemicals containing lead, chromium and/or arsenic? Easy peezy. Borax is the answer.
A Non-toxic and Inexpensive Method of Wood Preservation
There are any number of effective chemicals available for wood preservation. Borax is what I recommend based on direct workplace experience. Its a naturally-occurring white powder sold everywhere as a laundry detergent additive. But it’s not just for washing Gentle Reader’s socks, oh no. It’s essential in many industrial processes, including blacksmithing, where it’s used as a flux when forge-welding iron and steel. Japanese blacksmiths use it too.

The vast majority of borax is mined in California where there are huge deposits in ancient lake beds. You may have heard of famous “Twenty Mule Team” wagon trains once used to transport borax from Death Valley.
For this application you don’t need wagons or mules, just water and borax powder, but NOT Borax-brand washing detergent. Both are sold as laundry additives, so don’t confuse them.
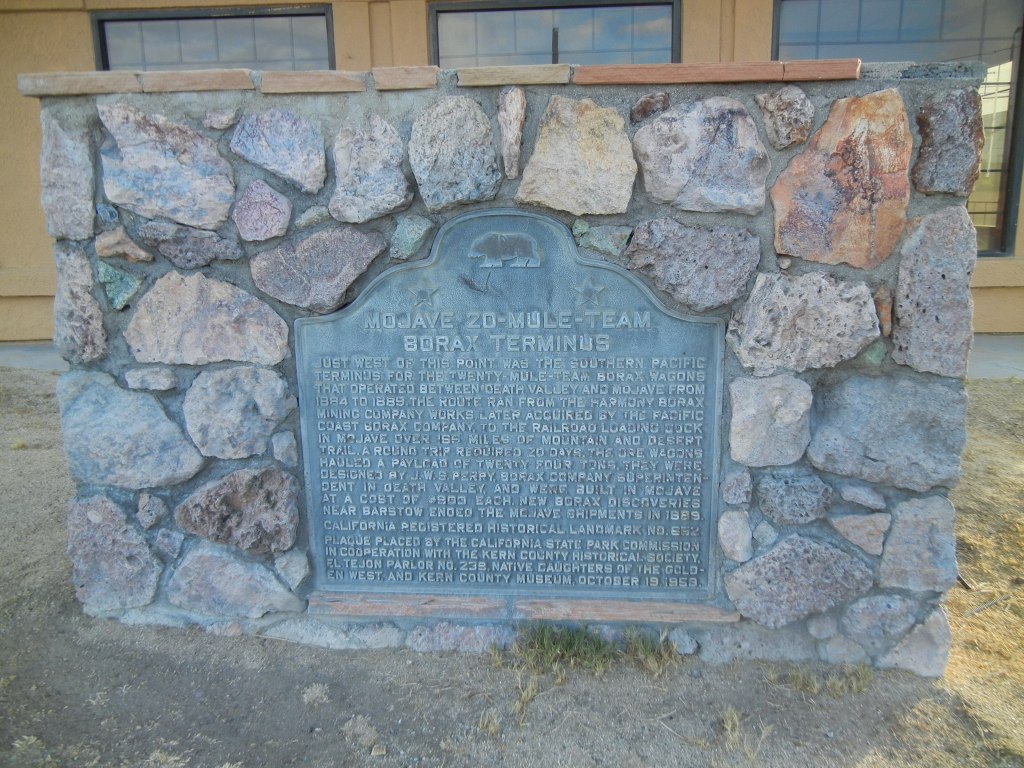
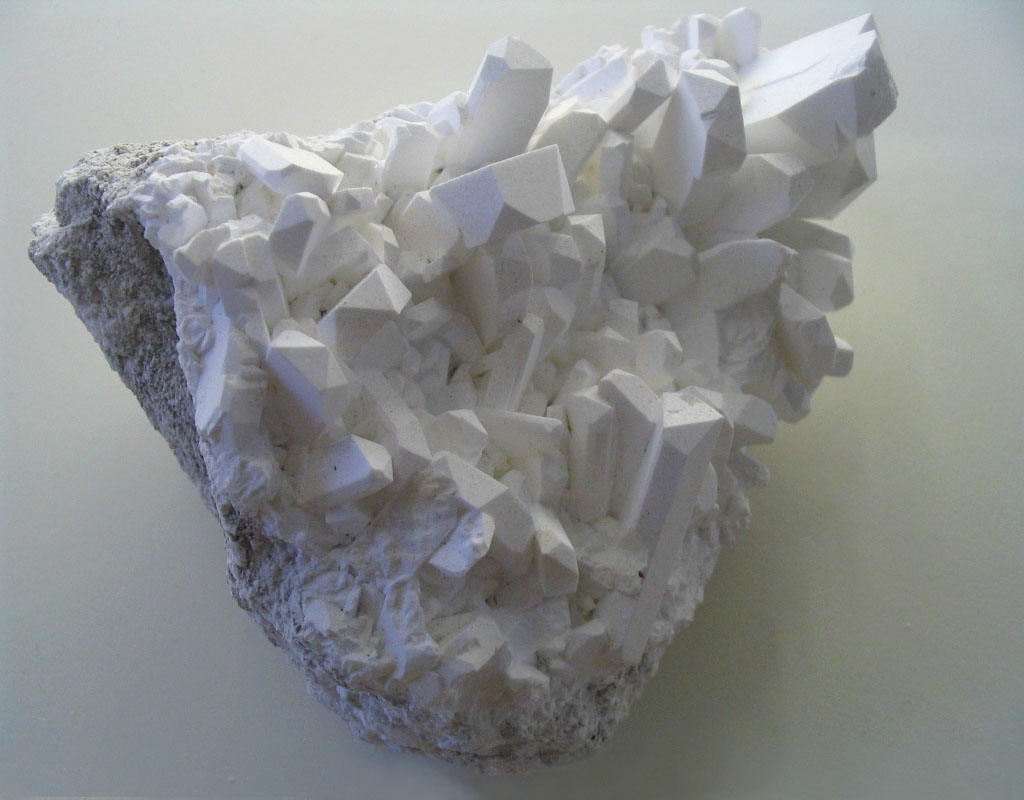
 2 mule team wagon



 A borax mine in Boron, California USA
To prepare this wood preservative and insecticide, dissolve borax powder in warm water to make a 7-10% mixture. Then spray it onto wooden objects at-risk, or better yet, soak the wooden objects in this mixture and let dry. Be careful not to spray the cat or the carpet.
Borax messes with the internal functions of bugs and fungus, but it’s harmless to humans and domestic animals to handle, so long as you don’t soak in it and ingest it. Indeed borax and its variants are the only sure way to protect wood against bugs and rot without putting human life and health at risk. No VOC risk. No carcinogens. It won’t pass through skin. No environmental contamination risk (that’s important). Won’t corrode metal fasteners. It has no odor. And it’s cheap. These are all important reasons for woodworkers to use borax.
There are only two downsides to using borax. First, since it’s water soluble, you need to keep wood treated with borax from repeated wetting or the borax will leach out. Second, you need to keep wood treated with borax out of direct contact with soil because moisture in soil will, once again, leach borax out of wood.
I add borax to the water I soak my sharpening stones to prevent crud from growing. It works for years at a stretch, and doesn’t harm any variety of sharpening stone, synthetic or natural, nor does contact with dissolved borax harm me, or even irritate my skin, so long as I don’t drink it (see the Wood Finisher’s Pledge above). That said, I don’t bathe in it, and I understand that some people have a reaction, so don’t go crazy.
Borax also makes the water alkaline preventing rust.
But before using this mixture to treat wood, please recite the Wood Finisher’s Pledge along with me now: “I will not drink wood preservatives, use CCA impregnated toothpicks, nor wash my face with oven cleaner.”
A Quick, and Cheap But Slightly Toxic Way to Eliminate Bugs from Wood
Borax will kill bugs already in the wood given time, but is there a quicker way to get rid of those voracious beasties?
Here’s a technique to deal with wood-eating bug infestations I learned from woodworkers in Japan. I’m sure its not unique, but I’ve never heard of it being used elsewhere.
Before employ this methodology, please recite the Wood Finisher’s Pledge again, but with more feeling this time.
Simply find the entrance/exit holes bugs chew into and out of an infested wooden object and, using a syringe or pipette, squirt or drip a little gasoline into each of them. You might even soak the wood overall in a bit of gasoline.
But, be warned, because Murphy rules the universe and truly wants to hurt you and yours, be sure you do this outdoors well away from anything flammable. Also be sure to put out your stogey, give your Puffco Cupsy bong a rest, and dial down your “electrifying personality” because “hair on fire” is not simply a real risk around uncontained gasoline, it’s practically garan-frikin-teed.
After judiciouly and carefully applying this small amount of gasoline, you can wrap the object in plastic, or place it into some kind of airtight container, to allow the gasoline vapors to permeate the wood. Do this outdoors, once again, and refrain from smoking. The gasoline fumes will promptly send the bugs, their eggs, and all their chilluns to the big lumberyard in the sky. In nomine Patris et Filii et Spiritus Sancti, Amen.
After a few days, unwrap/unseal the wooden object and place it outdoors in the sunlight to remove the smell of gasoline.
This technique works perfectly, everytime, and cost almost nothing. The chemical companies don’t make a penny on this process which is why you’ve never heard of it.
YMHOS
 I can’t believe those damned bugs ate my favorite bow! If only I’d followed Stan’s advice and treated it with borax.
If you have questions or would like to learn more about our tools, please click the “Pricelist” link here or at the top of the page and use the “Contact Us” form located immediately below. You can also reach us at Covingtonandsons@gmail.com
Please share your insights and comments with everyone in the form located further below labeled “Leave a Reply.” We aren’t evil Google, fascist facebook, or the Congressional IT department of the Democrat Party and so won’t sell, share, or profitably “misplace” your information. If I lie may bugs eat all my tool handles, and food taste like charcoal.
New panel.
In with the new panel.

It has been agreed with CCT to take a SPAB (Society for Protection of Ancient Buildings) approach to this restoration. I.e. minimum intervention/leaving the new timber unstained. It will mellow in in 50 years or so.

The joints drawbored/pulled tight as they were before. It's amazing what oak will put up with!


Shape the ends of the pegs to the moulding, and then a look at the back. The rear of the panel matches the original panels now, with axed chamfers.

Buying Old Tools
When you’re looking at where to buy old tools, you need to decide where to go. When I started collecting tools back in the 1980s, the main places were antique shows and flea markets. Even after all these years, these are still the two easiest places to find general woodworking tools at a good price. You get to look at what you’re buying to see how good the condition is. Then you can barter on the price if you want with the seller. Large antique shows and flea markets have hundreds of vendors during the show. If you’re looking for common planes, chisels, and saws, this is the best place to be. After buying tools for forty years, this is still the primary place where I buy tools.
However, since the ’80s, numerous other places to buy old tools have opened up. Mainly because of the internet. eBay is by far the easiest way to find what type of tool you’re looking for. A simple quick search can lead you right to the type of tool you’re looking for as well as its vintage. Prominent eBay sellers will take multiple pictures of the tool and include a solid description of what you’re buying. On eBay, you can either wait for the auction to be over or simply buy it with a Buy It Now button. eBay is where I’ve been selling my restored tools for the past twenty years and will probably continue to do so for the next twenty.
Antique tool sellers’ personal websites are also another resource. They, too, will categorize their inventory into a search format so that you can easily find what you’re looking for. Tool collector websites often sell tools that are in good to mint condition, so little restoration may be needed. With this, the pricing on their tools will often be more than what certain eBay sellers will have, but not always.
Online classifieds like Craigslist and Facebook Marketplace are another option. In my experience using those platforms, I’ve I have found that sellers are often very vague in their description and only include one or two pictures of what they’re selling. I rarely buy tools through those two platforms as I don’t like having to schedule a time to meet up with the seller, and prices are often too high anyway.
Along with Facebook Marketplace, Facebook tool groups is another way to buy old tools. There are dozens of tool collecting groups on Facebook that specialize everything from restoring workbenches to using stanley planes to collecting infill planes. The members of the group will post pictures of the tools they want to sell along with their price. There are also Facebook groups where you can bid on tools like an auction or even swap tools for trade. I have never bought anything from any of these groups as I have heard and seen too many scammers listing tools they don’t even own just to take money from the buyer and split. Others may have had luck with these groups.
Yard sales is another way to buy old tools. However, the yard sales around me are always filled with clothes and baby toys. Driving around town from a yard sale to yard sale is a painful way for me to spend a Saturday afternoon. Unless it’s a barn sale out in the country, I generally skip any community yard sale, with one very large exception, The US 127 World’s Longest Yard Sale!
The US 127 World’s Longest Yard Sale runs from Michigan to Alabama on state route US 127 the first weekend of August. This sale is hundreds of miles long and has thousands of vendors who set up from the Thursday through Sunday of the show. In fact, the sale is so large that many sellers will set up the weekend before the show even starts. Anything and everything is sold during this show. Every year, I spend several days traveling up and down US 127 between Ohio and Tennessee looking for old tools. Some years I hit the jackpot, others I get skunked only coming home with a handful of tools. But the show is amazing. I call it the Super Bowl of Antique Shows.
Another good place to buy old tools is from tool collector associations. The largest is the Mid-West Tool Collectors Association, but there are a few smaller regional assoctions like The Ohio Tool Collectors and PATINA. Each association will have shows several times a year around the country where members meet up and show and sell their tools. It’s a great way to meet fellow tool collectors and learn about the tools they own. It’s one of the best ways to learn about old tools and how they work.
The most fun I have buying old tools is from antique tool auctions. I prefer the live ones, but their are a lot more that appear online that I participate in. Live auctions are full of action as the auctioneer bids out the tool to the gallery. I get a rush trying to win something I’ve been waiting several minutes to hit the auction block. I’m always hoping that I’m the only one who wants the tool, and in some cases, that has happened, but for the most part, I have to bid against my fellow tool collectors. I always have a set price of what I want to pay and also take into consideration if there is a buyers premium and tax taken on top of my bid. Buyers premium is a fee many auction companies will use in order to cover some of the cost of setting up the auction. Many times, the buyers premium will be 10-15%. However, I’ve seen some as high as 20%. You’ll need to be careful when bidding so you don’t inadvertently overpay for your tool. If a buyers premium is 15% and they charge tax, I automatically adjust my bid fees to 20% in my head. So, if I’m willing to pay $100 for a tool, my max bid will be $80.00. $80.00 bid + $12.00 buyers premium, + $6.00 tax comes to $98.00.
repurposed box.......
So far the router box turned into a toolbox is moving along swimmingly. I'm on the fence about making a new box for the plunge router but we'll see what shakes out when I'm done with this box and the cherry chest.
I spent the day in the shop but when I killed the lights I was surprised by how little I had accomplished. I was expecting to see a lot more done based on the time I had spent in the shop.
 |
| hiding the plywood |
Used the LN 140 to plane a rabbet for the cherry banding. The cherry was left over from Leo's desk. I glued it in the rabbet with yellow and super glue.
 |
| last one |
Because of the thinness of the banding I didn't miter it at the corners. I used butt joints and they are small enough that they aren't that noticeable.
 |
| top done |
I picture framed the top of the box in cherry. I banded the inside of the top in cherry too.
 |
| done |
I thought of putting banding on the lid/bottom joint line but didn't. The big thing IMO was hiding the plywood edges at the bottom. Thinking ahead after looking at this was what about handles? Should I put one on the top or on the sides. This is a substantial box with a 1/2" bottom so it will handle a lot of weight. So handles on the sides gets the cigar.
 |
| single dovetail |
I am going to put two tills in the box. The box is deep and the two tills will make stowing things in more efficient. The top till will be about 1 1/4" high. the 2nd one beneath it will be about 2" high but that is subject to change.
 |
| hmm..... |
Went together off the saw with one corner a wee bit loose. These single, small dovetails have always caused me problems. The 1/4" plywood bottom will be glued on and that will add a lot of strength to the till.
 |
| it fits just shy of snug |
The fit should loosen up once I plane it after it has cooked. Both of the tills won't extend fully R/L because of the chain lid stay. The till beneath this one will also be shorter on the width so it can be lifted out/in.
 |
| sigh |
I thought the plywood I had was enough to both till bottoms but it wasn't so boys and girls. The left over was wide enough but 1 1/2" short on the length. A Lowes run is upcoming.
 |
| waiting |
Haven't forgotten the cherry chest. I managed to get one tail board in the Moxon and then nada. I turned my attention back to the toolbox build. The idea was to work on the two together but that ain't happening so far.
accidental woodworker
new project.......
It is actually a left turn project for one, and a new start for the 2nd one. The left turn one started at as a box for my plunge router that turned into a possible toolbox. That one is progressing nicely. The 2nd project is a miniature cherry chest. I have churned out a few of these lately in pine, This will mirror what I have done but in cherry. Looking forward to how this one turns out.
 |
| repurposed box |
I had to fill in 8 holes left from plowing the top lid groove. I didn't bother to try and bury it in the tails/pins. I don't mind the look of the plugs.
 |
| 1/2" bottom |
I glued the bottom on rather then installing it in a groove. While this was cooking I started on the cherry chest.
 |
| breaking down the cherry |
I had two wide cherry boards for the main carcass and two smaller width boards for the base. I think I have a cove molding plane that I'll need for the molding on top of the base. If not I'll look into buying a cove bit.
 |
| hmm...... |
Put the chest together to eyeball the dimensions. When I laid the corners for dovetailing the size of the box looked awkward. I was thinking of making it smaller in the height but changed my mind after seeing it like this on the bench.
 |
| done |
Took me a while to layout the tails. I didn't want a boatload like I have the repurposed dovetailed box. I settled on 6 tails and 5 pins. Not too wide apart and not to close together.
 |
| went with quick and easier |
I had about a 16th overhang of the bottom all around to flush. I started planing it and stopped. Planing this 1/2" plywood felt like I was trying to plane stone. Zipped it flush with the small battery router and a flush trim bit.
 |
| adding screws |
I didn't use a lot of glue securing the bottom on. To make sure it stayed home and played nice nice, I added screws.
 |
| hmm....... |
The bottom is flat and not rocking but the top still has a wee bit of it. I'm leaving that as is. There isn't any compelling reason to knock it back. Nothing will be married to the top so it doesn't matter.
 |
| awkward |
Cleaned up the outside of the box with the #4. I planed half this way,
flipped it, and planed the other half. Didn't get any appreciable tear
out and I followed the planing sanding it with 80 grit.
 |
| lid is free |
I was going to saw the lid off by hand but nixed it. I couldn't figure out any way to secure it so I could do that. Zipped the lid off on the table saw. Bonus is I didn't have to plane the lid or the bottom to fit.
 |
| hmm....... |
A couple of weeks ago I watched a YouTube vid on someone making a display case where he surface mounted hinges like this in shallow mortise. That left the hinges flush with the surface. I decide to give that try on this box. Unfortunately these hinges set me back almost $50 and I was a bit reluctant to use them. But they were the only hinges I had on hand that weren't thin stamped crappola.
 |
| done |
I like this look a lot. They look so much better than just being surface screwed to the box.
 |
| flush |
I was concerned about this aspect of the hinging. The lid is flush with the bottom 360.
 |
| ta da |
Opens and closes smoothly. No binding, creaking, or complaints.
 |
| yikes |
I went searching for a latch for the box and this box that has my threaded rod clamps fell off the drill press cabinet and this end popped off. I had to make a detour and glue it back together.
 |
| latch installed |
This brass latch was the only one I had. It has a locking option that I really didn't want. I had 5 sliver ones but the hinges are brass so the latch has to be brass.
 |
| cherry off cuts |
I'm going to use these on this box. The first will be to cover the plywood edges of the bottom. Thinking of picture framing the top in cherry also. I have the time and I want this box to look nice. Also thinking of putting one or two tills in the box.
accidental woodworker
I have seen the light.
Slowly take the stile off the tenons. When you can see the light, you know you're winning!

Gentle taps and leverage; these mortices possibly haven't seen the light of day for 400 years.

What a joy to see the evidence of the original joiner working the wood. The runout of the plough plane through the tenons, shavings made when chopping out the mortices still in the bottom of the mortice! If you've been careful ,the holes in the tenon should be intact enough, to pull the joint together again.

Place the half of the pulpit to one side and set about removing the broken panel.

My office for the day.
Temperatures are rising, here in South Devon, so it was pleasant to be working in the cool of this charming little church today.

I have been working next door and visited the church, on my lunch break. The church does not have regular services, or a congregation and is looked after by the Churches Conservation Trust. Even though it's out of the way, someone had vandalised the pulpit, smashing one of the panels. There was a sign asking for donations, so I got in touch with the Trust and went one better, offering to fix it. I fell in love with the pulpit straight away. It's 17thC and made from riven oak, how could I not!

Guilloches and arcading. Lovely.


The panel that was smashed, was itself a modern replacement; a flat thin piece of oak, which was probably why the miscreant was able to smash it. The original panels are all thicker, with axed chamfers on the reverse, as we would expect on 17th C furniture.

So, first up, drill out the pegs, carefully, with spoon bits and brace.

And extract any remaining pieces.

Leo's desk is done........
 |
| first one fitted |
Off the saw the pins and tails were too snug. It took a while before I got it to come together.
 |
| hmm...... |
Tried sawing the pins a different way and it didn't work out. All of the left side cuts were tapered. Some I could straighten and remove, a few I couldn't.
 |
| better pic |
I usually saw the left vertical saw cut by looking at the saw on the right side. These cuts I looked on the left side of the saw as I made the cut. I sawed the other end cuts the way I usually do and had better cuts. Need more practice sawing on the left.
 |
| sigh |
The glue up looked good but it is a wee bit short. Note to Self - double check eyeball measurements with a rule/tape.
 |
| off the saw |
This side was easier to fit. It fit off the saw but I wasn't happy with the tightness of the pins and tails. I didn't think I would be able to glue it up with yellow glue. I felt the glue would swell the pins/tails and make it impossible to seat the two. Trimmed all the pins with a rasp to loosen the fit.
 |
| yikes |
Had a brain drain on the measurements. The R/L should have been 11 inches but this is 9 5/8". The edge guide fits but barely. There is zero wiggle room but it will still work.
 |
| one more to go |
No trimming needed for this one to come together.
 |
| hmm...... |
Last one fitted, box together, and the guide still fits. The plan was to put this in the underside of the lid.
 |
| won one, loss the big one |
The long rods fit in the interior. These were planned to keep the guide in the lid company. The big loss is the router. It is too tall to put in the box upright but that wasn't a problem. The plan was to lay it down on the bottom.
 |
| nope |
Remember the R/L being 9 5/8"? Well it is biting me on the arse here. The router is wider then the width of the box. The router won't fit upright and it won't fit laying down. I couldn't think of anyway to salvage this for the router.
 |
| got lucky |
Found a piece of 6mm and 1/2" plywood for the top and bottom for the box. At Lowes yesterday a 2 foot square piece of 1/2" birch plywood was $22. The 6mm will be used for the top and the 1/2" for the bottom.
 |
| rocking |
I don't understand where this is coming from. All the corners are flush or less than a frog hair off. It is rocking on the high corners a healthy amount. Removing the rocking was batting next.
 |
| doesn't fit |
I have a 6mm iron for my Lee Valley plow plane, The 6mm panel doesn't fit in the groove I plowed.
 |
| groove width |
 |
| plywood thickness |
It ain't going fit. I wonder if my fellow metric woodworkers have these same headaches?
 |
| plowed a shallow rabbet |
I ran the rabbet plane 3 times on each side. It was a self supporting fit.
 |
| glued and cooking |
Needed some help seating the pins and tails. Because of the snug fit and the number of tails, I used hide glue. Hide glue doesn't swell the pins/tails like yellow glue does.
 |
| Leo's desk |
I'm happy with the dowel joinery I used on this desk. It feels as solid as mortise and tenon joinery. The only downside is what will the desk look like in 20 years?. Will the dowel joinery hold up as well as mortise and tenon joints do.
 |
| glamour pic #2 |
I like the front drawer rail a lot. It doesn't look out of place (IMO) with the rest of the desk.
 |
| glamour pic #3 |
I didn't know if the desk will be up against a wall or not. The back is finished so it can be if needed.
 |
| side by side |
Both of the grandsons wear the same clothes and share a lot of other same things. The desks hopefully won't be a sore point between them. I don't what one thinking the other got a better deal him.
accidental woodworker
almost done.......
It has been unseasonable warm for the past 3-4 days. For the past two days the temps got into the low 90's with today topping out at 96F-36C at my house. The official temp for Rhode Island is taking at T F Green airport. That temp was 88F-31C. Normal temps for this time of the year are a high of 69F-21C. According to the blurb I read the temp rarely exceeds 82F-28C. This mini heat wave is supposed to break tomorrow. Fingers crossed on Mother Nature cooperating.
 |
| this ain't going to work |
Realized after I got screwed in that it won't stop the drawer from being pulled fully out. It needs another stop between it and the biscuit.
 |
| done |
Got both of the drawer stops installed without any hiccups. I should have done this on Miles's desk - putting the stop on the tilt rail. Something to remember for the next one.
 |
| sigh |
I really like how the drawer pulls look against the cherry. Unfortunately the supplied screws are phillips heads which I don't like. I had #5 slotted oval head screws but the heads are too small. I'll get some #6 ones on order ASAP because I can't give this desk to Leo with phillips head screws.
 |
| sigh |
I was hoping to post the glamour pics of Leo's desk today but that ain't happening boys and girls. I had put a moving blanket on the workbench before I had put the desk on it. There are two drag divots on the top, one small and thin with the other being longer and wider. I couldn't see anything on the moving blanket or something underneath it on the bench that caused it. Regardless I will have to deal with it and for it delaying posting glamour pics.
 |
| can you see the router box? |
Went to Lowes and bought three 1x12 x 4ft pine boards. The box the router came in gave me the minimum measurements but I had to up them some. There are two router fence guide rods that are 15 inches log - that drives the minimum interior dimensions. The OD measurements are 17x 13x 11 (roughly).
 |
| split |
I was able to get both long sides and one end from one board. This end had a split that went across the entire width. I broke it in two cleanly and glued it back together. I will let this cook until the AM.
 |
| hmm....... |
I hope I never tire making dovetails. It still revs my motor sawing and chopping on two different boards and then having them come together at 90°. Usually I layout dovetails with a larger pin but I went for a smaller ones because I will be sawing the lid off after the box is cooked.
 |
| one side done |
When I sized the sides, I did it so any knots or other defects were 4" or more from the dovetails. In hindsight (which sucks sometimes) I should have done one wide tail where the lid would be sawn out.
 |
| long sides done |
Been a while since I have done so many tails on the ends. Pins on in the on deck circle.
 |
| pins laid out |
I am a little wary with these boards. Most of the time pine boards I get from Lowes do stupid wood tricks within a day or two. Fingers crossed that these will behave themselves. The remaining two boards will be used for the top and bottom - I'll thickness them down around a 1/2" or so.
The plan is to return the shop after dinner and at least saw out the pins. If I feel ambitious I'll chop them out. Pics on the 11 o'clock news update.
accidental woodworker
Pages

Please Leave a Reply Cancel reply