
Hand Tool Headlines
The Woodworking Blogs Aggregator
“Glory to God in the highest heaven, and on earth peace to those on whom his favor rests.” - Luke 2:14
Be sure to visit the Hand Tool Headlines section - scores of my favorite woodworking blogs in one place.
General Woodworking
Miles's desk pt XXI.......
 |
| hmm....... |
To my eye it looks like a design element of the desk. (the little doo hickey things on the underside of top rail against the legs). It hides the end grain of the front rail from being seen. Note to self - on Leo's desk make all the top rails the same width .
 |
| happy face on |
Out of the clamps and all is fine in Disneyland. All the miters are tight heel to toe on this side. On the opposite side it is the same except one miter is a 1/2 of a frog hair open at the top. Overall happy with the outcome and the frame withstood me scraping the miters on both sides.
 |
| )(&@%)Q&@*_Q |
Made the first batch of splines too small. Only one might have been usable but it had zero wiggle room. Made a new batch oversized more than I allowed on the first ones.
 |
| not my fault |
I know this spline was loose because I checked it dry. When I applied glue it froze about 1/8" shy of bottoming out. Glued in a shim from each side to close up the hole. Clamped all the splines and set it aside to cook.
 |
| PITA |
Got the rails and legs sanded and ready for paint without any hiccups. However, the slats are proving to be a massive PITA. I had planed all of them before gluing them to the rails and now after the first sanding with 120 all kinds of ugly tear out are popping up to shake hands.
I worked on resolving that until the dinner bell rang. Got one side and the back done but left side still needed attention. I dealt with that after I filled the pie hole.
 |
| better |
Got 6 spray coats on the test piece and it matches the top pretty good. Even the depth of the finish looks about the same. It looks like 6 spray coats on the slats will do the job.
 |
| prepping the frame |
Used the #3 to smooth and flush the miters. I am keeping the frame as is. No chamfers or any other molding edge detail. The map is a formal document and the frame will match it.
 |
| back rabbet frame |
Glue and nailed 3 sides first. Then I fitted the last one to it. Filled in the nail holes with putty. I'll be painting it black in the AM - not milk paint but a latex black paint.
 |
| hmm..... |
First spray coat on the slats. I did that so I could if any spots of tear out were missed. Cherry is a pretty wood with a finish applied. I will spray on 6 coats before I brush shellac on the rest of the base.
accidental woodworker
A Fray Brace with Different Style Chuck
When I found this brace a few weeks ago, I grabbed it because I didn't have a 6" brace. And because it's a Fray.
 |
| John S. Fray 6" brace |
John S. Fray was in business from the late1850's to 1909 or 1920 (accounts differ), when they were bought by Stanley. But Stanley continued to use Fray-marked components after the purchase, so it's not clear when this brace was made. There's some evidence below that it's post-1932. I'm sure there are some people out there that could nail it down, but I'm not one of them.
 |
| THE JOHN S. FRAY CO. |
 |
| BRIDGEPORT, CONN U.S.A. |
 |
| The only other marking is this "7" on the ratcheting area, but it's a 6" swing! |
I'm not certain, but the handles might be rosewood - I saw examples on the web that had rosewood and some with walnut. Either way, they're in great shape and I did nothing to clean them up.
The part of this brace that I want to point out is the chuck, or bit-holder.
 |
| Jaws opened |
 |
| Jaws closed |
I found a website by George Langford that had a list of patents related to Fray braces. One of them, applied for in 1928 and granted in 1930 or 1932, shows a bit holder very similar, if not exactly like this one. That's several years after Stanley had bought Fray. Apparently it took a long time to use up the Fray parts that they had purchased.
The chuck jaws were like none other I'd seen before. It is a two-jaw chuck and after wrestling with them for a while, I got them removed from the housing.
 |
| Pointing to what I think is an oil port. Loosening the screw to the right allows the jaws to come free. |
 |
| The jaws removed and cleaned up |
 |
| Looking down into the chuck where the jaws go. The bright spot is part of a threaded section on the inside wall of the knurled outer shaft. |
In the picture of the jaws above, you can see a threaded section on the jaws, just next to the leaf springs on the right end. These engage with inside threads deep inside the chuck. When the knurled section of the chuck is turned, the chuck pulls the jaws inside and they clamp on the shank of an auger bit and grab it tight. That little screw on the knurled part of the chuck's housing somehow keeps the jaws in place. I can't quite see what's going on in there, but the screw does it's job.
Here's another picture looking down inside the chuck while the jaws are in place. Down in the bottom, there is a recess shaped to accommodate the square tapered shank of an auger bit.
 |
| Tough to get a good picture of the recess where an auger bit sits |
After a bit is set in that recess, the knurled shaft is turned and the jaws grip tightly on the auger bit. And I mean it REALLY grabs tight!
 |
| Here's a bit tightened in the jaws |
If it helps to understand the mechanism, here is a picture from the original patent (thanks to DATAMP and Google Patents).
 |
| I hope this pic comes out OK. It downloaded as a PNG file rather than JPG |
Here's a link to the Patent picture, if the above doesn't show up well in the blog.
The tough thing about this brace is that I can't remove the chuck to clean the innards. I cleaned what I could with dental tools and small brushes (and I pulled out a lot of crap), then oiled it generously. It worked as found, but it works more smoothly now.
To clean up the brace, I wire-brushed most of the metal parts fairly lightly just to clean off the grunge. And I left the wood parts alone - they were already in pretty good shape.
 |
| And there she is |
It's always nice to see different mechanisms like this. I don't necessarily get all there is to understand about it. For example, what are the leaf springs on the ends of the jaws for? And why is that little screw in the knurled section needed? Well, it's good to learn about these things anyway.
Gone Bowling
 My first bowl I made that I like
I'm catching the wood turning bug. The biggest issue for me is developing automatic skills. When I cut up wood, I cut square by hand automatically: I don't have to think about it. When I'm turning I still have to think about it. But I am thinking far more automatically than I was even a month ago.
Above is a picture of my first bowl. It's the same bowl that I was working on last week - but finished. It's made out of cherry, and I think it's a little thicker in section than I would like, but I'm new and I didn't want to press my luck. Producing it took me about two and a half hours plus breaks on the treadle. I worked up a light sweat and a heavy heartbeat, and that was very good news. I saved a trip to the gym, which for me is a big part of the appeal of a treadle lathe. My knees are also in much better shape than they were a few months ago.
Learning to turn has been a wander at my own pace, up to learning curve. Technically this is not my first bowl; it's actually my fourth. And the picture below shows the progression. I was skimming YouTube for turning videos a few weeks ago and I came across this "Make a bowl out of a 2x4" video. There are actually a lot of these types of videos out there - this is a common, popular project that seemed easy enough. So I took a 2x4, cut off four inches of it, and away way I went. On the first one (back), I had real trouble cutting the foot to attach it to the chuck. On the second one (left), you can see there are huge chunks out. There's two reasons for that: pine is a rather brittle wood and if you hit something the wrong way you get cataclysmic problems. I did not know how to use my tools correctly at this point and I was using a 3/8" spindle gouge. For the third bowl (right), I reground the spindle gouge to a bowl gouge and that was a big improvement.
I have my quibbles with the finished bowl, but I can at least say it's a bowl-shaped object. If I were a better turner, a bowl or spindle gouge wouldn't have made much of a difference, and the pine would have been fine. For a beginner, these factors can pose real challenges. Last week when I ordered some wood, I also got a 2x6 cherry board to make some more bowls and I tried again.
Originally the bowl was just going to have a smooth outside, but then when I was turning the outside, I ended up having sort of a ghost of a beginning of a lip. I really liked it, so I made the lip a feature. The inside was as deep as I dared going. I'm pretty happy the way this came out even with some tear-out on the inside. My next bowl is on the lathe now (see last picture below)) made of the same material. I just finished rounding the square stock.
In related news: Most of the first round of pre-orders for the lathe have been shipped. We will be contacting the remaining first-rounders to arrange delivery very shortly. The second batch is probably two months down the road.
 My first bowl with failed attempts
 My second bowl in the works
 Miles's desk pt XX & Leo's dresser.......
 |
| sigh |
I kind of thought this might go south on me. The saw blade had slipped so the slot mortises and the tenons were different lengths. Being brain dead, I glued it up anyways and hoped for the best. Well boys and girls, it bit me on the arse and drew blood.
 |
| new frame |
I am going miter this frame. I didn't feel like digging into the saw blade height hiccup. Besides I have to master making mitered frames in spite of how much I dislike miters.
 |
| hmm...... |
The mitering was going fine. No hiccups other than a little see sawing with getting the sides to be the same length. I allowed a 1/4" of wiggle room on the overall length to plane the miters.
 |
| encouraging |
Planing done and the frame dry fitted with all corners closed up.
 |
| no expletives said |
Dry fitted the frame with my Sears miter clamps. No hiccups and all the corners look good. Three are dead tight and one has a bit of a gap at the toe. Other than that I'm happy with how well the clamp up yet.
 |
| survived |
Of course with glue applied all the miters tried to out do each other with slipping and sliding in/out and up/down. I got it done without the urge to give it free flying lessons. Added the extra clamps to pull the miters together tight from heel to toe. I will let this cook in the clamps until the AM.
 |
| fixed and ready to go home |
Happy with the paint job but it isn't completely done. I wasn't going to paint the drawer unit on the top. However, I noticed that there were a few dings with some white showing. But there is a color difference between the drawer unit and the dresser. I have time to paint it to match the dresser.
 |
| so far, so good |
The three rails I glued back in place appear to be secure for now. I have manhandled this quite bit since I glued it and nada. When I first shipped this down to North Carolina, one of the rails popped loose putting it in the car. I tried to replicate that stress/strain and the rails have behaved. Fingers crossed that it stays that way this time.
 |
| back rabbet stock |
These are off cuts from making the first frame. I'll add them after the 2nd frame is done and splines are installed in the miters.
 |
| came last night |
I don't have any experience using spray shellac. I am not sure how many cans I will need to do the slats. I'll be finding out later this week.
 |
| hmm..... |
The top has 6 coats on it and it looks good but I'll be adding a few more. For now this is good enough to set aside as is while I sand the base.
 |
| left drawer |
At the end of pushing it in the drawer stuck a little. I was still able to push it fully but there was a bit of hesitation I didn't like. I planed the top a couple of times and that cured it. Easily pushes in fully without any binding or hesitation.
 |
| done |
Both drawers are done, well almost done. I'll have to put a couple of coats on the top of the left drawer before it is a 100%.
 |
| I like |
IMO I think the oil bronze pulls look good. I thought of using brass but nixed it after seeing a knob on the cherry. The almost black color of the pulls matches the black gun pockets perfectly.
 |
| hmm...... |
I was on the fence about doing a small chamfer on the outside edges of the legs, specifically just these edges. There is a ding on the back left leg edge that was driving this decision. A chamfer would hide it and wouldn't look out of place. Putting chamfers on the other 3 edges is doable but not as easy. Plenty of time to kill some brain cells thinking on it.
 |
| sigh |
The bottom of the front rail bottom is visible from the side. It looks unsightly IMO although I doubt anyone other than me would notice/pay attention to it.
 |
| the fix |
I'm going to glue a small block on the bottom of the side rails at the front and back. Don't need it at the back but it balances it.
 |
| the top |
The top has a shine that I like but it also has a depth to the finish. It will live here until it comes time to marry it to the base.
 |
| I hate sanding |
I am using 3 grits to sand the base - 120, 180, and 240. After starting I had to add the Stanley #112 and a card scraper. One of the back legs had minor tear out on squirrely grain that the sandpaper did nada on. The #112 and card scraper removed it.
 |
| hmm...... |
3 coats of the spray shellac. I can see a difference between the two. I'll spray on 3 more and see how it looks than.
 |
| hmm...... |
I thought I was done but one more leg wanted to shake hands with me. With the flashlight and the pencil I high lighted several problem spots on the legs. The #112 wasn't working well and neither was the card scraper. Sanded it first with 80 grit and that took three attempts before they disappeared.
Followed the 80 grit with the other three and they were history. Smooth leg with no tear out anywhere on it. Went dead in the water here because of the blocks I had clamped. It restricted how I could position the base for sanding. I'll pick it back up in the AM session.
 |
| ugly looking |
I shoulda, woulda, coulda, but didn't clean up the glue squeeze out when I clamped it. Out of the clamps and I removed the glue squeeze out with a carbide scraper and it torn out chunks of wood along with the squeeze out. It is tedious work but I'm making slow progress using a chisel as a scraper to clean up the damage.
accidental woodworker
Miles's desk pt XIX........
 |
| underside |
Three coats and I'm calling this part done. Three coats is sufficient for the underside IMO.
 |
| topside |
No evidence of the indentation but the chamfer and the end grain needs a touch up. Sanded them with my sticks from 100 up to 220 grit. After that I was read to apply the shellac. Spent the rest of the AM session applying said shellac on the top and the drawers.
 |
| new pic frame |
My wife bought a reproduction of a 1689 map of the Plymouth Colony. I was asked to make a frame for it and this is it. 1/2" poplar frame that I use bridle joints to join the corners.
 |
| glued and cooking |
I'll let this cook until tomorrow. I'll bring it to Maria after I get it painted.
 |
| 4 coats |
This batch of shellac is super blonde and I can see a difference in this compared to my last batch which was blonde. This is a lot clearer without a hint of a yellow/orange tint.
 |
| my OCD was in overdrive |
I had to replace the left drawer tilt rail. Super glad that I didn't use glue on this.
 |
| hmm...... |
The pine drawer tilt rails are strong enough for this purpose but I am concerned about the poplar wearing against the pine. There is over an 1/8" of clearance between the tilt rail and the top of the drawer. I'm going to glue a 16th inch thick cherry strip to the underside of the tilt rail. Cherry should wear better than the pine would.
 |
| done (almost) |
Wear strips glued and cooking. I had tested the wear strip clearance and the drawer slid in/out smoothly still. It knocked down the slight tilt the drawer I had to almost nothing.
 |
| much better |
Better fit with no gap this time. Installed it the same way as the original, no glue and one screw.
 |
| hmm....... |
I'll let this cook until the AM to ensure a good bond. It is only a glue connection, no nails or screws to help out.
Got the spray shellac from Amazon so I can't put it off anymore. I will be done with the applying shellac to the top by tomorrow. The next batter is sanding the base which I ain't looking forward to.
accidental woodworker
Miles's desk pt XVIII........
 |
| couldn't wait |
Went back to the shop after dinner to check on the dent. It had been a couple of hours since I steamed it and it looked good. It was flush - I couldn't feel it at all with my finger tips. Happy with that but I could still see the outline of it.
 |
| twenty minutes later |
Scraped and sanded the indentation outline until it disappeared. I wiped down the area with alcohol and 99.9% of it was gone. One small spot could be seen in raking light but I stopped here. Made a command decision that this was good enough.
 |
| surprise |
UPS delivered the drawer pulls at 2034 on saturday. I can't recall ever getting a saturday deliver from Lee Valley. The pulls are smaller than what I thought they would be. The under grabbie space is adequate - my fat fingers fit - so it will definitely work for Miles/Leo.
 |
| checking the indentation in the AM |
The work I did on it after dinner last night still looked good in the AM. Even the small spot I saw in raking light was hard to find this AM. The final check mark will be what will happen once shellac goes on.
 |
| hmm..... |
Wiped the area where the indentation was first with alcohol. Nothing popped out with the alcohol. I then wiped down the entire top with alcohol to see if there were any other holidays.
 |
| fingertip test |
Ran my fingertips all over the top to feel for any rough spots. I had sanded the top after wetting it with water and I found a couple of raised rough areas. The indentation was no where to be seen. I think I'm finally done with the top.
 |
| template |
The screw holes on the pulls are on 3 1/4" centers. Which means the holes are 1 11/16" on either side of the center line. Used this to transfer the screw holes to the drawer front with a center punch.
Editing update. While proofing the blog I saw that I had lost a 1/3 of the blog post. It was going nutso trying to save it and it went south into the black hole. Stercus acidit. This is the second time in the past couple of weeks that this has happened. Another annoying quirk to deal with?
Recap of what blogger shitcanned on me - got 3 coats of shellac on the drawers except for the fronts. Three coats of shellac are on the bottom of the top. Mixed a fresh batch of clear shellac that I'll use for the rest of the desk.
To help with applying shellac on the slats I bought 3 cans of spray shellac from Amazon and I'll have them today. From past experience, applying any type of finish on slats is difficult and time consuming. It is maddening trying to keep drips and runs from happening. I'll brush shellac on all the drawer fronts, rails, and legs.
accidental woodworker
Miles's desk pt XVII & Leo's dresser.......
 |
| flushed |
The epoxy planes easy and clean but it is kind like planing cherry. I'm not going nutso on cleaning the bottom at all. It is flat and straight in all directions and that is all that really matters.
 |
| hmm..... |
I'm going to install a couple of anti drawer tippy things. I have them on my desk and I'll put them on Miles. The drawer tips downward a little and it is a wee bit floppy so this will cure that. However, I can't put them centered on the drawer because I have table top clips in the way. Instead I'll position about 1/3 of the way in from the drawer edge.
 |
| reinforcing the top rail |
Found a bunch of #12 two inch screws for the rail screw job. I had ordered some #8 by 2 1/2" screws but now I think they would have been too small for this.
 |
| Yankee screw driver |
I was surprised by how well this screwdriver handled the #12 screws. I had no hiccups driving them 99.9% of the way and no headaches locking it and driving them flush. I like using these Yankee drivers - I have 4 of them - for driving screws. Unlike using a cordless drill, it is almost impossible to over drive or strip the head of a screw with them.
 |
| underside of the top rail |
I only put one screw in the center divider along with one each at each end. Feel a lot better about the table top clips not failing due to the rail going south.
 |
| checking |
Since I had the base on the top, I checked that my overhang was consistent all the way around. I checked each and every position for the table top clips. One to make sure that they fit and two, that I would be able to screw them down. The drawer guide assembly wasn't interfering with any of them.
 |
| boring work |
Routed a 45° chamfer all the way around and now I'm sanding the end grain smooth with the sanding sticks starting with 100 grit.
 |
| cherry ain't easy |
The 100 and later 120 grit sanding sticks were making poor progress on smoothing the end grain. Decided to try a card scraper and it worked. I was not expecting it to work as well as it did on end grain. In spite of it working much better than the sanding stick, it still took a lot of time and calories to smooth the end grain.
 |
| sigh |
Sanded the top starting with 100 and ending with 200. This spot has a couple of indentations that came from ?????? I tried to scrape them away but nada. I thought I was done with the top but it ain't so boys and girls.
 |
| test piece |
I am using 3/4 pine for the drawer tilt thing (drawer tilt rail?). I cut a slot centered on each end for a #0 biscuit. Did a test piece to make sure I figured out how far down from the top of the rail the mating biscuit slot had to be. Got it on the first try.
 |
| done |
The biscuit is just to hold the rail in place. I drove one screw in at each end to secure it. No glue, just an one inch #6 screw and a #0 biscuit.
 |
| hmm...... |
 |
| underside of the top |
Sanded the underside with 100 grit and stopped there. Branded and initialed it. This has a check mark in the done column.
 |
| better pic |
I didn't notice this after I was done sanding so it happened between then and when it shook hands with me. Tried sanding it with 220 and nada. Plan #2 is try steaming it out with my shop iron.
 |
| done |
Continue to be impressed with the paint job with the smooth finish roller. I think I'm done, I didn't see any holidays .
 |
| drawers |
No streaks from a paint brush and it looks pebbled now but after it dries it will be as smooth as a state zero sea.
Steamed the hiccup on the top and it didn't go smoothly. I accidentally spilled water on the top so I had to flood and wet the entire top. I'll be sanding it again in the AM but I think I managed to get the indentation raised. I'll find out in the AM how well that went.
Didn't get any pics of the initial fiasco but I was optimistic about how the iron did steaming the indentation.
accidental woodworker
New Model Mandolin: 3
Here’s Part 3 of my New Model Mandolin build series. In this one, I look at joining the Adirondack soundboard and making and fitting the rosette. There’s also a bit more on the neck and last but certainly not least, the back gets braced and fitted and you’ll see how the radius dish (seen in part 1) continues to help the process.
Cheers Gary
Miles's desk pt XVI........
 |
| fitting the drawers.... |
The left side drawer in/out guides are square to the front. However, the right side ain't so boys and girls. On the flip side of the coin, the guides are parallel front to back. I pried off the right guide and used the drawer to set it again. Sure glad I only nailed them.
 |
| almost |
This was the fit of the left drawer after planing the top and bottom edges flush all the way around.
 |
| done |
Fitting the left drawer was painless. I had to go back and trim the sides twice before the drawer slid in/out effortlessly. No binding or hesitation pushing it in or pulling it out.
 |
| done |
Both drawers work the same. I didn't go nutso trying to get a piston fit - I care more about how smoothly the drawers work in/out.
 |
| right hand drawer |
Dry clamped the drawer guide and then I fitted the drawer. I got the left drawer in/out guides screwed down. No glue, just screws, so anyone coming behind me can effect any necessary repairs/replacements.
 |
| super glue |
Decided not to nail the drawer guides first before screwing them. Instead I put a couple of dabs of super glue at each end. Clamped them lightly to help the super glue cook and set quicker.
 |
| drawer stops |
I glued the stops in place and let them set for an hour. After that I added two screws to each of them.
 |
| hmm...... |
Both the drawer fronts are slightly proud of the front rail. I marked them with a pencil and planed them within a frog hair of being flush.
 |
| done |
The right hand drawer guide is screwed off and nothing shifted. The drawer still slid in/out easily and without any hiccups.
 |
| hmm..... |
There isn't much left to do on the desk. I put stops at the front so the drawer can't inadvertently be pulled out and play the bounce test with Mr Floor. All that is left to do is finish the top, attach it, sand endlessly, and slap on 5-7 coats of shellac.
 |
| speaking of the top |
I like the overall look of this desk. It is clean and simple. Glad that I didn't go for a bank of vertical drawers on the right side. The tedious part of applying the finish is just around the corner.
 |
| one more hump |
I doubt that this would be noticed but I expended the calories and flattened it. It took me less than an hour to do that. Used 3 hand planes, the Stanley #80 & #112, and finally my random orbit sander with grits from 100 to 220 to finish the top.
 |
| passed with flying colors |
Wiped down the top with alcohol and nothing popped out. No plane tracks, chatter marks, rough squirrely grain showed up.
 |
| choices |
A 45 chamfer or a table top thumbnail, which one wins the Kewpie doll? I really liked the thumbnail profile a lot but in the end I'll be using the 45 bit. The round over of the thumbnail bit doesn't fit in with the overall look of the desk. The overall look of the desk is rectilinear with squared off edges galore.
 |
| hmm...... |
The divider gave up the ship. Four of the corner blocks let loose. Glued it back together and let cook in situ.
 |
| pull out stop |
No need to go nutso on this. Unless someone goes Cro magnon, it should last as long as the desk does.
 |
| hmm....... |
The top of the front rail flexes a lot. Too much to ignore. The top of the rail will be under the strain of holding the top down to it and it needs some help. I am thinking of putting a couple of 2 1/2" screws into the center divider and the two ends to stiffen it up.
 |
| hmm..... |
This is the underside of the top and I thought I had filled this in already. All I had done was to stuff the knot hole with cherry shavings.
 |
| done |
Filled it in with epoxy. I didn't bother to dye it black because it is the underside. This will keep bits of the knot from loosening and falling out down the line.
accidental woodworker
Miles's desk pt XV & Leo's dresser.......
 |
| first one |
The fit looks good - it is snug and gap free even though it is seated less than a 1/3 of the way in.
 |
| 2nd one |
Fit was just as good and it continued on with the 3rd and 4th ones.
 |
| hmm..... |
I didn't think the drawer would fit at all. Disappointed in the half blinds at the front. After they were fully seated gaps stood up and shook hands with me. Sigh.
 |
| plowing grooves |
On the dry fit of the drawers I checked that the bottom edges lined up flush. This way the groove would align all around.
 |
| left hand drawer |
I used prefinished plywood (one face only) for the drawer bottoms. It was left over from the bookcase I made a few months back. I could only get one corner of the left drawer to fit in the opening.
 |
| glued and cooking |
Needed some help with the back dovetails - this drawer had loose fitting back dovetails. I didn't want the back clamps to pull the drawer out of square so I clamped the front ones. They were snug and didn't need any clamp pressure.
 |
| 1st coat |
I'm impressed with this first coat. It covered every sin with nothing showing. I'm optimistic that one coat will do it but it will be getting at least two. One of the rails didn't cooperate and the paint didn't cover well and will need a second coat.
 |
| from Wally World |
The only spot on the dresser I used a paint brush was the legs. Everything else I used this roller. I have always been a brush man but that changed today. The paint job from the roller was heads above the brush work. The roller work is dead smooth and the brush work on the legs is no where as smooth. I was skeptical about this 'smooth' finish but I'm impressed the results.
 |
| filling the groove ends |
In order to bury this groove in a pin socket I would have had to sacrifice drawer depth and I didn't do that. I'm able to contain my OCD and fill in the holes.
 |
| gap filling stock |
Took some heavy shavings with the 5 1/2 until I made some thick enough to fill the gaps in the tails/pins.
 |
| it worked |
I wasn't sure that the shaving would survive being pushed into the gap but it did. I used this on all the gaps I filled.
 |
| one done, one more |
Found a thin piece of cherry to fill in the half pin gaps at the top and bottom. I used a hammer to thin the cherry until it fit the gap.
 |
| still cooking |
I am going to wait until the AM before fitting the drawers. I didn't want to risk planing them now and blowing out the joinery.
 |
| came 3 days early |
Jefferson is my 2nd favorite president. I have a book about Monticello and the gadgets he has I find fascinating. This desk was the 18th century equivalent of a tablet. Looking forward to reading it - it also has plans to make one.
I ordered 4 drawer pulls - oil rubbed bronze - because I like how they look against the cherry. Ordered them two days ago and they shipped today. I doubt that I'll get them before monday of next week at the earliest.
accidental woodworker
Miles's desk pt XIV.........
 |
| hmm..... |
The glue up healed well and was just slightly proud. A few strokes with 120 grit and it was flush and smooth.
 |
| one down and one to go |
Tails done on the first drawer. The plan is to do one drawer, one step each, before moving on to the next one.
 |
| lost the previous one |
Searched for it but nada. This is needed to set the height of the stock in the vise correctly.
 |
| hmm...... |
The spacer top is flush with the top of the outboard thing a ma bob behind it. Makes transferring the tails onto the pin boards level and easy.
 |
| should swell with glue |
Back of the first drawer dry fitted. Went together off the saw.
 |
| hmm..... |
The back left corner is loose as in it ain't snug. I initially put it together the wrong way. That way it was snug but when I put the corner together in the right orientation, it was loose. There is no way glue will swell this one. I'll be filling in the tails/pins with veneer.
 |
| 2nd drawer |
Found the problem mismatch on the first drawer. I had labeled the bottom of the sides wrong. They were correct for the long sides but not for the back. Caught that before I did the dry fit on the 2nd drawer.
 |
| prepped |
There are two more steps before the drawers get a check mark in the done column. I have to chop the pin sockets in the drawer front and plow the groove for the drawer bottom. There isn't much more that needs to be done to complete the desk.
 |
| pin sockets |
This was the last thing I got done today on the drawers. I don't over saw my half blinds, I think that is sloppy workmanship. A wee bit harder hammering the card scraper in cherry vice pine.
Had to go the VA in the AM and I'm glad I did. My wife is coming to West Roxbury with me for the CT biopsy on the 22nd. The procedure takes ~30 minutes but I have to spend 5-7 hours in recovery to ensure I don't get a collapsed lung. Anyways, I made a reservation for the shuttle and that is what I'm glad for. There wasn't one for me, unexpected, but the coordinator saved a seat for me and my wife.
accidental woodworker
Feeds and Speeds on a Treadle Lathe
 Tearout that shouldn't be there
When you work on a CNC mill, it's all about feeds and speeds. For a particular material, the questions are: how fast do you spin a given milling cutter, how fast can you move the tool across the work, and how deep a cut can you take? Do it right, you get a nice smooth finish and fast cutting. Do it wrong and you waste time, break the tool or damage the work.
With a wood lathe, when it's just you holding the tool in your hand against a toolrest, the same actual criteria apply - but we don't actually calculate them. Instead, you go by feel. When making a cut, how much pressure do you put on the tool so it feeds into the wood and how fast you move the tool across the work? A treadle lathe has totally different feeds and speeds than a regular powered wood lathe has.
For example, I've been playing around turning a piece of cherry wood. Cherry is dead easy. The wood turns easily, but because everything is coming out well, I have noticed my tendency to do what I do with powered equipment: lean into it. That is, subconsciously my brain is thinking that everything is cutting nicely, and the lathe seems to have plenty of power, so why not push a little deeper?
If I am lucky, when I stop the lathe I just see more tearout than I would want; if I am unlucky, this tendency is rewarded with a rough cut - chatter. Chatter in spindle turning occurs when the interplay between the sharpness of the tool, the speed of the lathe, and the depth of cut exceeds the force of the tool needed to shave the wood easily. So you have the tool unable to cut cleanly, and one of three things will happen.
1 - You get a shaving - but probably not since the force on the wood isn't enough to remove a thick shaving.
2 - The tool is so jammed into the cut that everything comes to a screaming, dangerous stop. The tool could break or get jerked out of your hands; the work could shatter; or the lathe could stall.
3 - The most likely outcome on a treadle lathe is that the wood just pushes the blade out of the cut and keeps turning. That doesn't sound too bad, but the wood is rotating while you are still trying to take that heavy cut, and as the wood revolves the tool is sneaking back for another try, going for a heavier and heavier shaving until the tool gets pushed out of the cut again. This is how you get chatter.
Treadle lathes run slower than powered lathes - under 1000 RPM vs 2,500 to 4,000 RPM on a 2" spindle. With the same pressure on a tool, the tool will advance into the wood 2-3 times the feed rate per revolution. Less power and a potentially higher feed is why a treadle lathe is more prone to chatter than a powered lathe.
What I just described really applies to spindle turning where the grain of the wood is perpendicular to the cutting action. In bowl turning where the grain of the wood is parallel to the tool, the problems are worse. You get tearout (above) or chunks of wood flying out from the work. Half the time when turning a bowl you are cutting against the grain of the wood. Bowl turners have strategies for combating the grain problem with tool selection and cutting approach, but unless you are controlling your feed, you will have this problem to various degrees.
The picture shows the tearout in my cherry bowl that occurred when I went against the grain - my tool wasn't very sharp and I was holding it wrong. (Since I took that picture, the bowl has progressed and the problems were fixed.). On the other side of the bowl blank (below), I am cutting with the grain, and in spite of my dull tool I am getting a clean surface.
The other problem is when starting a project, the wood isn't round yet, you are cutting air a percentage of the time, and there is nothing for the bevel to ride on. When that happens, the tool wants to lurch forward into the cut, and suddenly you are taking way too thick a cut (and bad things will happen - see above).
The first step towards a solution is sharp tools. While sharp tools are critical on any lathe, it's even more important when turning with a treadle lathe. A sharp tool lessens the force needed for a clean cut so you can take heavier cuts before the lathe rebels. With a sharp tool, the shaving is cut away cleanly, and not just ripped off the wood. I have all HSS tools and I keep an extra fine diamond stone next to the lathe and routinely touch up the edge. A strop with green honing compound helps too.
The second step is to understand how to keep the tool steady so that you can control the depth of cut no matter if you are cutting wood or air. I have learned enough to now know that have been doing it all wrong. I am used to resting the tool on the toolrest and the bevel on the wood and then raising the handle so the tool cuts. I maintain pressure, relying on that pressure on the wood to keep my cut consistent. This doesn't work at all when cutting air on an interrupted cut. Resting the bevel on the wood and raising the handle is how you set the depth of cut, and riding the bevel against the wood keeps the tool from shifting about. But keeping the handle in a consistent position is what keeps the feed rate constant. You do that by holding the the tool at the end of the handle. (The other hand is at the rest moving the tool back and forth.) Any hand movement is reduced proportionally by the ratio of distance toolrest to work versus toolrest to where you hold the handle. You can also brace the tool against your side. Long- handled tools allow for a steadier cut. But long handles do get in the way on a treadle lathe. Increasingly I find myself automatically changing my position and alternating feet as I turn to get out of the way - and the long handle is becoming less and less of an issue. On a bowl I do a lot of turning standing facing the headstock, treadling with either foot from the side. This is a big learning curve for new treadle turners, myself definitely included.
Some turners will say that this idea is obvious - but obviously for me it wasn't. Short handled tools are easier to use on a treadle lathe because they get in the way less, but they need more gentle, steadier holding at the handle end. Long handled tools make for a steadier turning session, once you learn to get out of their way. We know that the lathe has attracted attention from folks who are new to turning and - as someone myself learning new tricks - I want to acknowledge the learning curve (and also say developing the skill has been a lot of fun).

"/> No tearout when the grain direction cooperates on the opposite side of the bowl
Miles's desk pt XIII & Leo's dresser.......
 |
| clamps off |
There weren't any stresses in the desk - as the clamps came off nothing groaned or shifted. Sawed off the dowels and flushed them with a chisel.
 |
| hmm....... |
The back drawer rail is 5/16" off the front drawer rail. I hadn't thought about this when I made the front rail wider to accommodate a bigger drawer - depth wise. It took a few to wrap my head around how to deal with difference. Sometimes my spatial visualization ain't too good.
 |
| test piece |
I think I resolved what had to be done at the rear drawer rail to make it level with the front drawer rail. A 5/16" tongue on the back of the drawer in/out guide was the trick. The test piece lap was too deep but it put me on the right road.
 |
| depth setting jig |
My 18" combo square worked just as well as this would have had I not broke it.
 |
| drawer in/out guides |
Glued the guides and set them aside to cook. After lunch I added 3 screws to them because I didn't want to rely solely on glue.
 |
| front drawer rail |
No glue for this, just 5 screws. If need be any repairs/replacement will be easy.
 |
| didn't want to break this out |
The back drawer rail install didn't go smoothly. Initially I had screwed one end and the rail had shifted downward. Unscrewed the rail and filled in the errant screw hole. I then nailed the rail flush with the back top rail. Part of the problem was there wasn't any where to apply a clamp. The nails were sufficient to hold the rail flush so I could screw it off.
 |
| in/out guides |
Since I had the nail gut out, I nailed the guides with one nail at the front and back. After I make the drawers and fit them, I'll add a screw at the front and back to each one.
 |
| drawers |
The plan was to start the drawers in the AM. I stopped working on the desk here and turned my attention to Leo's dresser.
 |
| no paint today |
Got the dresser and all the drawers sanded and ready for paint. However, I blew off a big chip on the front of the dresser. I glued that back on and once it has set I'll have to do some putty work. One part of the blow off went MIA.
 |
| hmm...... |
Made a test groove for the plywood I plan to use for the bottom of the drawers. This fit is not snug but it isn't sloppy loose either.
 |
| done |
Got the depth and inset from edge dialed in. I was going to use drawer slips but I am now plowing grooves for the plywood in the front and sides.
Laid out the tails on both drawers and set up my Moxon vise. I'll start on the half blind dovetailing in the AM.
accidental woodworker
Some More Tool Finds
My name is Matt and I've got a problem. I just can't seem to help myself. About 4-5 weeks ago I visited a couple of estate / garage sales and found a few cool things. I just can't stand the thought of these things going to the dump if nobody takes them. Or the thought of someone else finding these things and not knowing what they are and mistreating them. Well, I guess the first step to recovery is admitting I have a problem. I'd rather think of it as charity for the old tools.
First, at one garage sale I found a nice partial set of auger bits. These were #4, 5, 6, 7, 9 and 10 bits. A shame the set didn't go all the way up to 16, but beggars can't be choosers. I can't recall, but I probably paid no more than $10 for them all. They cleaned up easily with wire wheels in a drill. And they were easily sharpened, too. Full length cutting spurs.
 |
| The Irwin bits in size order |

Logo upper: IRWIN

Logo lower: U S OF A
 |
| The file is pointing to a ruined spur |
Then a week or two later, I found this group of tools at another sale. This group cost a measly $20. And I got to the sale late! Who knows what I might have found if I had gone early!
 |
| Spring clamps, more auger bits, a 6" brace, saw set and "parts" plane |
This group of auger bits had an 8/16" size, so after cleaning it up, I added it to the earlier set to fill in that missing size. The bits' sizes and logos were as follows (a slash indicates a divider between lines in the logo; a ~~~ symbol means unintelligible markings).
- 1 1/2" (#24) TEMPER / TESTED
- 1" (#16) U.S.A. HSB & CO. CHICAGO (Hibbert, Spencer and Bartlett)
- 1" (#16) THE IRWIN BIT / MADE IN U.S.A. / MAINBOR
- 5/8" (#10) Jennings / Pattern
- 1/2" (#8) ~~~ Bit / ~~~ S. Pat. Off.
- 3/8" (#6) ROCKFORK ILLINOIS GREENLEE / MADE IN U ~~~
- 3/8" (#6) IRWIN / U S OF A
I gave this group of bits a bath in rust remover and then wire wheeled them with a drill. They look really great now. One of the 1" bits went into another set I've got that was missing that size.
 |
| Lookin' good! |
The is a 6" sweep brace made by John S. Fray. I didn't have a 6" brace, so this was a nice pickup. There were some interesting things about this brace, so I think I'll write about it separately.
 |
| 6" sweep brace |
 |
| THE JOHN S. FRAY CO. (other side says BRIDGEPORT, CONN U.S.A.) |
The plane is what's left of a type 9 (1902-1907) Stanley #3. I wish I could have found the missing parts, but even if I had, the frog had been broken (or cut) above the depth adjusting yoke, and a piece of brass had been riveted to the inside of the left cheek. I wish I knew what the prior owner was trying to do with this - maybe making some sort of nicker, judging by a corner of it placed at the plane's mouth.
 |
| Stanley #3 with frog broken or cut |
 |
| This brass was "riveted" to the cheek using a peened nail |
I got the plane to use for parts. For a couple of bucks, how could I go wrong. But I would really have loved a useable type 9 #3.
Last on the list was this saw set. The only marking on it was J. M. KELLAR and I'm thinking that was an owner rather than a maker - I found nothing about Kellar with a quick internet search.
 |
| The saw set |
 |
| The only marking |
 |
| Front end with anvil dial settings |
It looks like a fully functioning saw set, but I've yet to try it out. The first pic of the set shows the lower screw that "squeezes" a saw plate to the anvil, similar to some other sets I've seen. I might have to see if I can take it apart and clean it up. More on that later if I do.
Miles's desk pt XII & Leo's dresser.......
 |
| hmm...... |
My set up thing-a-bob is several frog hairs short. I thought I would definitely need it for the back rail to set the bottom drawer guide rail.
 |
| the fix |
I glued a thin piece of cherry to the guide to build up the depth of it. Planed it until it was dead nuts but all for nothing. I broke the jig rendering it into kindling.
 |
| center drawer guide |
I'm not crazy about the width of the maple at 5 1/2" wide but it will work. Thinking that I will use only screws to assemble it, no glue. I'm pretty sure that I used glue and nails on the drawer guides on my desk.
 |
| before I broke it |
With the guide in place and the bottom drawer guide rail butted against it, the top of it was flush with the bottom of the drawer opening.
 |
| hmm...... |
Upcoming hiccup to resolve. The front drawer rail is 5 1/2" wide and the back one is a little more than 5". The in/out guides will be sitting atop the front and back drawer guide rails. I will have to half lap the in/out guides on the back drawer guide rail.
 |
| nope |
There isn't enough room to drill the Miller dowels in at 90°. I won't be drilling them at at an angle. Instead I'll drill them at 90° from the outside.
 |
| cooking |
Hiccup free glue up of the base. Happy that clamping pulled the twist out of the left side that was twisted. The base isn't rocking nor does it look like it is twisted. The diagonals on the top were less then a 16th off.
 |
| maybe |
The dust panel is proud on the left side. I'll find out if it will be a hiccup when I install the drawer.
 |
| needs a paint touch up |
All the drawers fitted, easily pulling in/out without any hiccups. I went to Benjamin Moore paint store and they had a record of the paint I bought for the dresser in june of 2024 - Smoke Gray. The important thing is that drawers slide in/out and the rails I glued are rock solid now.
 |
| top drawer unit |
This is good to go. No dings or 'white' spots on it anywhere. I'll screw it back down to the top after the painting is done.
 |
| haul from the paint store |
Dresser paint, 4-0 steel wool, and two empty quart cans for shellac.
 |
| paint prep |
Sanded the drawers and the dresser first with 220 and followed that with a card scraper. Filled in the dings, etc with wood putty. Tomorrow I'll sand those spots and paint it. Hopeful that it will only be one coat but I don't think it will be so.
 |
| Miller Dowels |
This was it for today. I'll have to cool my heels and let things cook until the AM.
accidental woodworker
Spring Update

Goodson Woodcraft
by Eric Goodson on March 31
Hi everyone,
The snows have melted and the daffodils are emerging here in Newbury, MA after an especially icy winter. I wanted to send around a quick update on upcoming events that might interest you.

Gatherings
There is simply no better, cheaper, or more fun way to continue your craft practice than to join others in creative camaraderie. Here are a few upcoming events, both near and far, that might interest you. For more information about these and other events, feel free to email me.
“Sloyd Social”, Sunday April 15th, 2-5pm, at my shop in Newbury, MA/
Come join other burgeoning craftspeople for a little pot luck, carving, turning, weaving, whathaveyou gathering. It is a cozy affair, usually just a handful of folks, and a great chance to meet other creatives in this area.
“Spoon Camp NJ”, May 1-3 in West Milford, NJ.
Held at camp Vacamas in the woods of western NJ, this is a really delightful event (pictured above). Free, with donations to the camp encouraged. You can stay in the cabins, which have bunkbeds, hot showers, and a communal kitchen where we cook family-style dinners, or you can camp out if that is your thing. Folks come from as far away as North Carolina, Delaware, and Maine for this event. I will be heading down Wednesday to help set up, and you can come early too. Come hang with a bunch of spoon nerds.
“The Spoon Gathering” in Milan, MN, June 5-7, with pre-classes starting on Tuesday the 2nd.
The oldest gathering of its kind in the US, if not the world. Over 200 people descend on this tiny Minnesota town once a year to camp out, carve spoons, and connect with other folks passionate about greenwood carving. This is such a spectacular event. I went for the first time last year, and will be returning to teach an “Intermediate Spoon Carving” class during the pre-festival. I know it is a hike, but well worth the trip.

Courses
This year is shaping up to be a big teaching year, surpassing the sixty class days I held last year and ranging from Maine to Minnesota. Here are a few highlights:
Introduction to Spoon Carving at the Newburyport Art Association, April 11th.
A one-day intro to spoon carving in a beautiful gallery space. Come visit scenic Newburyport for the day–carve some spoons, walk the beaches at Plum Island, and maybe end the day with a nice dinner in one of the many restaurants in the area.
Woodturning Two Ways at Snowfarm in Williamsburg, MA, May 10-15
Spend a full week exploring a wide range of woodturning projects in western MA. Snowfarm is a wonderful craft school, with a vibe that feels like summer camp and food to die for.
Week of Slojd at the Nantucket Historical Association in MA, July 20-24
What could be better than enjoying the island life on Nantucket and taking a week of sloyd classes at the Historical Association? We will cover spoon carving, chip carving, kolrosing, and even heddle making. I will also be teaching kids classes and an adult turning class if you are on the island.
Bowl Turning and Tool Forging for the Pole Lathe at Historic Eastfield in East Nassau, NY, Aug 31-Sept 4th.
Spend a week forging your own hook tools and then turning bowls with your hooks in this unique hybrid course. Co-taught with blacksmith Beth Holmberg, you know you will get first-class instruction all around. Oh, and lodging is free in the renovated 19th century tavern, but you have to bring your own candles!
For a complete list of classes, see my webpage.
Latest Work


I am shifting my craft focus a bit, producing fewer product runs and instead spending my time on gallery items. I am especially focusing on skruvask, or locking-lidded boxes, and how to expand the form and design of these unique vessels.
I just published an article in the latest edition Spoonesaurus Magazine on spoon gatherings. It is a small quarterly magazine put out by fellow-carver Emmet Van Driesche. I am also working on an article for American Woodturner, which should be submitted soon. Finally, I continue to write on craft and craft pedagogy on my blog.
That is all for now.
As always, thanks for your support, and feel free to reach out with any questions.
-Eric

Goodson Woodcraft
Miles's desk pt XI & Leo's dresser.......
 |
| dust panels |
Happy with the rails. They are secure, tight, and appeared to be glued good this time. One sharp rap with a mallet and the rails just giggled at me. However, the dust panels didn't fit - they were about a 16th too wide.
 |
| dust panels |
One panel I was able to drop into rabbets. The other didn't have rabbets. When I made the rails I brain farted and put the rabbets facing down rather than up on two of the rails. The panels aren't structural so I was able to glue the 2nd one in place along with nails.
 |
| been a while |
Been a couple of months since I last posted a blurry pic. This one is for the center divider. I flushed it with 80 grit sandpaper. I will have to slap on at least one coat of paint to cover this and a few others spots.
 |
| leveled |
This is the epoxy filled in knot hole after 99% of it has been leveled. No pin holes from bubbles so far. You have to be careful with the pigment because even dry, it will stain the wood. Like an idiot I mixed the epoxy and stain on this board. Note to self, don't do that again.
 |
| cute |
Went to Lowes and bought a 4 foot length of 1/2" maple for drawer runners. Saw these miniature 5 gal pails on the way in and bought two of them. Food safe too. Absolute no idea why I bought them because I don't need them.
 |
| wee bit of a panic |
Got the bottom of the slats in with no hiccups but I couldn't say that for the tops. The dry fit went off without a hitch but with glue in the equation I couldn't solve it. Had a devil of a time getting the first three slats started. After several frantic minutes I got them going and then slats 10,11, and 14 had a major hissy fit. They finally fell into place. What took me 3 minutes to do dry, took me almost ten with glue applied.
 |
| sigh |
Put the center stile in upside down. The cathedrals point down. I brain farted and put it in the bottom rail with a the labeled top facing up when it should have been facing down.
 |
| dry fitted |
I didn't glue the base up here. I wanted to leave it dry because I was going to dry fit the drawer guide assembly. Wasn't sure if I could do it with the base glued and cooked.
 |
| sizing the top |
I barely had to saw more than a 1/8" off either end. Not something I had any confidence in sawing with a handsaw.
 |
| happy face on |
The overhang on all four sides was dead on.
 |
| sigh |
Couldn't find the slat I used to make the dutchman for the missing part of one of the legs. Could have sworn I saved it.
 |
| table clip slots |
I didn't brain fart on the table clips. I got all four inside edges done correctly.
 |
| ta da |
Found the dutchman. I'll get it installed after I glue the base up. Until then I'll keep it here on the base.
Didn't get any time in the PM session. On a trip out to the recycling bins, I tripped and did the bounce test on the back door stoop. I slammed into the cobblestones and ripped a pound of flesh off both my knees. I'm sure that I'll be feeling it in the AM.
accidental woodworker
Fine Woodworking’s first 10 Issues
This weekend I had the opportunity to buy the first ten issues of Fine Woodworking at an antique mall in Northern Ohio. When I saw them laying on a magazine rack, I couldn’t believe what I was looking at. Even more so was the price of each issue. A mere $0.50 each. Unbelievable!
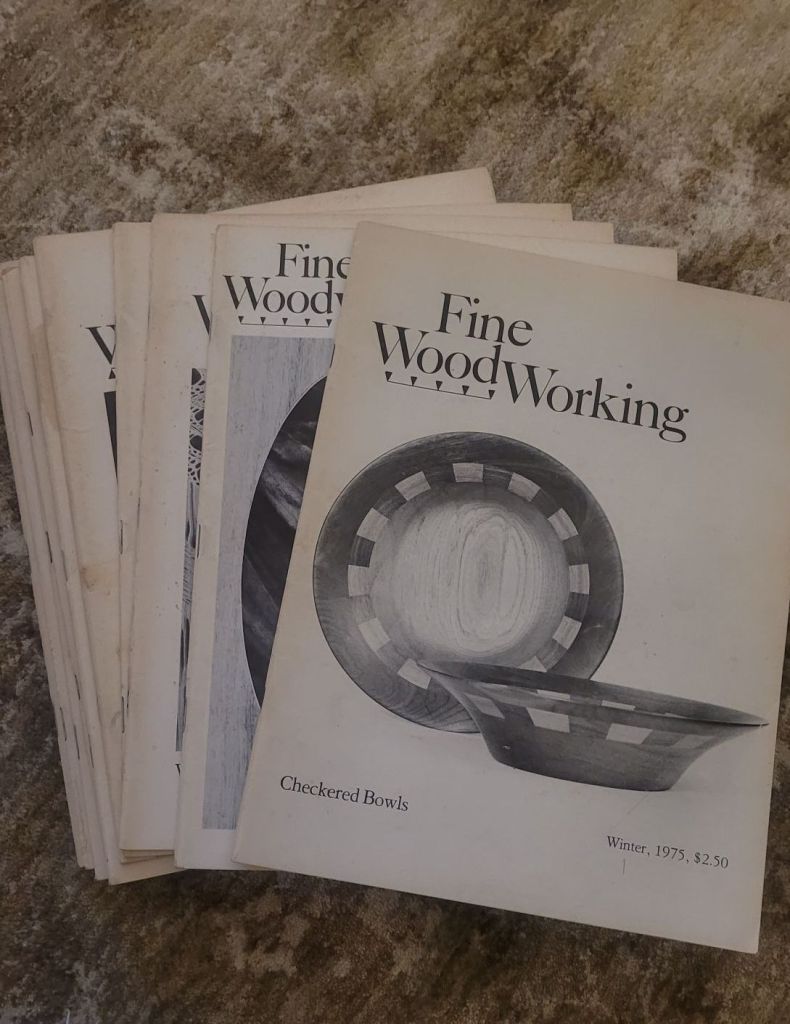
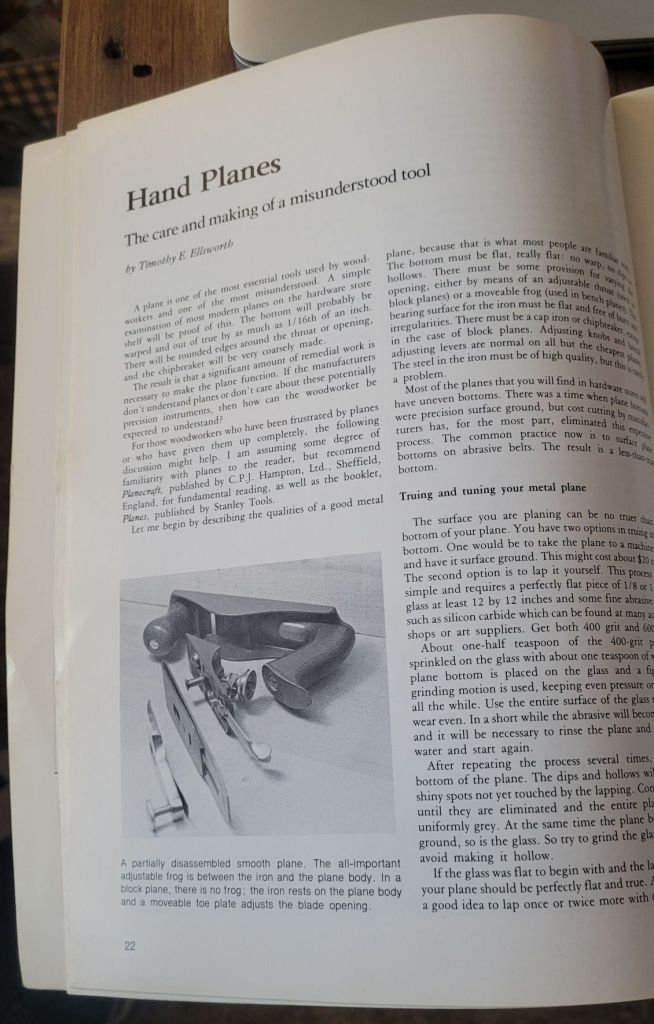
When I got home, I looked through the issues and read some of the articles. The first issue of Fine Woodworking had an article near and dear to my heart. Hand planes, with the caption “The care and making of a misunderstood tool.” This shows you how this was the very beginning of a magazine dedicated to woodworking if the common woodworker thought of a hand plane as being a weird foreign object.
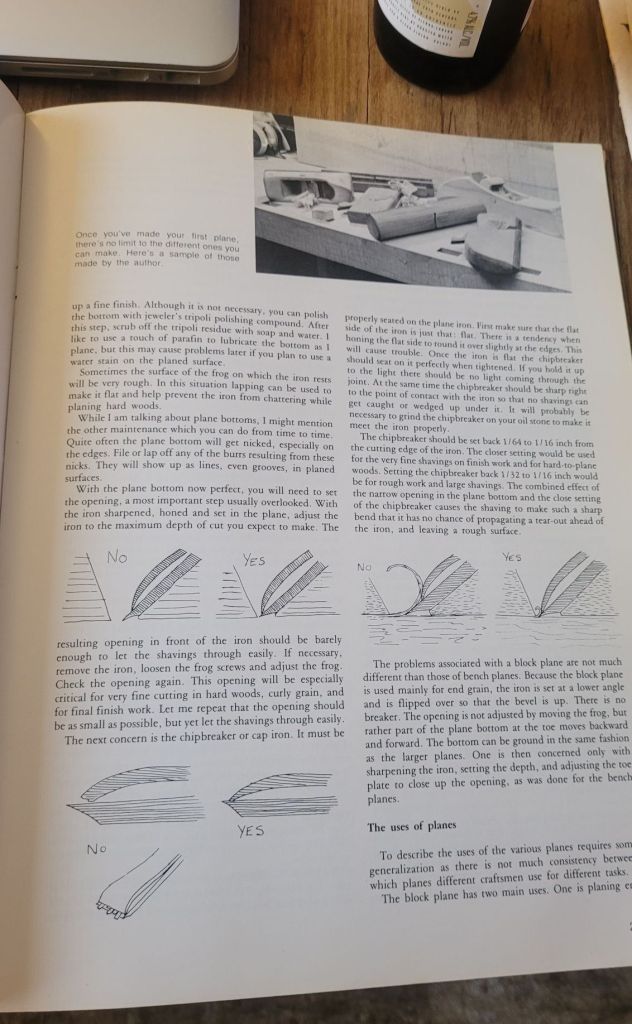
Scanning the issues, I saw Tage Frid was an early contributor with several articles he wrote in first few issues.
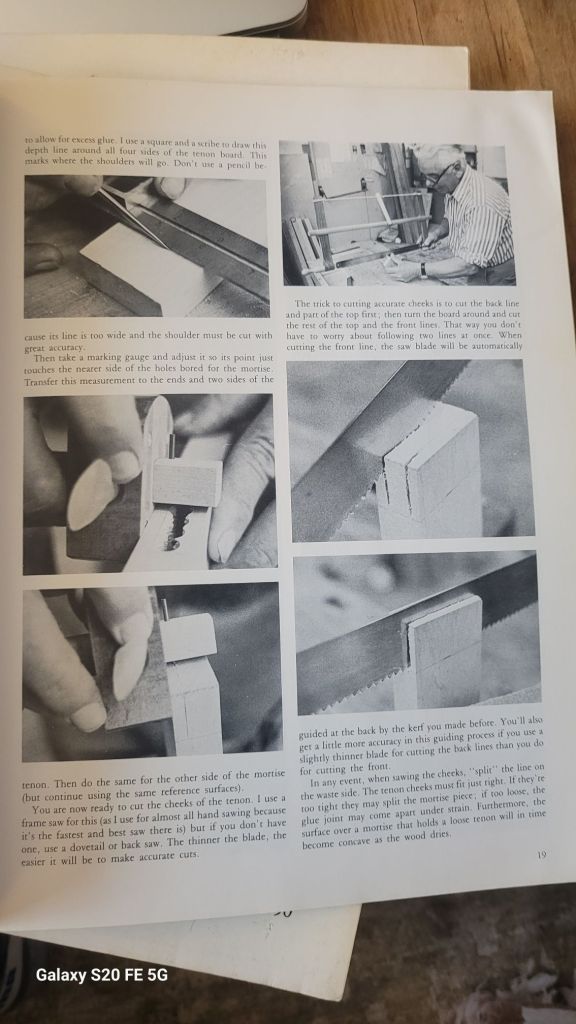
Along with Frid, there are articles by James Krenov, Jere Osgood, and Bruce Hoadley. A basic who’s-who of 20th century woodworkers.
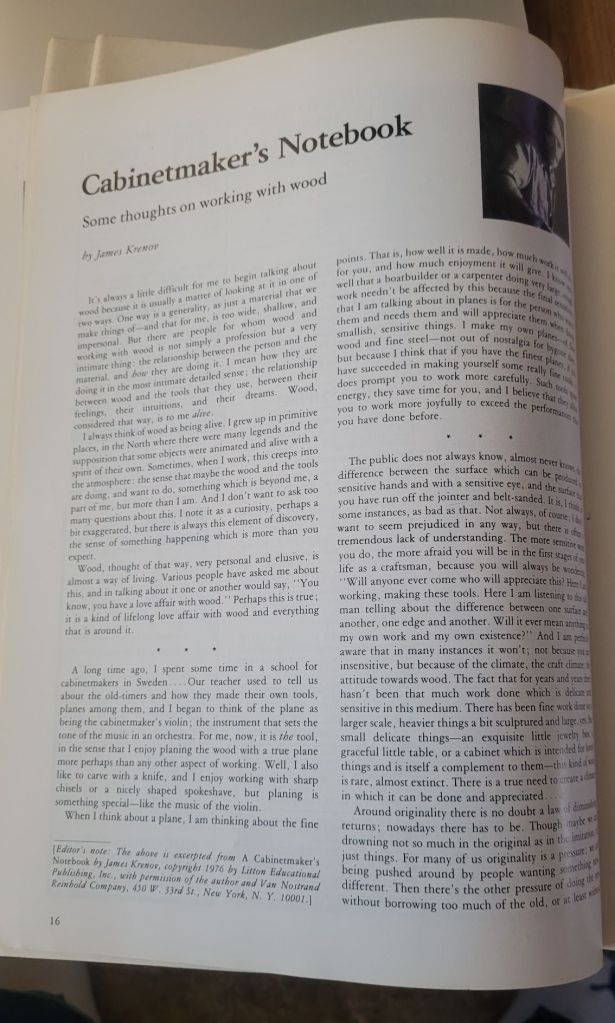
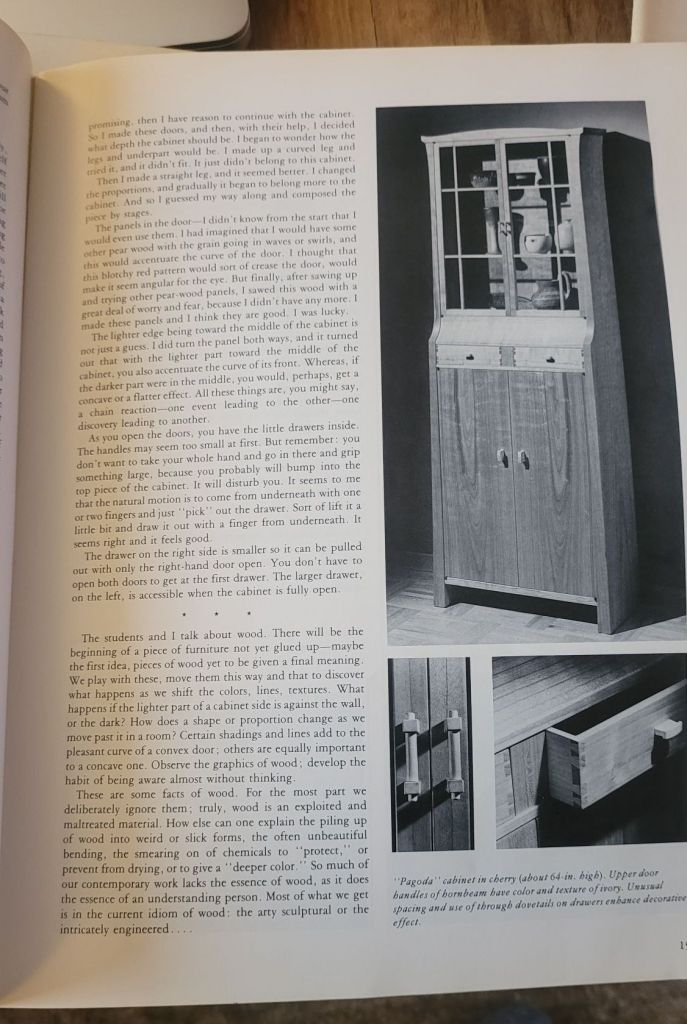
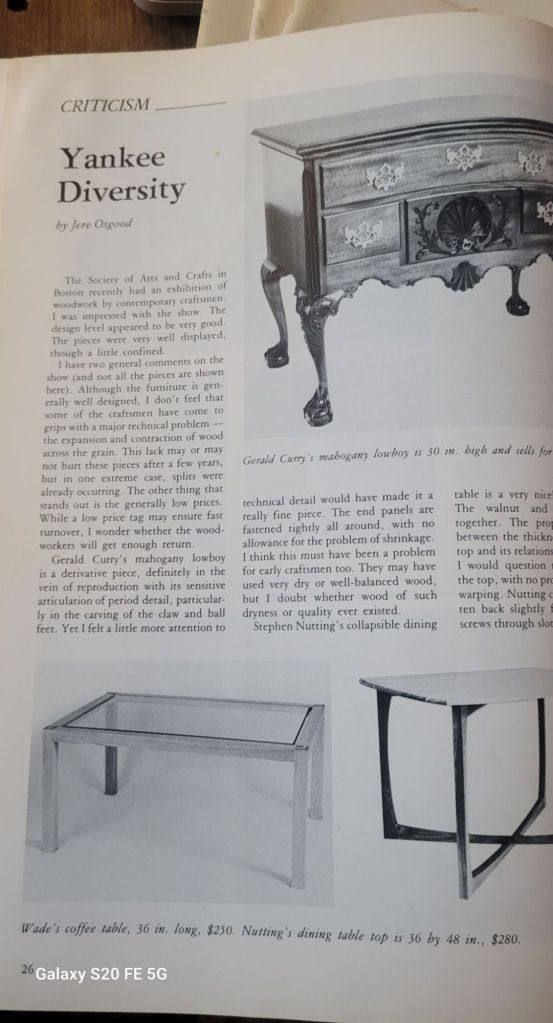
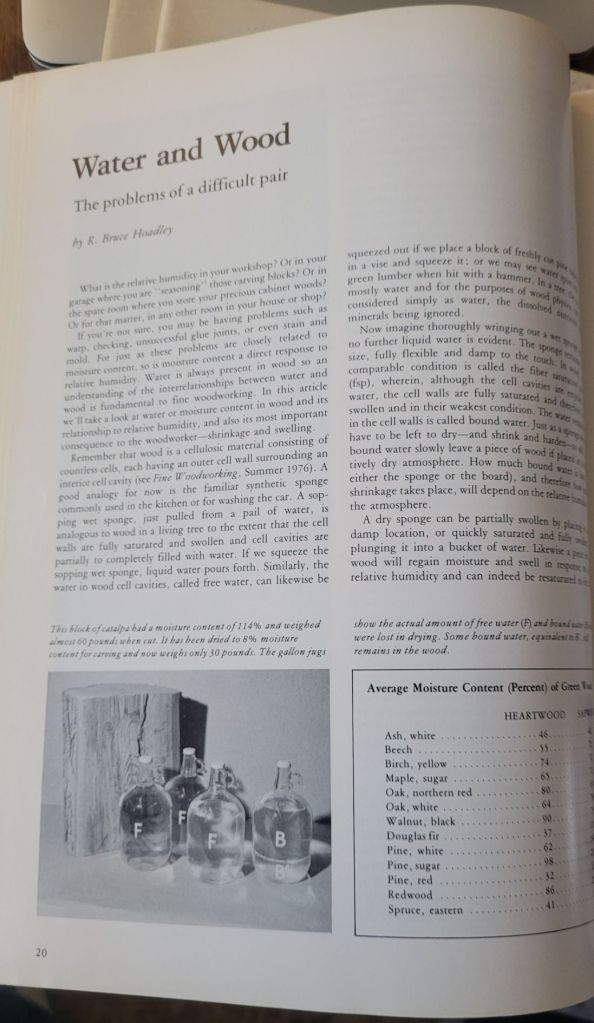
The first issue had very few advertisements, but the magazine quickly grew thicker in a couple of years as woodworking companies saw the opportunity to reach their audience by placing an ad in their pages.
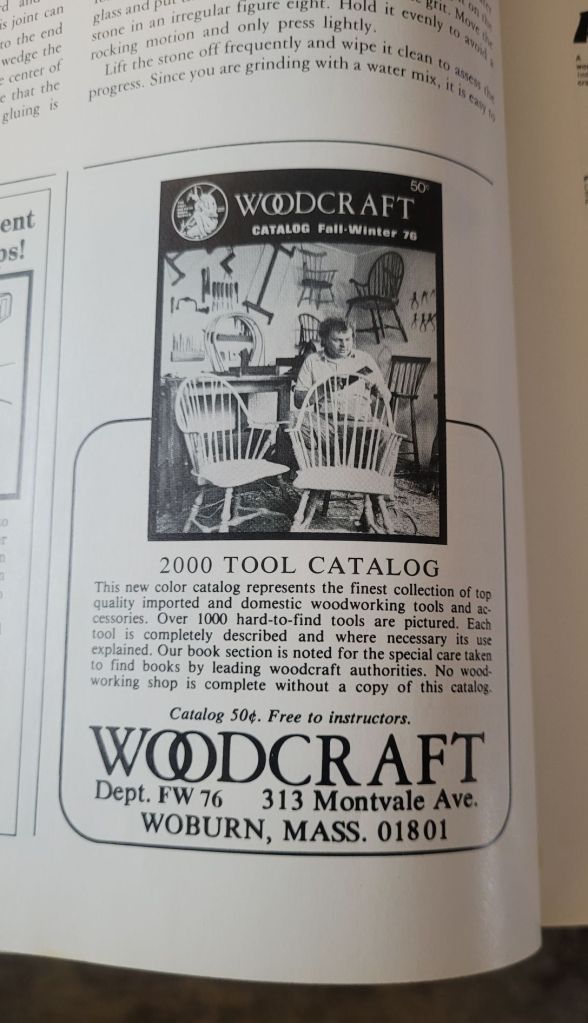
It’s interesting, but a bit sad to see the companies that were thriving 50 years ago, only to go bankrupt or be acquired over the years. The issues are full of now defunct woodworking companies.
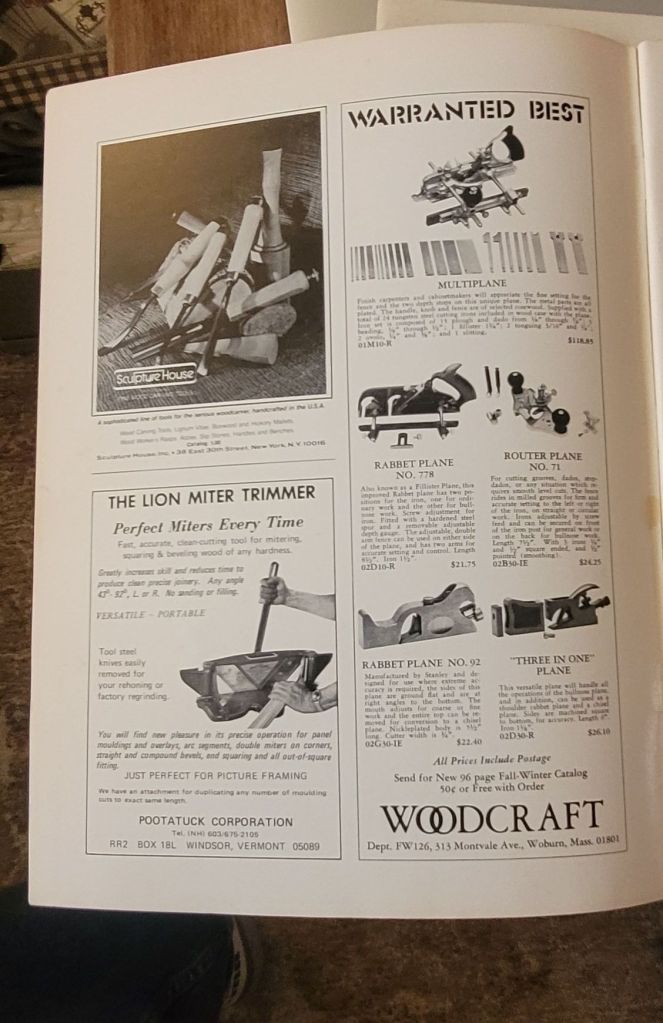
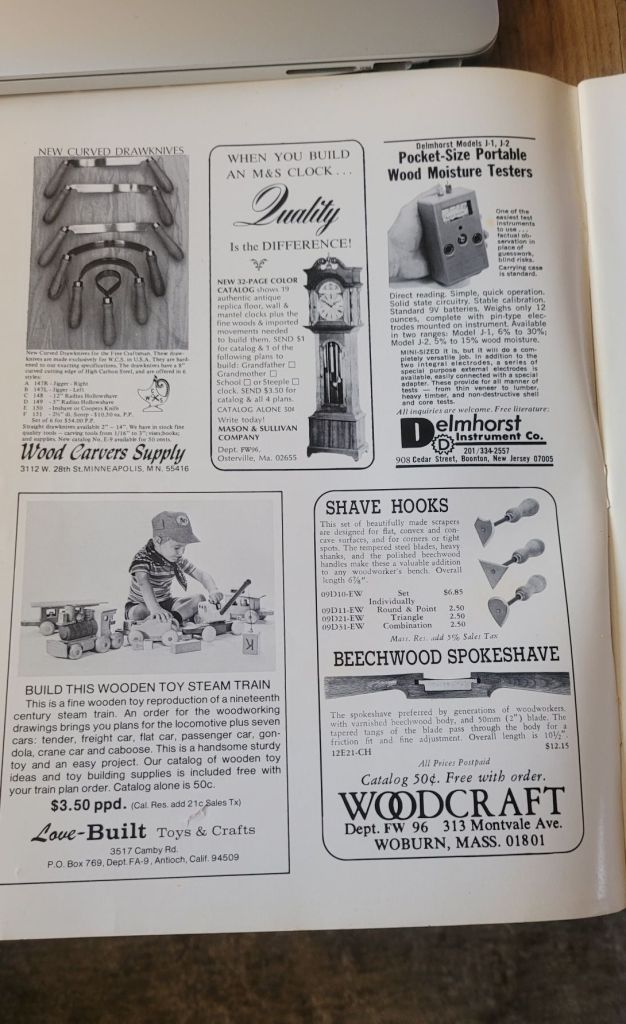
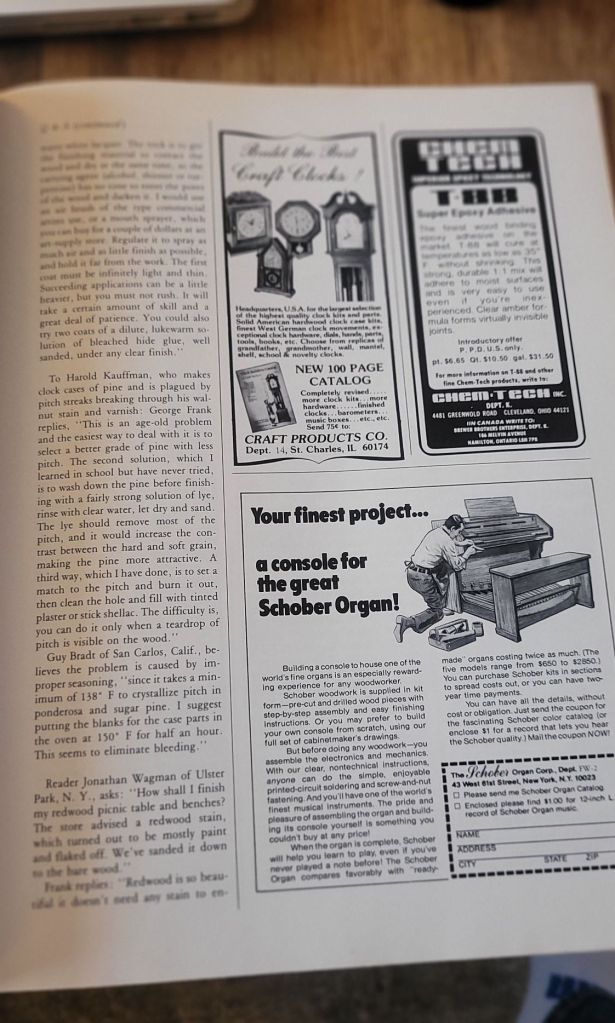

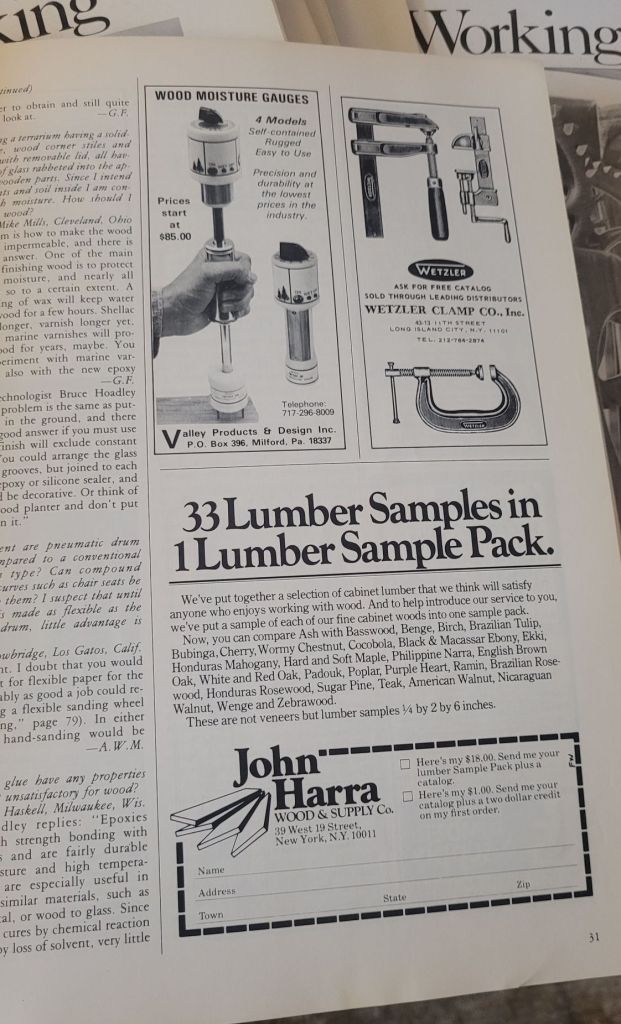
I’m still in the process of reading all the articles, but there is a wealth of knowledge with these issues. The one thing I did notice is back in the early days, the magazine focused a lot on wood carving and occasionally had articles on blacksmithing. Something that you would rarely find in today’s issues.
I checked eBay to see what these magazines might be worth. They’re actually worth a lot less than I would have thought. You can currently buy the first 12 issues for around $40.00. Of course you can buy all the issues of Fine Woodworking online if you don’t mind having a digital copy. I’m old school and still like holding a magazine in my hand instead of on my phone.
Miles's desk pt X......
 |
| hmm....... |
I don't remember it, but I can see how I did the drawer guides for my desk. I kept it simple and easy. I'll be replicating it for Miles's desk and Leo's later on.
 |
| center drawer divider |
I've been using this desk for years (10 or more?) and the drawers still work flawlessly. the guides (red oak) show almost no wear at all. No worn drawer bottom grooves at all but I won't be using red oak on either for the grandson's desks.
 |
| Miller dowels |
I pinned the sides with Miller dowels on the inside faces. The dowels worked perfectly as they were a 16th less than the width of the legs. The back I might have to do the doweling from the outside face. I'll deal with that when I glue the desk together.
 |
| table top clips |
I am going to attach the top to the base with these clips. I chopped the mortises for them with a 1/8" chisel. Three each on both sides.
 |
| back top rail |
Put five in the back rail - I didn't think 3 would be sufficient.
 |
| filled in |
The actual hole is smaller than what you see here. It got larger when I hit the epoxy with a heat gun to pop the bubbles in it. If I don't like it after it has set up I'll move on to plan B which is a dutchman.
 |
| hmm..... |
Wasn't sure if I was going to do the table top clip mortises in the front rail. I was a little gun shy after screwing up the back but I bit the bullet. If I did them wrong it would be easy to whack them out correctly. As a bonus the errant mortises will be hidden with the drawer guide rail.
 |
| hmm........ |
Whacked out a jig to help with setting the front drawer guide rail. The top edge of it will be flush with the bottom of the drawer opening. This simple jig will ensure it is even across between the legs.
 |
| fingers crossed |
Scraped the ends of the rails and the housings as best I could. Glued and installed the rails again. They will cook at least until the AM and maybe longer.
 |
| top rail |
I didn't have any problems getting the top rail and the center divider out. The dovetail detail was on the thin side and a small splinter stayed behind from the bottom of the divider. Scraped what I could and glued it again.
 |
| sigh |
The ends of the rails seated flush and snug. The center divider was a PITA. I tried frantically for several minutes but I couldn't get it flush. The screw holes for the drawer guides lined up but the center divider is proud of the rails. After the glue has set I'll see what I can do to flush it.
 |
| drawer set up |
There is a bottom bearer on the front and one on the rear. The drawer guide will be screwed to it. Underneath it will be a board that drawer will ride in/out on.
 |
| center divider |
This is an idea of what the whole thing will look like. The white wood is maple which should wear well as the drawer will be moving in/out over it. I don't have enough of it to do all three so I'll be making a Lowes run tomorrow.
accidental woodworker
Miles's desk pt IX.......
Went to the shop this AM with one goal in mind. That goal was to get all the slats installed on the back rails. Spoiler alert - made my goal with 12 minutes to go before the quitting bell rang.
 |
| hmm...... |
Split the outside face chopping a couple of mortises. I let them cook while I chopped the mortises on the other rail.
 |
| almost done |
It would seem that my calibrated eyeballing needs a reset. Two of the mortises were not deep enough. Fixed them and made them a few frog hairs deeper than 3/8".
 |
| done |
Got the wide center rail fitted into the top rail. The next batter in the rotation is slat #1.
 |
| planer snipe gone |
Three of the legs had some snipe and I planed it off. This was the 3rd and last one to be done. All of the snipe was placed on the outside faces.
 |
| yikes |
How did this happen? Missing a big chunk at the top of the mortise. It won't effect the rail tenon to mortise connection. However, I will fill in the missing chunk and I'll probably use epoxy due to the shape and location.
 |
| fitted |
I will do this after I glue up the desk.
 |
| sigh |
I would have bet a lung that I had double, triple checked this but something wandered out into La La Land. I really wanted this to face the inside but it ain't so boys and girls. I'll be filling this in with epoxy and black pigment dye.
 |
| it was almost lunch time |
Went dead in the water here. I needed to dry fit/clamp the base so I could measure for the length of the back rail slats. I had planed both of the back rail edges so I knew they wouldn't be the same length as the side ones. It took 6 shavings to clean/smooth the top rail edge and 5 on the bottom one. I had to give this rail at least an hour to cook before unclamping it.
 |
| 5 extras for any oops |
Picked through the remaining slats and got lucky. I was able to get 16 slats that had straight vertical grain. The center wide rail has cathedral grain.
 |
| this is finally toast |
Been well over a week since I mixed this batch and I can say it is now toast. It is still liquid and there was a lot of settling at the bottom. It was mixing in but it smelled like a sewer hole.
 |
| hmm....... |
Clamped it enough to get a measurement for the back rail slats. They were a 1/8" less than the side rails.
 |
| the back bottom rail |
Checked the depth of all the mortises and 3 were too shallow. I didn't want this surprise to shake hands with me when it was being glued up.
 |
| hmm...... |
Should have thought of this when I did the side rail slats. Ganged and clamped 8 slats at once and planed a chamfer on the four edges. A bit of a PITA but it did work. The slats slipped by some while planing and the first 2-3 on the plane lead in did not develop the chamfer like the others. I had to go back and give them special attention.
 |
| sigh |
I shouldn't be griping about this but gaps make me go postal and nutso at the same time. These 4 gaps -slats 1 to 3 and 6- I'll fill in with cherry veneer when I glue them up. Not that bad considering I had to chop 70 mortises.
 |
| looks good |
Sneak peek on the dry fit with all the slats fitted and shaking hands.
 |
| side view |
Thinking about chopping four more mortises to decrease the space on the sides. I'll have to see how difficult it will be to layout them out to match the others.
 |
| sneak peek with the top on |
This will be a good student desk for Miles (Leo will get one too). Initially I was going to put 2 vertical drawers on the right side but nixed it. I don't have that feature on mine and I don't miss it nor do I feel a need for it.
 |
| another head scratcher |
The top of the desk is square within less than a 16th. The bottom is out square almost a 1/2". I thought the legs at the front not having a bottom rail was the cause. Not so, the measurement between the legs at the bottom of the top rail and bottom of the legs was dead on the same. Could be twisted but the desk isn't rocking at all. I'll play this some more in the AM. Killed the lights and headed topside here.
accidental woodworker
Pages
