Hand Tool Headlines
The Woodworking Blogs Aggregator
“Glory to God in the highest heaven, and on earth peace to those on whom his favor rests.” - Luke 2:14
Norse Woodsmith Blog Feeds
Ouch.......
My truck failed the state inspection. I knew that was going to happen because I had long crack in the windshield. What I didn't know were the problems with the control arms and the back brakes plus a few other minor headaches. Total estimate is $1600 but that is dependent upon how bad the rear brakes are.
 |
| shelf dadoes first |
The goal was to get this glued and cooking today.
 |
| done |
Three coats on the back and four on the front. They are ready to go to Maria in the AM.
 |
| left one self supporting |
I've come a long way since I starting chopping dadoes this way. I had to plane the underside before it fit. Better that than a sloppy, loose fit.
 |
| ditto for the right one |
I got both of these to seat fully and especially at the front. I had to clamp them to close them tight.
 |
| sigh..... |
This router works well for getting the slat mortises to the same depth as the dadoes. However, today it would not stay set - the back screw would loosen and the depth of the iron would increase. The solution is to put a nut to help and hold the iron where it is set. The headache is the locking screw is metric. After faffing about I finally figured out it is a 6mm fine thread. I couldn't go to ACE because the truck was in the shop and my wife was off doing her dead people stuff. I'll come back to this in the AM.
 |
| it worked |
Used my two small routers to get the dadoes and slat mortises to the same depth. The depth ending up being an 1/8" deeper than I wanted them. Not a big deal but it was an annoying hiccup.
 |
| side by side |
The left one is for the grandson(s) and the right is the request. The biggest difference is the size of the shelf. I am going to try my best to make both of the ones I'm making for the grandsons to be the same.
 |
| side view |
The end heights are about the same but the width is 2" more on the left one.
 |
| hmm...... |
This shape is growing on me. Most of my previous ones I made the tops on the ends parallel to the bottom.
 |
| finally understand this |
When I first got this I had a ton of problems setting the angle. Yesterday and today it just fell into place for me. The key for me was to make the lock handle the reference. DUH.
 |
| oops |
Made a me-steak here. I should have sawn the angle first and then the cutout for the legs. I was able to 'fix' it. I sawed the angle and sawed the cutout again.
 |
| worked |
I had to saw the back half of the cutout again. Rasped and sanded it smooth. No need to go nutso here because it isn't visible.
 |
| for the Miller Dowels |
This worked well on two builds. I'll add this step to future ones going forward.
 |
| goal met |
Glued and cooking. I might do the Miller dowels after dinner.
 |
| Lowes run |
 |
| the ends |
As I did with the first grandson's bookshelf, I didn't thickness the ends to 9/16". Instead I labeled the reference face as the inside. The opposite face I just flattened. I didn't attempt to make it parallel to the reference at all. I think it looks good having the ends as the anchors being a wee bit thicker than the other parts.
 |
| left side laid out |
If I didn't have to deal with the truck issues today, I might have gotten the dadoes/mortises chopped today. I don't anticipate any hiccups betting it glued and cooking in the AM.
accidental woodworker
who will win LX?.......
The little guy on my right shoulder says the Pats will win. It is 1644, Feb 8, 2026. I don't know how good the Seahawks are. I only saw a partial game of theirs. The Superbowl has come a long, long way. I still remember Superbowl I 59 years ago. I was only 12 at the time and I wasn't a sports nut. Fast forward to now I'm still not a sports nut and if I can't watch the game I'll survive.
 |
| 2nd bookshelf |
I guess making these again isn't like riding a bike after a bazillion years. I remembered some things and brain farted royally on others. Got both ends of the shelf to be self supporting. At least the woodworking didn't go south on me.
Lost the rest of the pics for this blog post. The camera SD card has been acting up for a couple of weeks, mostly giving random card errors. Tonight after the first pic I got another card read error when I tired to post the 2nd pic. Couldn't clear it and I got the same error in my two laptops and the shop computer.
So I went back to the shop after dinner and snapped a couple of more pics to finish the blog post for the AM. I tossed the SD card in the shitcan while I was there. I've been using this one for a couple of years and SD card have a cycle life limit.
 |
| 2nd bookshelf |
Got 3 coats of shellac on the bottom and I should be done with it in the AM.
One thing I did on this one was once the dadoes and mortises were done, I drilled holes for the Miller dowels. No more placement/layout headaches. Got everyone of them right on with no me-steaks.
 |
| one of two more |
Decided to make two more bookshelves, one each for the grandson's desks. Initially I had enough scraps to make them. I used my last Gurney's sawmill 1x12 for the ends and the slats. I am making these a little bigger than the 2nd replacement one so it will hold school books.
 |
| two of two |
Got the ends and the back slats. I'll come back to this one after I get the first one glued and cooking.
 |
| toast, extremely burnt toast |
These were the shelves for the two bigger bookshelves. However, when I was thicknessing the 2nd shelf, I couldn't remove the twist. I see sawed back and forth with it. I would remove some but not quite enough. Plane it a little more and check for twist and see that it was worse than before. It finally got to a point where I was chasing my tail in circles.
The right one (the 2nd shelf)was cupped and twisted. This board was case hardened I think because I had a difficult time cross cutting it to length. I went back and checked the first one and it had cupped, not as bad as the 2nd one, but enough for it to be unusable.
I had one board I had thicknessed a month ago to 9/16" that I used to make one shelf. I'll have to make a run to Lowes to buy a 1x12 to get another shelf.
 |
| getting there |
I had forgotten about these two frames. Glad I noticed them because I still can get them done before tuesday. Monday the Frame it shop is closed but it opens on tuesday. I'll bring them and the brown one then.
Got lucky with the Super Bowl. My digital antenna picked up NBC which is broadcasting it. This was the second time I watched broadcast TV with the digital antenna. I quit cable TV over a year ago and I haven't missed it. Now I watch You Tube and Amazon Prime Video.
accidental woodworker
What's Going On With the Unplugged Shop Blog Aggregator
It's been several months now that I've had problems with Unplugged Shop, the site to which many of us go to read woodworking blogs. For long stretches the site doesn't update with current blogs, and when it finally works again, it's short lived and then doesn't update for another while.
 |
I'm probably not allowed to use this image, so I'll just say it's trademarked and thank them for the use of it. |
In addition, my blog doesn't seem to be included anymore on the Unplugged Shop aggregator. I've contacted them about it to get reinstated, but I don't know if anyone monitors that site anymore.
I don't mean to be an ingrate because this has been a free service that they provide and I truly appreciate it. I can only imagine that it takes more work than I realize to keep it running.
Does anyone out there know what is going on with them? Please comment if you do.
oops and a double drat.......
 |
| out of the clamps |
Everything looked ok - joints were tight and it felt solid. It was laying dead nuts flat on the workbench too.
 |
| layout for the Miller dowels |
Two in each end of the shelf and decided to put two in each end of the back slats.
 |
| spider sense was tingling |
Something wasn't as it was with all the other bookshelves I had made. The alarm bells starting waking up when I saw that the back slats weren't parallel to the back edge of the ends. Not being parallel made it a wee bit more difficult to layout for the Miller dowels.
 |
| not bad |
Why can't I saw an angle like this when I try 45s? Thought of this to use as a gauge stick to layout the Miller dowels.
 |
| yikes |
At least this dowel boo boo came out on the bottom. I went 11 for 12 and the mishap was because I picked the wrong pencil line.
 |
| hmmmmmm........ |
This is definitely ain't what I had done with the other bookshelves. The top slat is too forward and not parallel to the back edge.
 |
| toast |
I rounded the two front corners and I did them too much. A portion of the round got buried in the dado not to mention there is a )&^@%*_Q_)#@^*_Q)*% gap.
 |
| not right |
Instead of the shelf titling backwards, front to back, it tilts down, back to front. That means whatever is put on the shelf ain't staying there. Now it has gone from toast to burnt toast and charcoal.
 |
| confirmation |
The CDs are staying in place but they look odd. It is only 7° but it is easily seen. I can't give this to anyone because of my bone headed, brain fart me-steak.
 |
| nope |
Tried to salvage this by sawing the bottom legs. That idea fizzled and died because the legs aren't long enough. Thought of adding pads to them and that would have worked but I nixed it. The top slat being inset too much ruins any attempt to salvage it. I will saw off the slats and the shelf and reuse them for another bookshelf.
 |
| 2nd bookshelf |
These bookshelves don't require a lot of stock. Got all that I needed from the scrap pile. It is a wash, rinse, and repeat of what I did yesterday.
 |
| layout |
Did it right this time. The shelf and back slats form a right angle (at the back and the front). The tilt of the shelf comes from the 7° angle on the bottom. On the first one I had laid out the shelf at a 7° from the front edge and also had sawn the bottom at a parallel 7°. If I had left bottom square to the front/back, it would have worked.
 |
| ready to be chopped |
Made and caught a potential me-steak on the left end. I initially laid out the slat mortises on the front edge rather then the back edge.
 |
| maybe |
Didn't get any paint on these today. I stayed in the shop until 1540 and I might get these painted after dinner.
It had snowed on friday overnight and it snowed 3 times today. The driveway and walk got shoveled twice but nothing after the 3 dump. I'll deal with it in the AM. The shoveling outings cut into my shop time and I wasn't able to complete the 2nd bookshelf. Should be able to wrap that up in the AM.
accidental woodworker
Chisels for Kumiko
While paring kumiko In the past I’ve often thought that I could create a tool to make this task a bit easier and possibly more ergonomic as well. Recently I had a customer/friend contact me to inquire as to whether I would be interested in creating such a chisel for him.
I made a list of the criteria we put together for this chisel:
(1) Wide blade for easy registration on the jigs typically used in kumiko work.
(2) Shorter blade so the pressure point of your hand is close to the cutting contact point. Something butt chisel length.
(3) Shorter handle as compared to a bench chisel so the end would fit comfortably in your hand and provide a way to push with the butt of your hand.
(4) A lower bevel angle to make for a better paring cut.
(5) Lower heat in the tempering process to leave the chisel a bit harder than standard. Paring and chopping are very different task. Leaving the steel in the blade a bit harder promotes a sharper edge better for paring than chopping.
(6) All sharp edges on the chisel blade where one’s hand may come in contact are broken/softened to make the user experience more pleasant and less wearing on the hand.
Below are pictures of the product created using this criteria. Woods are Desert ironwood, olive and figured resin infused maple.
Ron


New Additions to the Tools Available Page
Recent additions to the Tools Available Page as of January 28th, 2021.
To purchase visit the "Tools Available page"
Pair of Resin Infused Curly maple 18 degree Skew Chisels, 3/8" wide


Resin Infused Cherry Awl with removable blade feature and lye aged finish.

Most Recent Set of Dovetail Chisels
I recently completed this set of Dovetail chisels using Resin Infused Curly Maple for the handles. I also implemented a new ferrule design. The change is not obvious as it is concealed in the handle. The new ferrules feature an integrated threaded stud that actually threads into the handle and once thread locked it becomes integrated into the wooden handle.

This new feature allows all the components to become one thing and makes the final assembly a bit more predictable as well.


Ron
New Items Added to the Tool Available page on 9/2/20
To access that page follow this link. Tools Available
If you have any questions please contact me at ronbrese1@gmail.com


New Tools Available Page
All Awls are sold.
The awls featured in the last post sold quite quickly so I set about making another small batch of these tools in various woods. I also thought this might be a good time to create a page specifically for the tools that I have available for sale at any given time. Tools Available link.


Awl Issue Resolved
I guess if I really wanted I could fashion a jig to accomplish this task but as of late I've just made a new awl.
The obvious solution is to make an awl with a removable blade that is then easily chucked into a drill and spun against an abrasive to create a newly sharpened tip. This past week I've made a prototype of such an awl and have also made a small production run of removable blade awls.


It's Hot!!! (Chisels are Sold)
I've suspended outdoor projects for a while and have retreated into the shop to resume tool making.
I've recently completed another set of the diminutive Dove Tail chisels. This set features resin infused very curly maple handles. My friend and saw maker Ron Bontz is set up to do this infusing work and has a good bit of experience in the process. The maple turns much nicer after being infused and the figure is dazzling.
Sizes are 3/16, 1/4, 5/16, 3/8 and 1/2".
I've used Presco 0-1 tool steel for the blades on this set. It's a very high quality tool steel. It's the same tool steel I've used and enjoyed for plane irons.


Enjoy the rest of the summer, stay cool and safe,
Ron
Another Set of Desert Ironwood Chisels and a Popeye Awl (Chisels are Sold)

You may think this set of chisels looks quite similar to the chisels in the last post and I would have to agree but there is one significant difference. The steel used in the blades is Japanese Hitachi White Paper steel.
The Hitachi steel is proclaimed to be very pure steel and I have to say I could tell a difference as soon as I started roughing out the blades in the bandsaw. This stuff works lovely. Given the expense of obtaining this material I'm glad there were more benefits than just a difference in the hardened results.

Considering the price of the White Paper Steel these chisels are priced at $110 each with $5 per chisel discount for purchasing the entire set of 6. Total $630.


A Recently Completed Set of Chisels with Desert Ironwood Handles (This Set of Chisels is Sold)

I had intended to post this latest set of small Dovetail chisels earlier this week but a very close encounter with a tornado delayed things a bit. The line of storms that ripped thru the southeast Sunday night to early Monday morning caused a lot of havoc. We were awakened at 2:00 am Monday morning by our phones instructing us to "TAKE SHELTER NOW!!!"
We heard the distinctive roar of the tornado as we were standing in our bedroom closet and then it was over. We made the assumption that the tornado had passed over in the upper atmosphere. The next morning revealed a much different reality.
The tornado was a mile wide and was on the ground for 10 miles. The edge of the swath of destruction it left was literally 100 yards from our house. We were unbelievably lucky. Less than 2 miles from our property a house was moved from it's foundation intact and deposited in the middle of a state highway. Just a bit too close to OZ.
We were without power or cell service for 2 days. Obviously that wasn't much of an inconvenience compared to the devastating effect the storm had on the lives of the people in the path of destruction.
Now about the chisels. This is a 4 piece set and as I like to have all the handles in a set from the same piece of wood, I could only coax 4 handles from this piece of wood. This is especially true of Desert Ironwood. It can be so different from one blank to the next.


Dovetail Chisels, Something New and Interesting (Chisels are sold)

As a lot of you know I've been on somewhat of a hiatus from Tool making. It's been refreshing to pursue other types of work and it renews the spirit of creativity. I have made some tools along the way but mainly for my own needs.
I built what I would consider my dream shop for a someone else last year. It was a major construction undertaking that I wasn't sure I could accomplish. As in a lot of situations you find that you're capable of a lot more than you can imagine. For quite a while we could work at our leisure and then cover everything from the elements. We did this thru putting in the foundation, framing the floor and subsequently framed the walls and had them laying flat on the floor system. We could still cover everything with tarps so the weather wasn't much of a worry but then there's the day when you stand up walls and then you have all that time and material exposed to the elements and then it's a push to get dried in. It was a lot for two old guys to do but after a bit of trial and tribulation there came the day when it rained no more in the building. I can't even begin to express the relief.
But I digress. I then began pursuing some woodworking projects that had long languished on my list of things I wanted to make. Most of those things were joined with dovetails in one manner or other. I had a very adequate array of chisels for this work but soon discovered that I did not have what I would consider an optimum set of chisels for these task. I found myself picking up and putting down tools really more than should be required and finally came to the realization that with a proper set of chisels I could eliminate a lot of unnecessary movements. I began putting together a list of criteria that would describe this set of chisels.

I owned some shorter dovetail chisels that I really enjoyed, however they were 1/4" thick and given the way I typically layout my dovetails they would not fit between the ends of the tails to provide for incising the point where the side of the dovetail meets the baseline. In every case I had to put down one chisel to pick up another that was thin enough to fit.
Chopping base lines. When chopping to the baseline there should only be a minimal amount of material to be removed so an extravagant thickness is not required of a tool to accomplish this task. That sets one criteria. The second was length. It's nice to have a chisel short enough so that the base line where you're sticking the edge of the chisel and the top where you strike the chisel is in one line of sight. With longer chisels I would put the tip of the chisel in the base line and but when I changed my focus to where I would strike the handle the tip would move slightly. If you don't notice this then you end up with a wonky baseline. That sets another criteria to design for.
Personally I prefer good ole high carbon steel for my woodworking tools. At the last Forp Event where French/White oak was being worked profusely for days on end I noticed that everyone's chisels had serrated edges as the result of chopping in wood that had varying degrees of density. It didn't seem to matter if the chisels were A2 or PMV11 or High carbon steel. The end result was the same. The difference was in the time it takes to recover the edge. I realized years ago that a high speed steel edge that fractured took longer to recover than anytime one could possibly gain in edge longevity. I much prefer the sharper edge to be gained from using high carbon steel. I don't mind maintaining the edge as I work and when the edge does need to be restored with good technique it just doesn't take very long to be sharp and working again.
Evidently there are many others looking for a similar set of chisels because when I began posting pictures of the chisels I was making on my Instagram account I immediately started getting requests for these chisels. I took measures to get set up to produce these tools with a bit more efficiency and after a lot of trial and error and subsequent testing I was confident that I had a process by which to make very nice versions of these chisels.
The first 4 sets went out the door as soon as they were made and the set with Desert Ironwood handles pictured in this posting are the first I'll be offering for sale here on the blog.
As I mentioned this particular set has Desert Ironwood handles that all came from the same piece of timber. The ferrules are of course brass and the tool steel for the blades is New Old Stock Starret 0-1 tool steel. The overall length is 6". The sizes in this set are 3/16", 1/4", 5/16", 3/8" and 1/2". They are ground to have zero land on the edges but that edge is then broken so that it doesn't cut one's fingers as they are used. It's as minimal a land as can be had and not be dangerous to the user. The backs are polished and they come honed and working sharp.
The blade tips are taken into the heat treating process in a blunt state so that portion doesn't take such a beating in the hardening process and are subsequently ground back twice prior to final honing to make sure they are worked back into good steel.


The Web Page is No More
What I said about assuming the worse. I'm doing well, in fact I'm better than I've been for a while. In the last couple years I've shed 56 lbs. I'm more active than usual and feeling great.
I've been pursuing other interest, in fact I've been the General Contractor on a construction project since this past spring. As this project is winding down I'm back to restoring vintage machines and making planes again. I'm also doing more woodworking than I have for quite a while, in fact I'm about to embark on another work bench build. Not for myself. This is a commissioned piece for a client.
So there you have it, I hope you are all well and enjoying your woodworking,
Ron


Another "JR" plane, another Brese/Kennedy Creation
Just making this plane in the simplest functional form is quite a task. Coordinating both our efforts together adds an entire other element to this work but that keeps it's fresh and interesting and also makes it quite a challenge.
This is how it goes. I make all the parts. I mask all the areas of the interior of the plane that she is not to engrave and send them along to Catharine. She engraves the interior surfaces and all the movable/removable parts and sends them back to me. I then deburr, rub to a satin finish and oil the surfaces. Then I assemble the plane taking great care to preserve the engraved surfaces. There is no going back from here.
I then send the assembled plane body back to the Catharine to engrave the exterior of the plane body. She subsequently sends the plane body back to me. I work and oil the exterior surfaces, add the wooden bits, the iron and actually make the plane work.
Then it is shipped to our patron John Rexroad. Yes, these plane parts are quite traveled before this is done.
This is the third in this collection of tools. To date we have done a Winter Smoother, Winter Panel plane and now this Shooting plane.
When I post pics of these tools I always have people comment to me that this is way over the top for a "tool", and I realize this is not everyone's taste, however this format of tool making makes for a very rare collection of highly functional tools.
Ron
"The greatest challenge in life is discovering who you are. The second greatest is being happy with what you find"


Instagram is Easier than Blogging, and a Jewelry Box
If you're interested in what I've been up to as of late you may want to check out my Instagram page.
Here's a link:
https://www.instagram.com/breseplane/
And for those of you that don't wanna. Here's the jewelry box I mentioned in the title of this post.


The Saw Project is Complete
Workbenches, old American iron machine tools, my favorite hand tools. All these things are pleasing to my eye and inspired me to do work that is befitting of these tools.
There has been this one sore spot in my shop for quite a while that I've been meaning to do something about. The Grizzly table saw picture below is one that I purchased in 2004. Before I developed a taste for old American iron. There is really nothing particularly wrong with this saw that can't be resolved with new arbor bearings, belts and a considerable amount of tweaking. It has served me well but it just doesn't inspire me in the same way as my other tools. I removed the top a couple weeks ago to replace the arbor bearings. In the process it occurred to me this saw is basically an older model Delta Unisaw clone.


It All Started with Replacing the Arbor Bearings in my Table Saw
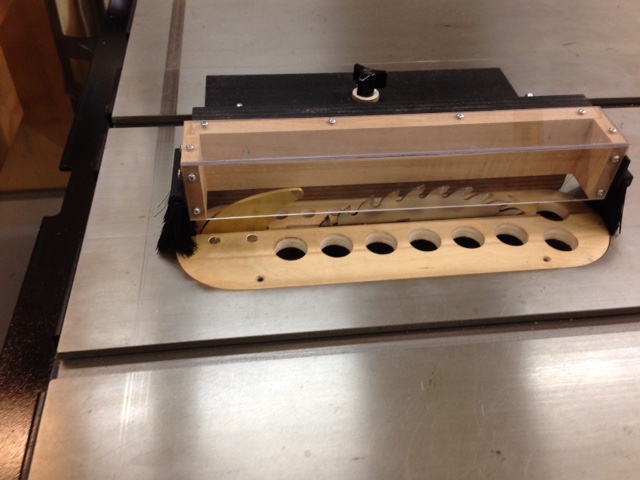
This is where things went wrong. As you know table saw dust collection is typically inadequate at best and while the top was off my saw I deemed this to be the time to design an improvement. 4 versions of a blade shroud later my saw dust collection is greatly improved. I'm into this project for way more days than I ever imagined and this spawned an entire re-arrangement of my shop. It was one of those, "while I'm at it I may as well", kind of thing.
The table saw has been moved forward and to the right approximately 2 feet. Doesn't sound like much of a task until you consider that the dust collection drop and the electrical feed also required moving. You can see evidence of the prior location in the picture below.

While the shop was in a total state of disarray I decided that now would also be the time to move my Powermatic 90 lathe to the other end of the shop. It's on a mobile base so easy right? Nope. This required me taking out the leg of my dust collection that went to the lathe, cap it off and then extend the main trunk of the system to the front end of the shop where the lathe now resides. Next I found myself crawling under my shop in order to pull a 220 volt circuit to the new lathe location while my wife was feeding the wire from inside the shop. Yes she is an extraordinary woman.

The lathe move was to facilitate moving my disc sander and oscillating spindle sander off a rolling tool chest into a fixed location on the back wall where the lathe used to reside. This required building cantilever brackets that attached to the back wall giving these tools a permanent home. I so hated having to roll that tool chest out every time I needed to use one of those tools. No more. Fortunately no electrical work was required for these machines. This sets me up to complete the finish work needed on the back wall of the shop. Trim and paint. You can see where the gray floor paint stops in the photo below. I'll be glad when the floor is all one color.

Last but not least Julie emptied out the cupboards of my Shaker workbench so we could change it's location. Even with the cupboard empty it was still quite heavy. That's part of why it's such a good workbench. We rocked it so that we could slide cardboard skids underneath. All this to move it approximately 2 feet.

Of course now the main room of the shop had the look of, "was anyone hurt when the bomb went off?"
It was time for a major aftermath clean up.
This was the final part of the re-arrangement and it all started with changing arbor bearings.
Just so you know, you can follow Brese Plane on Instagram. I'm enjoying the Instragram account. It allows me to post things going on in the shop in closer to real time and it's less involved than writing a blog post which can be hard to find the time to do.
Ron
“Whenever you find yourself on the side of the majority, it is time to pause and reflect.”
-Mark Twain