Hand Tool Headlines
The Woodworking Blogs Aggregator
“Glory to God in the highest heaven, and on earth peace to those on whom his favor rests.” - Luke 2:14
Be sure to visit the Hand Tool Headlines section - scores of my favorite woodworking blogs in one place.
General Woodworking
biopsy day and small table pt V.......
The lung biopsy today at the West Roxbury VA went well. No hiccups and after almost 6 hours in the PACU, I was allowed to go home. I had instructions to not operate any equipment nor engage in any stressful activity. Tomorrow I am cleared to resume my normal ADLs (activities of daily living). Which for me means I can work in the shop.
No results on the tissue they took from lung though. All I now for sure is that the lab said the tissue was ok to analyze. I'm hoping that they have something for me in a few days.
Before I left for the Providence VA at oh dark thirty five, I sprayed one coat of shellac on the end panel slats. After that I looked around the shop for a few and killed the lights. Headed out to catch the shuttle to West Roxbury.
 |
| back home and hmm..... |
It can't be all that stressful to remove the clamps from the bottom shelf.
 |
| side by side |
The top (right) and bottom (left) can't be confused with being from the same tree. I'm going with this side for the bottom shelf too. I like it too much and I believe it adds a lot of visual interest to the table.
 |
| the other side comparison |
These two are very similar in graining but not so much in color. However, once shellac is on it that should blend and agree more. Moot point as it will be facing the floor.
 |
| before I hit the rack |
I got three more coats on this before I went to bed. Spraying the slats beats the snot of brushing them. No matter how careful I am, I always have drips and runs to deal with.
I had to scrape one slat because it had 2 glue drops that I missed seeing on the first two coats but caught on the 3rd one. Shellac will stick to the glue but it will not hide it.
 |
| hmm...... |
After seeing (and liking) how the mortises for the table top clips looked like off the router I am trying something different with the make up mortises for the end panels. I knifed them all the way around. They should come out a lot cleaner looking then the first errant ones I chopped.
I would have chopped them after dinner but I declined. The doc said to take it easy and I didn't want to push the issue. I can whack these out in the AM lickety split.
accidental woodworker
Who Made These Planes?
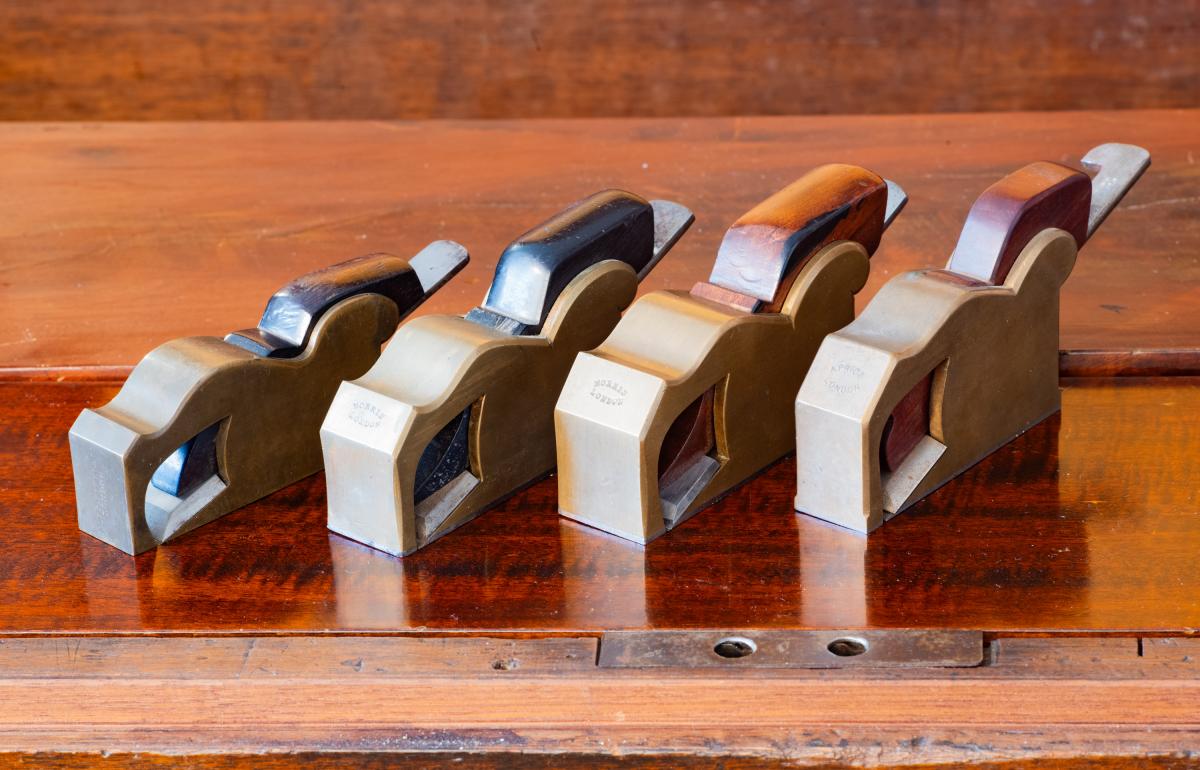
Here are four bullnose infill planes from the late 19th to the early 20th century: the oldest on the left is by Holtzapffel & Co (1828-1922); the two in the middle are by Norris (1872-1943); and the one on the right is by Arthur Price (1924-1967). All three companies were London makers. Bullnose planes are not that useful in a shop, so all of these planes show very little wear. The Holtzapffel plane does not have a steel sole for wear (planes without steel soles are less common that ones with steel soles). The two Norris planes are essentially identical, with the only real difference is the width - 1 1/8 vs. 1 1/4 - and wedges - one has a rosewood wedge and the other one has an ebony wedge. The plane with the rosewood wedge has never been ground and has just been honed a few times.
Who Made These Planes?
We know what brands the planes are stamped with. We also know that Norris didn't have a foundry. At the very least, someone else did their castings. Or did they buy castings from one of the various vendors that sold infill castings and simply finished them? Or did they outsource all their small cast planes like these bullnose planes in their entirety to a special maker that only made cast planes like Slater or Price? Norris and Holtzapffel planes are quite collectible, so we know a lot more about them. But there were many retail sellers of infill planes. For example, in Rd. Melhuishs 1912 catalog, a complete range of infill planes are shown with their own brand. However, while there are "Meluish" planes that survive, I don't know if the catalog branding extended to stamping the actual tool too.
I admit that these questions may not be that interesting to most plane collectors. But for someone like me who is fascinated by the process of manufacturing, these technical questions are very interesting indeed.
First let's take a look at the castings. All of these planes share the same DNA. The castings are essentially the same, but they are not from the same pattern. There are slight differences in proportion in the Arthur Price plane versus the Norris. The Holtzapffel plane is a little smaller. This difference can be attributed to one of three reasons: Each company had its own patterns that they had cast via third party foundries when they needed to make bullnose planes, all derived from the same original design; they all used the same castings from the same vendors and the differences reflect the fact that these planes are made over a period of about 90 years. They also might have purchased casting from one of the various retailers that sold plane castings. The last solution is certainly the easiest. All these makers were capable of filing a casting to clean them up. The hand filed decoration details by the different makers are quite different.
But I think the real answer is that Norris and other companies went to makers such as Arthur Price for small cast planes. The number of surviving Norris cast planes is quite high. The number of early Arthur Price planes is quite low, but the number of Arthur Price planes that date from the 1950s - after Norris closed - is actually high. Normally you would assume that a tool maker like Arthur Price, which stayed in business for a good stretch, would have more surviving planes. Unless the company dramatically altered either the number of planes produced or the method of production, their earlier planes should not be so scarce. This makes me think Arthur Price's early plane-making was devoted to planes sold under other brands. It also makes absolutely no sense for Norris to spend time making the cast planes when they have the special expertise for dovetailing steel planes. Outsourcing was incredibly common. Norris itself made planes for other brands. Robert Towell, the early 19th century plane maker pioneer, made planes under his own brand but also made many planes under other people's brands. As far as I know, Holtzapffel made very little outside their lathes. In general, the practical maker assesses their capabilities and resources and outsources everything for which they don't have a unique advantage. That having been said, we dont have any real evidence one way or another, so my theories are just theories.
I enjoy the premise that planes' commonality of design, and the efficiency of outsourcing, point to a London community of tool makers that supported each other.
I would love to find some documentation about how the hardware manufacturing business worked in London in the 19th century.
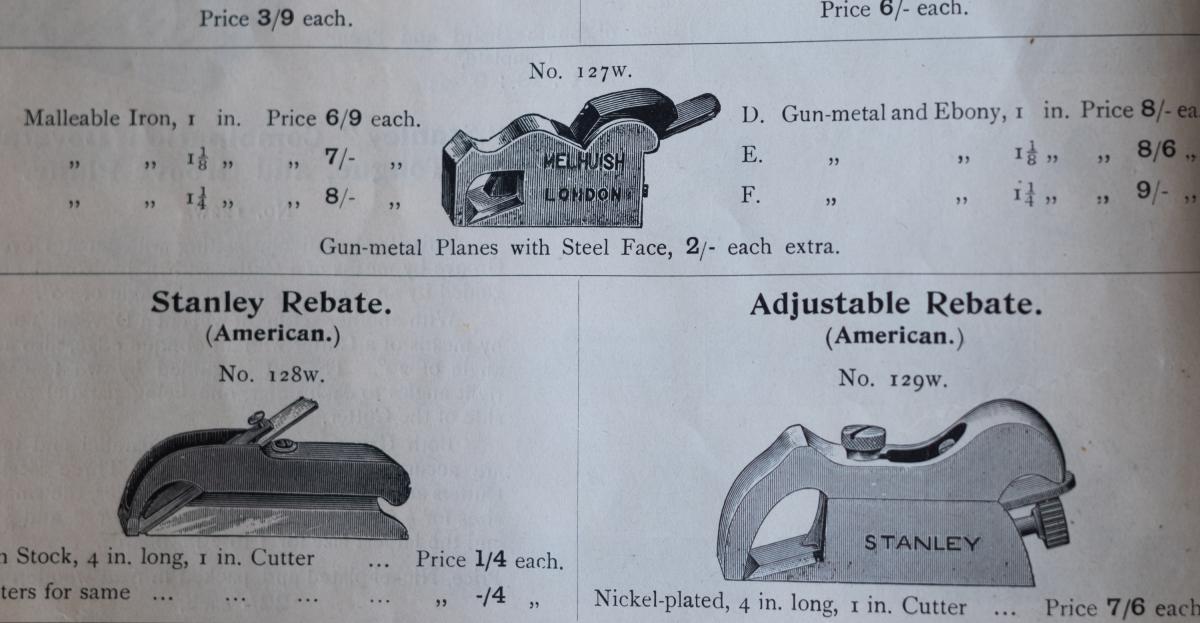 House brand infill planes in the Rd. Melhuish 1912 catalog
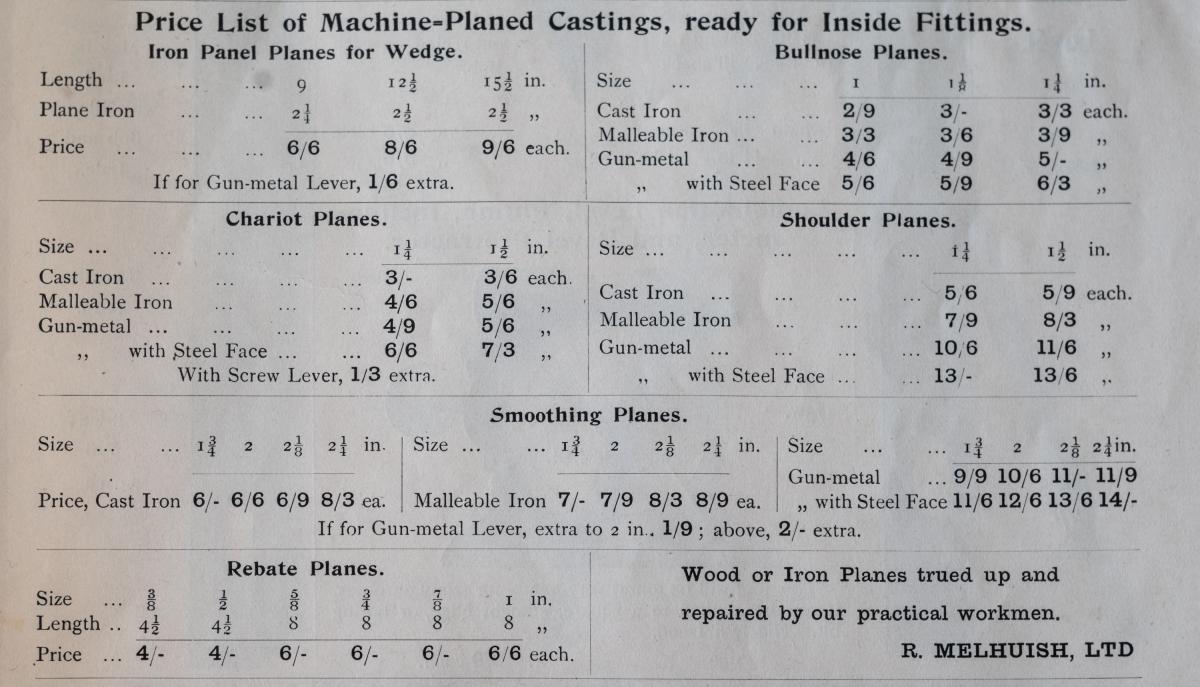 Machined casting ready for stuffing from the Rd. Melhuish 1912 catalog
small side table pt IV............
Not much shop time today. I rolled out of the rack late and I had an appointment at the VA. No complete glue up but I at least got the ends cooking. I had to do the vampire act also. The doc put an order in for blood work and they drained me to fill 11 vials. Never had that many with any previous blood work.
Tomorrow will be a zero shop time day probably. I have a lung biopsy at the West Roxbury VA at 0900. I expect to get home late - after 1800 so I'll only get to go to shop and look around and fondle whatever tools I have on the workbench.
 |
| sanded |
 |
| hmm...... |
I'm a wee bit short on these clips. I need four more of them. Ordered a 100 of them from Lee Valley last night. Woodcraft sells them too but the last ones I got from them were stamped and they were thin. I like these because they are thicker and stiffer. I haven't deformed any screwing them down like the thinner Woodcraft ones did. (I've since shitcanned them)
 |
| before I glue up |
Wanted to chop the mortises for the table top clips now before the legs are attached.
 |
| glued and cooking |
Made good progress. I wasn't sure I would get these done before I left for my appointment.
 |
| shelf |
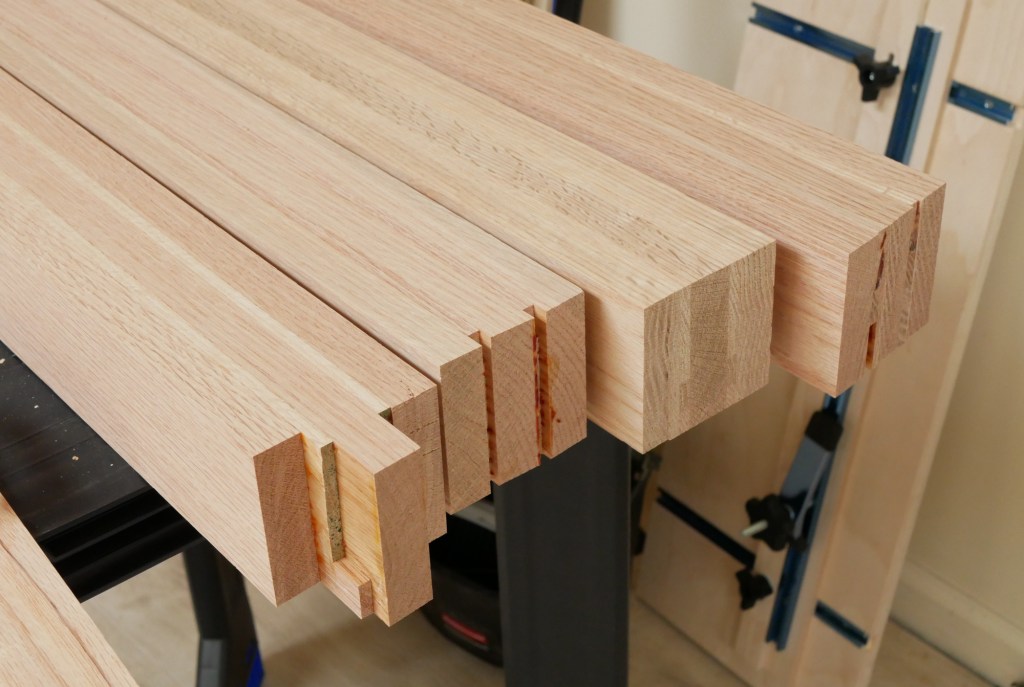
Squeezed in gluing up the shelf. It will be roughly 12-13 inches wide and about 28 inches long. One board will be 9" and the other about 5". I didn't do equal width boards for the shelf. I didn't want the screw through the bearer to screw into the glue joint between the boards.
 |
| wow |
I like the grain pattern on this side. Black gum streaks, soaring cathedral point, and a sliver of sapwood are all like eye candy for me.
 |
| stress free glue up |
I got an almost dead flush glue joint on both faces. The only hiccup were these two clamps needed a helping hand laying flat on the top.
 |
| the front runner |
 |
| opposite face |
This face grain is a lot tamer. On the glue joint there are matching black gum streaks that make this look like it is one wide board. Both sides IMO are a winner but I'm still leaning towards the one above.
 |
| just noticed this |
I have done a lot of bone headed, brain fart induced me-steaks but this has got to be the leading contender for the #1 spot. How could I chop 6 of these mortises and not see that I was all by myself out in La La Land? I'll have to chop six more on the correct edge.
 |
| last 8 mortises |
Did these with the plunge router and a carbide 1/8" router bit. A lot cleaner looking than the hand chopped ones.
 |
| shim stock |
I don't think these slots will visible but I am going to fill them in anyways. I was hoping to bring these out to the driveway and spray shellac on the slats. I might be able to squeeze that in after dinner.
 |
| last three |
This filled up the mortises better than I had hoped for. The mortises weren't that clean and smooth but the shims filled them in good.
accidental woodworker
small side table pt III............
Almost got the table glued up but it didn't happen boys and girls. No life alternating glitches or brain farts stopped it, just the work flow didn't go as fast as I thought it would. Maybe tomorrow I'll get it glued and cooking. All I have to do besides some mind numbing sanding is to glue up the bottom shelf.
 |
| Miller Dowels |
Put two dowels into the shelf from each end. I didn't put any in the back slats. The bottom shelf will keep the bookshelf together. The back slats were fitted snug into the mortises with glue. I doubt that they will ever give up the ship.
 |
| epoxy clean up |
This isn't 100% cleaned up but close. It looks good with no bubbles and the color is uniform through out.
 |
| table top epoxy fill |
The epoxy shaves off easily even with a dull iron.
 |
| the opposite face |
There is a void on this side. Debating whether or not to fill it in. This is the underside and will never be seen. hmm.......
 |
| sigh..... |
I was planing the burn marks off and both stretchers bowed on me. The left one you can see. The right one bowed up. Both of these are toast so I'll have to come up with another plan for securing the bottom shelf.
 |
| bottom shelf bearer |
 |
| chopping mortises |
The depth of the bottom mortises are 3/8" deep and I chopped the top ones 1/2" deep.
 |
| fitting the slats |
I purposely made the slats oversized in the width and thickness. Planed each one to fit their respective mortises.
 |
| not a me-steak |
I forgot to saw the slats to length. Not a boo-boo but a work slow down.
 |
| another boo-boo |
One tight fitting dowel threw hissy fit. It broke off flush with the top of the hole when I tried to pull it out with pliers. I had to drill it out again with the doweling jig. I left it on the bench just in case I ran into this again. Measured for the length of the slats with the end dry clamped.
 |
| left side |
I like this. IMO it better than not having any slats at all.
 |
| done |
Got both ends dry clamped and two of the slats have gaps. All the slats fit snug and I don't need to glue them. The two gaps are at the ends that I will fill in with wedges.
 |
| hmm...... |
I don't like this look. The miter heels should be facing down and not up. The miters will be partially visible and will look better that way.
 |
| super glue |
This rail has a bazillion little cracks that I filled with super glue. I don't know exactly what they are but I filled them mostly so they won't show when the shellac goes on.
Weather has gone screwy lately. Last week it was unseasonably hot for a couple of days. Now the temps have dropped and the overnight temps will be close to freezing (0C) for a while. I was going to shut the heat off but that won't be happening for a while yet.
accidental woodworker
small side table pt II............
 |
| blurry but readable |
Unclamped it and checked for more splits and I found none. Both of the two 3 1/2" wide boards will give up the aprons/rails for the table.
 |
| hmm...... |
I am going to dowel the table together and the doweling jig matches the width of the apron/rail boards. I was expecting to get maybe 3 dowels and not all 5.
 |
| done |
Having 5 dowels on each end will strengthen the leg to rail connection. I paid attention to the alignment tic marks before I did any drilling. Paid off because I didn't screw up any of them. I usually brain fart on this step due to not paying attention and jumping before I look.
 |
| birds eye cherry |
I looked this up and there is such a thing as birds eye cherry. There isn't a lot of it but enough to catch my limited attention. I have two 6 foot long boards of this.
 |
| got it right |
There is a 3/8" spacer with the jig which put the center of the dowel holes dead on the center of the leg.
 |
| no problems |
The dowels don't hit/touch on each other. I was able to fully seat both of the rails and close them up gap free.
 |
| survived |
Doing the leg doweling was nerve wracking. First baby steps were getting the layout for the aprons/rails. There are 6 of them, two each on the sides, and two at the top front and back. There are no bottom front/rear aprons/rails.
Once I sorted that out, which took a while and involved a whole lot of erasing, I drilled the first one. I set a reference face for the doweling jig and I agonized about getting it right for all six locations. A lot of second guessing and double checking but I finally got it done with any brain farts.
 |
| sneak peek |
I like this but after seeing it I think I should have made it a little higher - 4-6 inches?
 |
| hmm..... |
A single stretcher on the bottom isn't enough. The bottom shelf will be in between the inside of the bottom rails. I will have to put two stretchers in to support the bottom shelf.
 |
| side slats |
Played around with this and initially went with 5 slats and then changed that to 3. Finally settled on this, one center wide slat with two outside smaller ones.
 |
| filling some holes |
I stuffed a bunch of cherry shavings in the hole on the top before filling it with epoxy. The one on the rail doesn't extend to the opposite face. When I checked it an hour later it had sunk below the top. I'll have to fill it with a second round of epoxy. The second hole on the rail didn't sink so it won't need to be refilled.
 |
| the new table |
Everything needed to make the table except for the bottom shelf. I am still deciding on whether to use the birds eye or plain sawn cherry.
 |
| sigh |
The first stretcher I sawed out bowed before I set it aside. The next two came out flat and straight. I'll let them relax for a couple of days and fingers crossed they stay this way.
accidental woodworker
maintenance day et al........
I went to Koszela Lumber today and got the cherry for the upcoming small table. I finalized the plans for it in my head but that doesn't mean that is what I'll make. I'm still a little fuzzy about how to attach the legs and the number of aprons are still subject to change. Hope to start on that in the AM or monday at the latest.
 |
| 4/4 cherry |
I was hoping for rough sawn but she didn't have any. This 4/4 is dead on 3/4" thick. Two, five foot boards 3 1/2" wide for at least 4 aprons. Three six boards 9 1/4" because they looked too good to leave there. Two of the boards have a bunch of pin hole knots that look like birds eye maple. One of those will be for the bottom shelf.
 |
| sigh |
I think I finally have solved this plane. The right side flat seat is lower than the one on the right. This is the best I could come up with to measure it. Would be better if I had some machinists measuring tools to do it properly.
 |
| hmm..... |
This is a new iron from Lie Nielson for my 9 1/2 blockplane. There is a flat at the toe which means I have a lot of runway work to do first. I set this aside and picked a different iron to start with.
 |
| Donna's pen box |
The toes aren't dead on even, but there aren't any gaps.
 |
| the cherry top |
The rest of box looks on the plain side. Maybe I should inlay some banding to break all the whiteness of the poplar.
 |
| first iron |
The iron is out of square. Not much but enough that I need to address it. I have found over the years that it way easier to deal with multiple iron problems one at a time. There are two with this iron - first I addressed the out of square by dragging the iron vertically down the runway until it was square.
The 2nd problem was sharpening the iron. I find it is easier to not drive myself postal trying to sharpen and square at the same time. Of course I had to expend a ton of calories to sharpen because squaring the iron left a flat on the toe.
 |
| got lucky |
I found a piece of 5/4 scrap cherry under the sharpening bench. Now I have enough stock to redo the ends for the 2nd bookshelf.
 |
| messy work |
With all the runway grinding I had upcoming I changed the sandpaper on both runways. I usually use mineral spirits to soften the glue residue but I gave alcohol a shot because it doesn't smell as bad as mineral spirits does.
Might smell better but mineral spirits softens the glue residue a hundred times better than alcohol.
 |
| 3 left |
Got two irons for the LN 102 and 103 block planes both of which have flats on the toe. The last iron to be done is for the violin plane. It was almost 1300 when I got back to the shop to finish this up. I had thought I would have been done before lunch but it took a lot longer than anticipated.
 |
| violin iron |
These jaws for the LN honing guide are for short length irons etc. I can't use my normal 25° setting jig but this old Lee Valley setting jig works fine.
 |
| done |
Seven irons finally done. Three were out of square, three had flats at the toe, and two just needed to be honed.
 |
| RML shavings |
After the stones I stropped each iron before getting each one to spit on a set of RML shavings.
 |
| ain't done yet |
Missed one iron - left it in the block plane. Didn't notice it until I tried to put a freshly sharpened iron in it.
 |
| almost there |
Most of the waste got (>1/4") removed with the tablesaw and the ryoba saw. I just have to plane it down to the knife lines. Just found out that I've been spelling the japanese handsaw wrong. It is Ryoba not Ryobi.
 |
| yikes |
Big split on the apron/rail stock. Opened it up, slathered some glue in/on it and clamped it.
 |
| hmm..... |
Turns out that there were two splits that required my attention.I will let this cook until tomorrow and I'll eyeball it for any other splits in the AM.
accidental woodworker
Still hand-tools 99.9% of the time
 a new version of an oak carving
The past two days this blog got an average of 164 views -then today it got 1,585 views. Must be Chris – yup Chris Schwarz included a link in his post today – to something I wrote almost 14 years ago! About using hand tools, why I do it, etc. I’ll add some up-to-date thoughts on that subject in a minute. But first, thanks for the nod, Chris. If you are one of the 1,500 people who came here today, welcome. These days this blog mostly serves as an archive of my work. I started it in 2008 – and still post something here once in a while, but mostly I’ve been writing on my “new” blog at Substack – https://peterfollansbeejoinerswork.substack.com/ – I started there in 2023 – after seeing Schwarz’s substack blog. That blog has changed my life – the support I get there is a great benefit for which I am very grateful. When I first left museum work, I spent a lot of time on the road, teaching classes in Maine, Connecticut, North Carolina, Minnesota and some further-flung places too. All that travel got pretty draining and made shop work very choppy. Now I’ve reduced my teaching to just a few times each year and instead I put a lot of effort into the blog – trying to make sure that the readers there get their money’s worth. I try to post at least twice a week and aim to make the posts worth the time & money that the readers spend on them…
One thing I talked about in that 14-year old post is how the work I did for 20 years at the living history museum was a perfect situation for me – my living was derived from working with/for the museum visitors – not selling the handmade things I created. I got so much practice there that wouldn’t have been possible in the “real” world – it was quite an education. A quote from that post is “I often maintain that if I had to sell my furniture to make my living, it would not work the way I do it.”
Well – less than 2 years after I wrote that post, I quit that job and struck out on my own. And I’m still plugging away 12 years after that. And it’s partially true – if my whole income was dependent on selling my handmade items, I’d be hard-pressed. But now my income is split among a few branches of this woodworking I do – teaching a few classes each year at Pete Galbert’s in Berwick, Maine https://www.petergalbert.com/schedule , making stuff to sell – that’s mostly furniture, but also includes some instructional videos I’ve created here in my shop and some plans/drawings I developed with Jeff Lefkowitz – there’s links to those things on my little-used website – https://www.peterfollansbee-joiner.com/ The furniture I usually post on the substack blog – sometimes I put it on the website, then write a blog post pointing to it. And the books through Lost Art Press https://lostartpress.com/search?type=product%2Carticle%2Cpage&options%5Bprefix%5D=last&q=Follansbee&filter.p.product_type= with more to come there.
So – do I still work exclusively with hand tools, now that I’m out on my own and getting older (68 going on 69) every day? Almost 100% yes. I work with green hardwoods – splitting the boards from logs. Mostly oak. Big logs. I split them at the yard where I buy them, then move the large sections here to my yard. So I gladly accept help of friends with a chainsaw to cut those large logs.
 Not my saw
For decades now I’ve had the benefit of Rick McKee’s help when I’m log-shopping. He’s deft enough with that saw – and I’m nowhere near competent with them, so lucky to have his help. Plus it’s better to split those big ones with company too – even if it’s just to provide the rest-breaks that come with conversation. Here at my yard, when I need to saw some of the split bolts to length, I use a corded electric chainsaw. Always starts, no gas, etc. From there, all the woodwork is my usual assortment of hand tools. The lathe is still a pole lathe, powered by foot & caloric intake.
 pole lathe
I did have some help recently from another long-time collaborator – Pret Woodburn, who helped me build the shop – did some tablesaw work for me. I made this large box from some quartersawn white oak boards – but the boards had wide sections of sapwood that needed to be gone.
 white oak strapwork box, March 2026
If it had been riven stock, I could have split & hewn the sapwood off – but it didn’t look or feel reliable enough to split. And hewing dry stock is not all that pleasant. I can use a ripsaw, but when I marked out all the cuts, it just made more sense to get them machined. From there, I did all the planing and cutting – more than enough of it. And it was a pleasure. (same gig for a walnut box that I started about the same time.) But now it’s back to green wood that responds well to the froe, axe and plane.
The only other concession that I have is a grinder – I’ve just replaced my old Tormek with a CBN wheel on a slow-speed-that-seems-fast-to-me grinder. It’s so new I have little to report, other than good so far.
I feel like I’ve been to confession. My plan is to keep using the tools and methods I’ve used all these years til my body gives out. I’ve planed thousands of feet of riven oak boards and I never tire OF it – I get tired from it, but then after a night’s rest, I’m ready to go again. So until you hear otherwise, I’ll keep slashing away; froe, hatchet, planes, saws, chisels & gouges and more. I’m sure I’ll slow down, but I hope to get quite a few more years in. I have stuff I still want to make. And we still gotta eat.
 green shavings, red oak
If you didn’t see Chris’s post – here it is, with the link to my old post at the bottom https://christopherschwarz.substack.com/p/earlywood-if-theyd-had-a-biscuit
Union #3, corrugated sole.......
I am not sure that I can send this plane out now. I got the chip removed but the blade's toe was out of square by a mile. Decided to just swap out blade/chipbreaker. That opened a huge can of worms, bugs, and other slimy things. I couldn't get the plane to make shavings. Spent the better part of the day tiring and failing miserably.
Before I broke the plane down I was able to make RML (right/middle/left) shavings. After that, nada. It turned out to be a complete shit show. I don't remember who I bought the plane from but I am fairly certain that it is a plane made after Stanley acquired Union. Not sure what I am going to do with it now.
 |
| next day |
Left this cook in some cauls overnight. Got a wee bit of hide glue squeeze out on 3 edges.
 |
| hmm...... |
Got some bleed through but it won't interfere with the upcoming shellac finish.
 |
| finally |
What a total, complete, Royal PITA it was fitting the veneered top into the groove. I had to be neat about because it is the underside of the lid and will be visible when it is open. Plane, sand, and check the fit. Wash, rinse, and repeat a bazillion times.
 |
| took a break |
I needed to step away from playing with the Union. Dry fitted the box and clamped it. It wasn't a horrible experience and I will glue it up the same way. This way I won't have any indentations from the band clamp metal corners.
 |
| a great big HMM....... |
I struggled for a bazillion years trying to get the iron to project past the mouth and nothing worked. I tried all the tricks of the trade from the 100+ planes I rehabbed. I just happened to look down into the mouth and there it was - the chipbreaker/iron is too wide. There was a bit of casting build up at the bottom of the inside cheeks there that I filed away.
 |
| finally |
Took my time and carefully filed the outside edges of the mouth until the chipbreaker/iron fit through the mouth. This is the first time I ever filed the mouth of any plane.
 |
| ta da |
There are a couple of frog hairs of clearance on both sides of the iron. I was able to now advance the iron past the mouth but barely.
 |
| another headache |
Got the plane back together and I couldn't advance the iron past the mouth far enough to take a shaving. WTF? Just happened to see this when I took the lever cap off. The chipbreaker/iron is stopped from advancing because of the lever cap screw.
 |
| hmm....... |
There isn't enough meat to file away to allow the chipbreaker/iron to be advanced. More time lost pissing away into the wind.
 |
| another break away |
Dropped playing with the plane and glued up the box. No problems and no urge to cuss or to offer my free flying lessons. Got almost no squeeze out which I didn't expect. Fingers crossed that it all didn't go into the interior of the box.
 |
| my Lie Nielson #3 |
Lots of space between the lever cap screw and the slot for the chipbreaker.
 |
| Lie Nielson #4 |
Still a space but not as much as the #3 has.
 |
| Stanley #7 |
Lots of real estate here for movement. This Stanley #7 is a favorite plane probably because it is the easiest to set and have it stay.
 |
| Lee Valley low angle jack |
Of all the planes I checked for space, this one has the most.
 |
| Stanley #6 |
I only use this as a scrub plane when I thickness boards.
 |
| ???? |
The slot for the lever screw is the same on both irons. It is the same as the ones on three #4 chipbreakers. This ain't the problem. Back to the drawing board to see what else is OTL (out to lunch).
 |
| fixed one and this one....... |
I got the iron to advance as it should. It took a lot of back and forth adjusting the frog back and forward before it worked. However, the iron is slanted in the opening and high on the left. This hiccup is one that I've had to deal with since I first rehabbed it.
I know this plane works because I got the plane to spit out RML shavings perfectly just a week or so ago. Albeit with the blade adjuster thrown as far over as it would go. That played havoc with my OCD but the plane worked but there was no more room left with the blade adjuster.
Nothing I did for the next hour worked. I couldn't get the plane to make shavings on the right. I double and triple checked that the iron and the chipbreaker was square from the right sides. Ideas anyone ?
 |
| photographic proof |
I can make heavy to wispy shavings but only on the left side. Drove myself bonkers trying to reverse it and nada. Too big for a paperweight and useless as a smoother. Gave up on the plane again for today. Being that I can be stubborn and totally brain dead about things like this, I will attack this again in the AM.
 |
| for tomorrow |
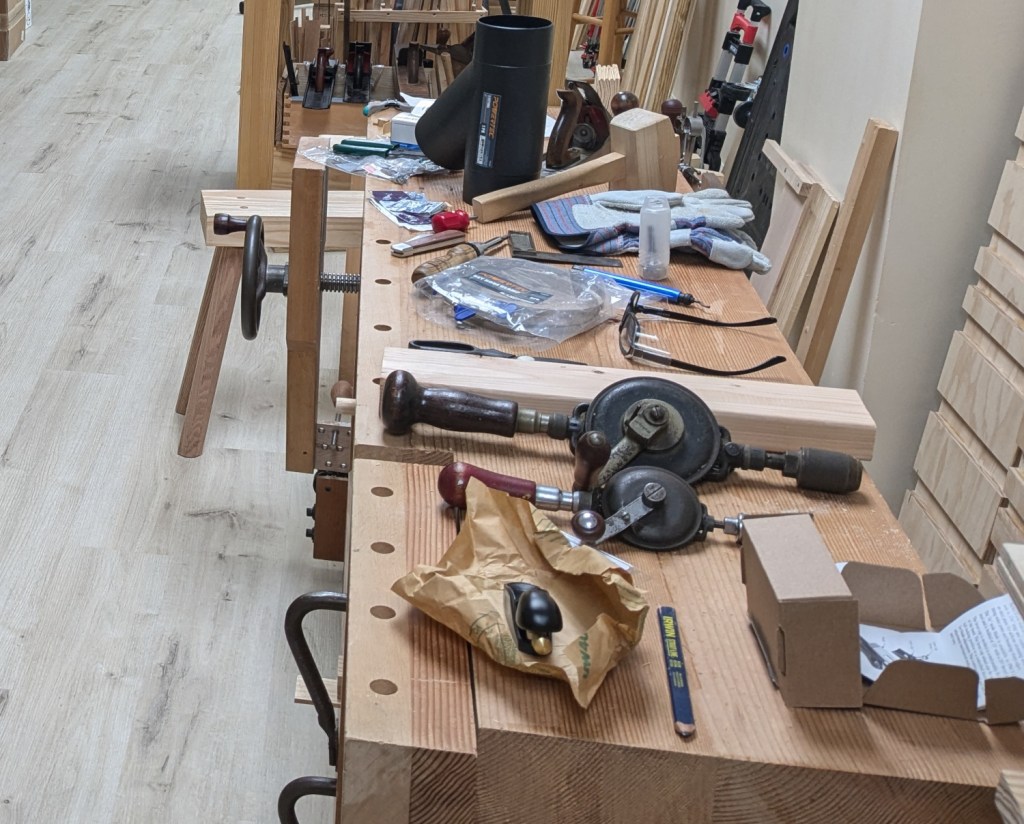
I have been putting off sharpening the irons of my block planes. Only two of these get 99% use but I decided to sharpen the irons in the entire herd. That way I'll have a few spares if needed in the heat of a moment.
 |
| couldn't resist |
As I was killing the lights I thought of something and checked it before I did that. There is adequate space above the lever cap screw. I checked to see how the chipbreaker/iron was laying on the yoke. It was laying off square. The left side of the chipbreaker/iron was down further then the right side. Why was the question?
 |
| maybe? |
The left side seat has a battle scar that splits it in two. The front part is flat/smooth and the rear half is scared and a few frog hairs lower than the front part. The square seems to be laying flat from L/R and R/L. I thought maybe the left side was a wee bit lower than the right side seat. Not sure where to go or what to check/do next.
accidental woodworker
Mild Progress on Dining Room Table and Mystery Project
Yeah, that dining room table was supposed to be done last year. Well, that didn’t happen due to what I’d describe as a combination of excessive chaos and lethargy. However, work was accomplished, if not by way of kicking and screaming.
The top has been complete for some time. My progress became slower when it got too large for me to move by myself. Because each additional board required the top-in-progress to be moved to or from the bench three times, that turned into a multiple of times when I needed to find someone to help, which turned out to be more problematic than I would have cared for.
Nonetheless, here is the top, sitting on (and therefore, annoyingly, blocking the use of) my sawbenches:
Then I moved on to the legs. I’ve had those glued up, squared, and dimensioned for a couple of months:
And I’m stalled there for the moment. The next steps will involve some mortising in those legs, and I’m not quite ready for that. Or something. Sure, I felt like I wanted a little more experience with my mortiser, for one, but there’s been a bigger problem.
The “new” shop in NJ has been sort of a wild animal, and I feel like I’ve had difficulty finding a way to get things organized in a way that doesn’t involve tools, parts of projects, boxes, and wood sitting all over the place, getting in the way.
Mind you, especially in light of how many times I’ve moved over the last 20 years, it was never terribly good.
This time, it felt worse. I don’t know what it was. It’s felt like I’ve been constantly fighting with the tools and benchtops, trying to keep the former off of the latter, but not having much luck because, sheesh, where is this thing supposed to go again? See below (I know, I know, you’ve seen a lot worse than that, but clearing this all of the time is a drag, and I have to clear it on a regular basis):
Maybe it started with the circumstance of needing to install a new floor before I could even really do anything. It took me more than half a year after moving in to gather the time, energy, and come up with a plan to do that.
Maybe it was discovering that the movers had kindly dented my bandsaw during the move, and that they refused to pay for it despite being obligated by law to. (Trust me, movers, and especially your bean-counters, I will remember that.)
Maybe it was the dust collection saga. I didn’t really have use of my bandsaw and thickness planer until I got that sorted out. I did mostly get it sorted out, though I have to ask why it had to be as unbelievably annoying as it was.
Maybe it was having to deal with lighting for the umpteenth time and still not completely nailing it (yet).
Maybe it was discovering that my vision had managed to get even worse, necessitating new near-vision glasses just to be able to saw to a knife line again.
Maybe it’s still not having a good solution for storing long boards.
Or probably, it’s been a combination of all of these things. Is this preventing me from doing work at all? No; I have done quite a bit of work in the new shop (after installing the new floor, of course). Much of that has been necessity, such as new drawer fronts and such for the kitchen, moulding for parts of the house, and so on. But it’s felt like a struggle, more than it should be.
I resolved to do something about this a few months ago. The difficulty I’ve been facing is that it’s not just “one thing.” There’s no silver bullet that will magically make everything better. However, somewhere along the line, I noted that the things I had stubbornly slugged my way through, such as the floor and the (still in-progress but mostly acceptable) dust collection, had really improved the situation down there.
So I’ve subconsciously mixed in shop improvement with furniture projects this year. Even something as simple as looking at where some boxes are and discovering how they can move a little bit to yield some more usable floor space helps.
And that brings us to the mystery project. I’ve gotta do something about the general hand tool organization problem. Yeah, I’ve got shelves and stuff, but they kinda suck. So here is the start of phase 1:
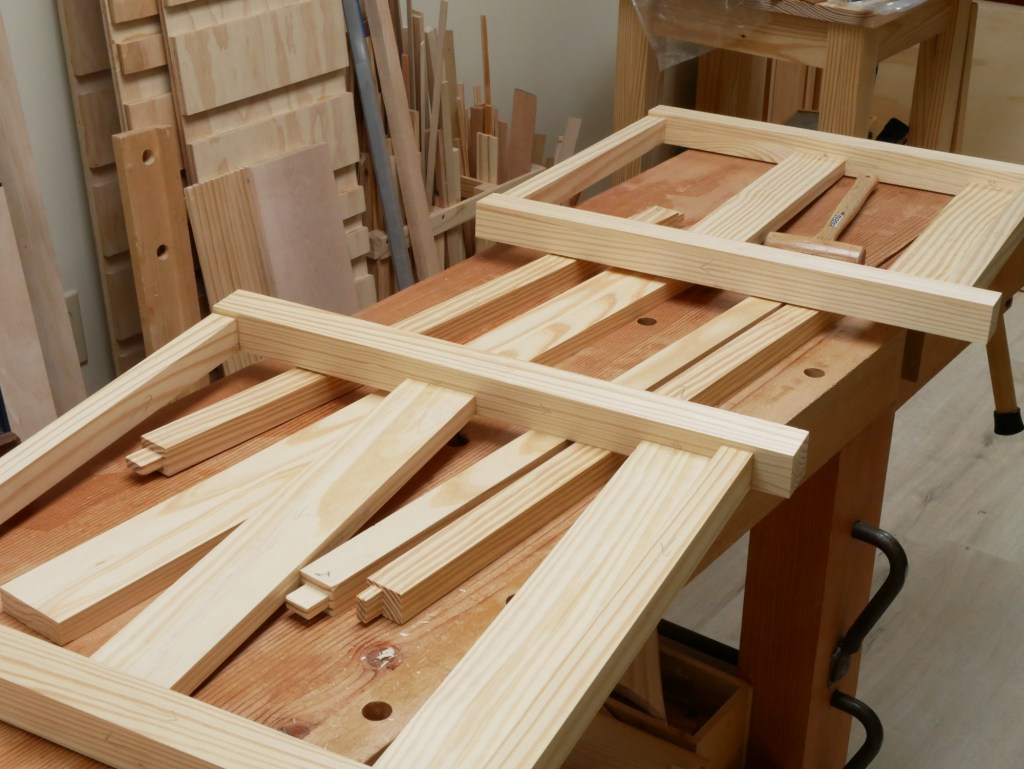
So, yeah, it’s a frame for something. I still need to make the front door, side and rear panels, and some other bits and pieces, but it’s been rolling along pretty well. Hey, I said I wanted more practice with the mortiser, and this thing has delivered (I should also mention that I built a new table for the mortiser, which has been a serious improvement.)
Of course, all of the mortises mean that there are plenty of tenons, and I’ve been working away at sawing those. I’ve tried out a new technique for marking those which seems to be going well, but I want to fool around with it some more before describing it. (And I’ve found myself thankful that I finally bought a shoulder plane; it really does a nice job at that one thing that it’s supposed to be good at.)
So, phase 1. I don’t think I’ll get to phase 2 before I’m in the final stages of the dining room table, but I’m going off of the assumption that any improvement is… an improvement.
not so good day.....
 |
| cooking done |
No rocking on the test surface. Sanding and then I can start applying shellac.
 |
| Leo's desk top |
There is a teeny bit of rocking evident when I push down on a corner. I still have to flatten and smooth it so I'll check for rocking again once that is done.
 |
| #3 |
The shavings on the desk top are all that it took to flush it.
 |
| the start of my not so goo day |
Got both the glue joint line on both sides flushed and I moved on to sizing the top - which would have been about 27 x 36. Didn't get there because the top is 27 7/8 x 33. I screwed up when I ran the saw against the wrong edge of the base.
After all the work to get it clamped and then flushed up and I brain fart. Instead of having Leo's desk top I now have a rather large paper weight. It is too short R/L to be a desk top IMO. I'll have to add the wood for a new top to the list when I go to Highlands.
 |
| hmm...... |
My last 5/4 board - almost 6" wide and 6 feet long. I got two boards almost 12" wide. Not fond of the upcoming top glue up. It would be a 4 board top and I would rather have a 3 board. Fingers crossed that Highlands will have 10" wide 5/4 boards in stock. I'll use these boards for making slats.
 |
| 2nd bookshelf |
The left divot will be facing the front and the right one will be facing the back. There is also a 'chamfer' on the right one on the back and the front. I set it aside while I thought about how to fix and use these.
 |
| a couple of hours later |
Decided to turn the errant desk top into a small table. Turned around my not so good day. I ripped off one of the boards to drop the width (front to back) to about 18". I then ripped out 5 legs from the 8/4 board. It wasn't enough to get four 1 3/4" square legs but I got five 1 1/2" square ones.
 |
| cleaning up the legs |
Cherry burns so easily. I have given up trying to saw it cleanly. It only took a couple of minutes to clean and smooth all four faces of the legs.
 |
| need apron stock |
I am thinking that this table could be used by daughter #2 by her front door. I am not putting a drawer in it and I am leaning toward putting a shelf on the bottom.
 |
| pen box for my sister |
My oldest sister Donna asked me to make a box for her to keep her pens in. I thought it would be a two or three pen box but she said she had about 20 of them to stow in it. Using poplar and it will be a mitered box.
I tried first to run the grooves on the tablesaw but nixed it. Still having hiccups with the blade height changing. I still don't want to dig into that bag of worms so I plowed them by hand.
 |
| the box top |
I'm going to dress up the box a wee bit by veneering the top with cherry.
 |
| first dutchman |
This one was easy to plane down flush. Not thrilled with the look of it even though it will at the back.
 |
| 2nd dutchman |
This one was bit more challenging to knock down. I didn't think it would handle the stress of me hand sawing it off.
 |
| hmm...... |
Knocked it down with the bandsaw. The first cut was simple and easy. The 2nd one was awkward because I couldn't lay it flat on the table. I had to free hand it through the blade.
 |
| they both stick out |
This one is on the front. I looked at my cherry scraps but I only had one that could be an end panel. I'll have to think some more on whether or not to use these two.
 |
| it's gone |
This Union plane was the only one that didn't sell until I got the final email. $25 plus the dreaded shipping and handling. Breaking it down and cleaning it up in preparation for sending it out.
 |
| hmm...... |
There is a chip on the toe on the right. Sharpening an iron wasn't on the menu but I can't send this out like this.
 |
| Yikes |
The iron isn't square and I didn't need the square to confirm it. I replaced it with a spare iron. I have to get a small box - the smallest priority box is too small and the next one up is too large. It sucks because I just tossed a bunch of boxes from Amazon.
Got an overall idea for the small table. I don't have any stock for the aprons and the maybe bottom shelf. I'll make a run to Koszelas tomorrow to see what they have for cherry.
accidental woodworker
Another Tea Box
Lately I've been working on some old tools that I've found at garage or estate sales. I found myself in need of building something - anything! So I though I'd make another tea box, similar to one I made a couple years ago.
This one is made from red alder, which can be a really beautiful wood. Some boards that I've seen have white streaks, and I'm not a fan of that, but the wood for this project was very nice. The back and left side even have some figure to them.
 |
| The sides have a 3/16" deep rabbet that will hide grooves at top and bottom |
 |
| First corner dovetailed and fitted |
 |
| All four corners dovetailed |
 |
| After leveling the top and bottom rims, 3/16" x 3/16" grooves are run |
The top and bottom are identical. All four edges get a 3/8" deep x 3/16" wide groove. I was unable to do the end grain edges with the plough plane, so I used a saw and chisels. Something was not quite right with the plough. I suspect the iron and wedge were not properly fitted - the iron was not forced against the steel skate and that resulted in poor performance. I need to look into this some more later. After the grooves were cut, the inside face was cut down about 3/16" on all edges.
 |
| Fitting the bottom into the grooves in the main box |
 |
| The short divider is housed in 1/8" deep dadoes. The long divider is half-lapped with the short one and its length is fitted to the assembled box interior length. |
I didn't show it, but the box sides are curved using an approximate 10 3/4" radius. This makes the top and bottom edges of each piece about 3/16" to 1/4" thinner than the middle.
 |
| Here's a test fit without the lid |
 |
| I pre-finished the inside surfaces of the box with 4-5 coats of shellac followed by 0000 steel wool buffing and then wax |
 |
| The box is glued up without the long divider installed |
 |
| After the glue dried and the joints cleaned up, the lid is cut from the bottom |
 |
| I used old plastic cards as spacers to fill the kerfs when clamping in the vise |
 |
| Then clean up the saw cuts on bottom and top, and correct any twist |
 |
| Adding hinges |
 |
| I mortised in a small piece of wood for a handle |
 |
| Outside was finished like the inside: 4-5 coats of shellac, then wax |
 |
| The completed box |
 |
| I added green felt to the bottom |
The box is intended to hold tea bag packets - four compartments for four types of tea. This one took a while - I went kind of slow on it. But it felt good to make something again.
spring is here.......
Yesterday the mercury hit 84F/29C and today it got pushed up to 86F/30C. Along with the temps there was a ton of sunshine, blue skies, and fluffy white clouds. I think it is safe to say it ain't going to snow again for a few months. And I noticed that the trees are starting to bud out.
 |
| slip nuts came |
They were delayed for a day but they came last night a little after 2000. This is going to make adjusting the threaded rod frames a whole lot easier. Pushing the button disengages the threads in the nut and allows you to move the nut up and down the threaded rod lickety split.
 |
| $11.98 from McMaster-Carr |
These are dumb down simple. The threaded rod goes through the hole in the part I'm holding. There is a spring and that is all there is to the nut. A wee bit expensive but the ease of use makes them worth their weight and gold.
 |
| storage |
Unfortunately if the nuts aren't engaged on the threaded rods, they fall apart. Since I don't want to lose any parts I think it is best to keep them on the rods. I'll play with the nuts and a frame later this week.
 |
| done |
A couple of swipes with the #3 and the glue joint line was dead flush end to end. This has got to be one of the best glue ups I've ever done.
 |
| hmm...... |
First dry clamp of the entire desk top. The glue joint line isn't as flush as the first glue up did. But I also didn't have any flattening cleats on the top neither.
 |
| out of the clamp |
It felt secure and the joint lines looked good top and bottom. What happened next you ask?
 |
| nope |
Am I the only person on the planet who can not glue a miter joint and have it stay together? This one broke the 2nd time I dropped it from about 6". I am going to try it one more time and use epoxy.
 |
| better |
Got the flattening cleats on and it made a big difference. The glue joint line is mostly flush but a couple of spots are a few frogs misaligned. Noticed that the middle of the glue up there is daylight under the flattening cleats. And that is where the glue joint line is off set.
 |
| planing a camber |
Planed a 6-8 inch long camber on each end of the flattening cleats. That helped with getting the glue joint line flush, not 100% but good enough. I can easily plane it flush after it comes out of the clamps.
 |
| stress free glue up |
I only had one 2x4 left so I had to use another wood for the right flattening cleat. Sigh. I had some 8x4 sapele but I didn't want to use it as a flattening cleat. So I went to ACE hardware and they were bone dry in 2x4s. They didn't even have a pressure treated one.
I didn't want to but I made a run to Lowes to get a 2x4. They had a rack of 2x4s in two and four foot lengths. Bought a 4 footer for $3 and change. Got the top glued and let it sit on the workbench. I had tried to move but it was too heavy and awkward with all the clamps I left it on the bench.
 |
| done |
Don't know what I might use this for but it is ready. Both side glue joint lines are flush.
 |
| glued and cooking |
3 hours later and I removed all the clamps except the bar ones. Nothing moved, shifted, or groaned when I took the others off. The glue joint line stayed put and I'll let this cook until the AM as is. I eyeballed it several times before I killed the lights for the day.
 |
| first of the last two bookshelves |
Blew off a big chip at the front of the shelf dado. Glued it and set it aside while I worked on the opposite end.
 |
| first two slats |
I'm impressed with how well the back slats fit in the mortises. They are both gap free and tight 360. Oh, and they are snug and self supporting too. This is a long ways from my first one where these were loose fitting, had ugly gaps, and were south of self supporting.
 |
| stayed past 1500 |
Cut the bottom at 7°, made a cutout for the feet, and rounded over the front and back top corners.
 |
| outside shelf corners |
Sawed an angle and used a chisel to clean and smooth them.
 |
| can't beat this |
I firmly believe a sharp chisel is the handiest tool in my shop. The finish left by the chisel didn't need anything else.
 |
| glued and cooking |
I stayed past quitting time to glue this up. Killed the lights at 1534. I'll whack out the 2nd one tomorrow.
accidental woodworker
Some 18th Century Bodger's Lathe Tools
 The set of five bedgers tools in a box
A few weeks ago I wrote about about the actual gouges and hook tools used for mainstream turning - as opposed to the scraping tools used mostly in ornamental turning on fancy hardwoods.
In that post I mentioned that I was unaware of any current manufacturer that makes hook tools today. Since I wrote that I have found a few specialty makers that make machined, beefier versions of traditional hook tools for turning the inside of a bowl. As it happens, while I have no practical experience with hook tools, I own a set of hook tools from the late 18th century made by Salt, a company based in Birmingham, England. Some of the tools look exactly like the images in the various books, and some are shapes that I've never seen illustrated anywhere.
So far I have been unable to track down any details about Salt. I think the tools themselves are probably a set (two of them are stamped Salt, but the others have no markings on them), the case seems a later addition. All the tools show a fair amount of wear - and are not sharp enough for use. The surface finish suggests that they were pretty rusty before they became a collectible. The handles are longer than average lathe tool handles because typically people would tuck them against their body and under their arm when using. The dealer who sold these tool told me that they were 18th century bodger's, or chairmaker's, tools. I have no idea if he is correct. Until I can track down the maker, I won't know for sure. Similar tools were used by chairmakers at least until before World War II.
 The three hook tools in the kit
Three of the tools are hook tools: a tight hook, a larger hook, and a third straight hook that are all right out of Moxon.
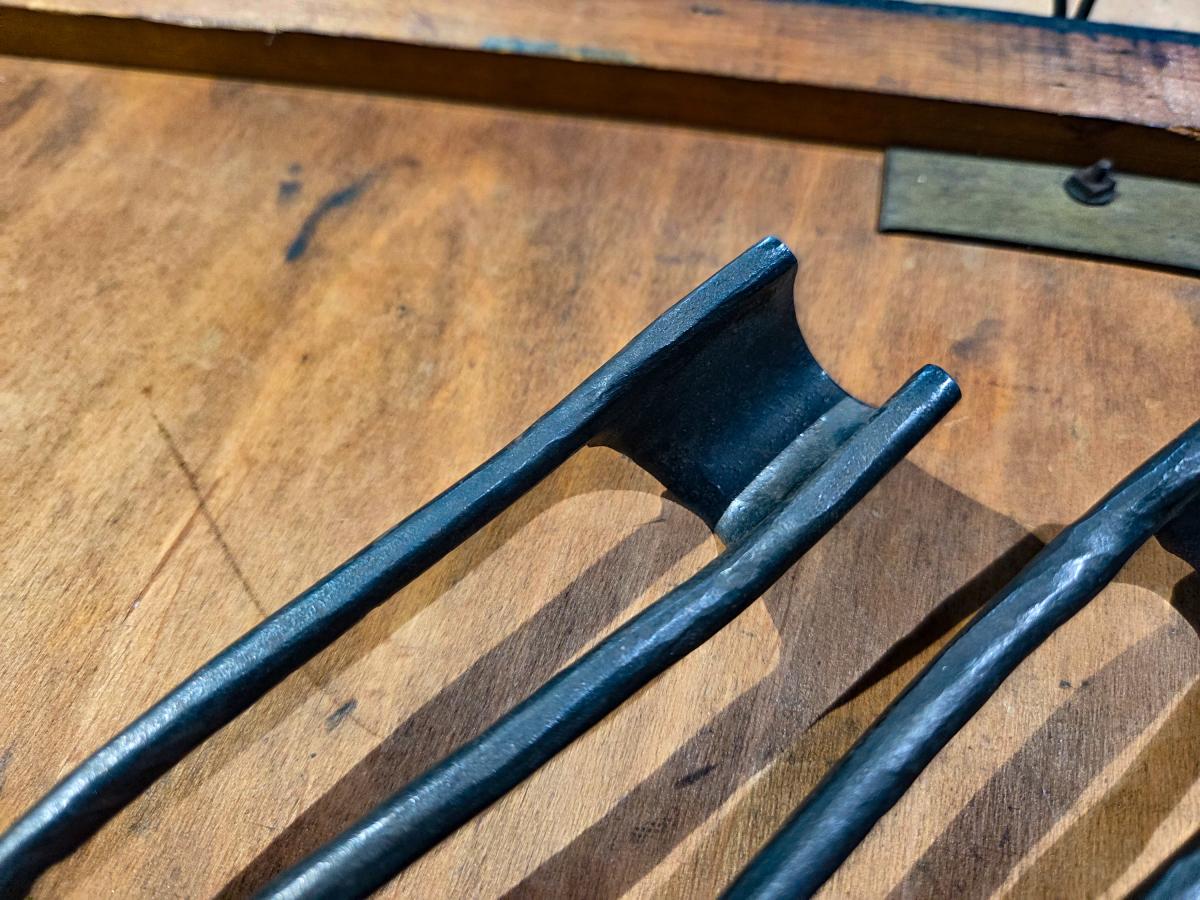 The two "gouges" in the set both have their cutting edges on the inside between the rods
 The other tools look like gouges, but the cutting edges are on the inside of edge of the blade, not the outside, and the insides show extensive sharpening. The general geometry of the way the tight and larger hook tools are sharped, and in particular how they curve down from the handle, suggests that they are designed to work with the shaft of the tool on the toolrest and the cutting edge dangling below the center line of the lathe, shaving wood upwards. Green timber would turn wonderfully this way.
These tools were designed for use with a pole lathe. On a powered lathe, or even a treadle lathe, the added speed could be scary. I haven't had the courage to sharpen them up to give them a try. Maybe when I am a better turning and feel more in control I will.
 This small hook tool is very elegantly bent
  The well worn middle size hook tool that's in the kit
 "Salt" of Birmingham - the maker
 started Leo's desk.........
 |
| done |
Leo's bookshelf done with 4 coats of shellac. Just needs his desk to put it on.
 |
| glutton for punishment |
Redoing the miter that failed with yellow glue. Shot the miters clean and glued it up.
 |
| fingers crossed |
Got a good dry fit. Miter closed up toe to heel. I'll find out in the AM how the hide glue performed.
 |
| hmm..... |
This has got to be a Guinness World record. I put the boards on the bench and liked what I saw. I didn't bother trying any other combinations. This will be Leo's desktop .
 |
| brown knot |
This one is loose I'll dig it out and fill in the hole with epoxy. Leo's and Miles's desk will both have a gum pocket on the desktop.
 |
| not easy going |
Two of the boards are bowed and I finally got to use my Horrible Freight deep reach clamps. It took me a while to get the glue joint line flat and straight. After that I expended more calories getting the glue line flush. I was thinking of using dowels but nixed it. I couldn't see anyway to flatten the two boards to engage the dowels in the two boards.
 |
| wow |
The bow is 1/8". The two glue lines are being a PITA but at least the bowing is the same direction on the two. I'll have to do the top glue up in two steps.
 |
| one hour later |
I only had two deep reach clamps and I needed more. Sawed a pine board to help out flattening the top.
 |
| finally happy |
Ignoring the bow and just looking at how the laid up against each other.
The goal I was shooting for was the joint line to be tight along the
entire length with no clamp pressure. That took a lot to accomplish. A
lot of in/out of the vise and eyeballing the joint line. Mostly used the
#8 followed by the 5 1/2.
 |
| good feeling |
Checking the 3 boards for twist. The first one was ok along with having a slight hump running the entire length. The 2nd one was twist free but the third had a wee bit which I planed off.
 |
| better then F clamps |
When I first started woodworking I bought a lot of C clamps. Mostly because I couldn't afford F or bar clamps. I bought most of these at yard sales and I doubt I paid more than a buck each for them.
I haven't used them in years. The F clamps popped off if I brushed them but the C clamps held firm and exerted a lot more pressure on the flattening cleats.
 |
| first dry fit |
I had dry fitted the other two board which went off with no hiccups. For the second one I made new flattening cleats out of a 2x4.
 |
| this surprised me |
As I was removing the flattening cleats I noticed that the boards remained as is. They didn't shift or move and the boards remained as flush as if they were still clamped up.
 |
| another surprise |
This one made me feel better about this upcoming glue up. The amount of the bow is half of what it was from the first dry clamp. This is my first time attempting to glue up 3 bowed boards.
 |
| glued and cooking |
I spent the morning prepping and dry clamping the top. Started a little after 0800 and quit at 1115. Decided to fill the pie hole before gluing it up.
The glue up went beautifully. I was expecting the the boards to slip and slide but that didn't happen. I removed the flattening cleats and the deep reach clamps to wipe the glue up from underneath them and the joint line remained nice and flat along the entire length.
Happy with how well this happened. No stress and the glue line looks real good. Fingers crossed that the 2nd glue up goes just as well.
 |
| checking |
Before I set this aside to cook, I checked that every clamp was laying flat and tight against the top.
 |
| leave it be until the AM |
I am still a wee bit out of sorts with not needing the flattening cleats and the deep reach clamps. I came and checked this several times before I killed the lights.
 |
| last two |
Got the layout done and the dadoes and mortises knifed and ready to be chopped out.
 |
| labeled |
Labeling is important on this because the slat mortises are individually knifed off the back slat. The same with the dadoes for the shelf.
 |
| 2nd one knifed |
I expected to get at least one of these at least dry fitted. However, I also didn't think that I would spend the entire AM session getting 1/2 of the top ready to glue up. Miles's desk top took me less than two hours.
accidental woodworker
odds and ends day......
It has been a long time since I have posted a blog with this many pics. 30+ when I checked the upload. So that means I go lean on the keyboard diarrhea and rely mostly on the pics to tell my story.
 |
| out of the clamps and zero rocking |
 |
| Leo's on the left, Miles's on the right |
 |
| sigh |
Defect in a bad spot. Decided to saw an angle to remove it.
 |
| nope |
Dropped this on the bench from a height of 6" three times. I broke apart on the 3rd one. I'll try hide glue because I have seen miters in furniture older than me that are still tight.
 |
| oops |
I used the center punch on the wrong side of the line. I'll have to find a way to fill them in. Oh, BTW it had to be a blurry pic too.
 |
| clipping the corners |
 |
| looks like crap to me |
Initially I had just sawed angles on the front and that looked worse to my eye than this did.
 |
| better |
I rounded over both the front and back angles.
 |
| checking/adjusting for square |
 |
| whizzing shavings |
This didn't work as well as I thought it would. Less than half turned into dust. I had to sand a piece of cherry with 80 grit to get the sanding dust I needed.
 |
| hmm...... |
I balled up a bunch of old T-shirts to apply a coat of shellac to the pic frames.
 |
| better |
This worked - The T-shirt ball eliminated 90% of the brush strokes on the frames. I'll repeat this in the AM and call them done.
 |
| hmm....... |
Super glue and cherry dust.
 |
| fake gum pockets |
The filled in center punch holes popped and looked out of place because they were directly above the Miller dowels. This black pen is not alcohol based and shellac covers it without streaking or erasing it.
 |
| thought I had but..... |
I didn't fully seat the shelf against the back of the dado. Filled it in with superglue and cherry sawdust.
 |
| hmm...... |
From 2 feet away I couldn't tell that these weren't real.
 |
| one coat of shellac and the fake gum pockets look good |
 |
| the other end |
I like this one better than the other. This end I only had one center punch hole to fill.
 |
| proving it wasn't a fluke |
 |
| chamfed the holes |
 |
| wasn't a fluke |
I still get over the simplicity of using this doweling jig and the results. The joint line isn't dead flush R to L, but it is barely a frog hair off here and there.
 |
| 3 coats |
Leo's bookshelf might be done today if I go back to the shop after dinner.
 |
| Big Red says it is square |
Found this under of pile of crappola. Remember making it but never using it.
 |
| from 2013 - on the list to redo |
Nine different joints (?) - interested in seeing how well I do it this time.
 |
| one square on the right |
The middle and right ones are used with a plumb bob. I didn't see/find any blobs with these two.
 |
| square needs helps - wee bit out |
 |
| twisted on both legs |
 |
| 2 more cherry bookshelves - on the list for the AM |
 |
| taking inventory |
I have enough 5/4 cherry for Leo's desk top.
 |
| hmm..... |
I don't much stock. I need more poplar for the drawers and a couple more 4/4 boards for rails and slats. Don't need much for Leo's desk.
 |
| sigh |
I need another board of 8/4 cherry for the legs. I can only get three legs out of this.
 |
| wash, rinse, and repeat |
Tried the T-shirt ball on the Miles's desk top. I am not trying to french polish it, just knock down the brush streaks (which drive me postal almost as much as gaps do). It worked but it is going to take a few more outings to get it to my level of satisfaction. Did I mention it is tiring doing a wax on, wax off routine?
 |
| why not |
Found this board on the drill press and I'm adding to two I glued up an hour ago. I don't have a need for this, just playing around with the doweling jig.
 |
| definitely not a fluke |
Had a good day in the shop with most of it spent getting Leo's bookshelf ready for shellac. I'm thinking now that maybe I'll check Koszelas lumber before motoring on up to Highlands in New Hampshire.
accidental woodworker
Leo's bookshelf.......
 |
| hmm..... |
I was leaning towards painting these two frames but maybe not now. They have two coats on them and the poplar isn't white. There is a slight greenish tint to them that I like. A couple of more coats to go before the command decision hammer drops.
 |
| Leo's bookshelf |
I thought I had made Leo's bookshelf already but if I did I can't find it. The size of the cherry matches the one I made for Miles. There wasn't anything else on the workshop plate so I did this.
I'm going to try and go to Highlands this week to get the cherry for Leo's desk. I'm hoping the weather cooperates because it has been nice for the past few days. Hoping that Mr Murphy doesn't want to shake hands with me.
 |
| layout |
The ends have some sapwood on them but one has twice the other one. I am positioning that towards the back inside. If they had been about the same I would have put it on the front outside faces.
 |
| ready for chopping |
Got the dadoes for the shelf knifed and the mortises for the back slats. I was concerned with the mortises because some of the back slats for the desk came out looser than I liked. The goal was to not repeat that with this.
 |
| first one |
I would guess the first goal is to make it self supporting. The 2nd would be a gap free fit. Achieved both on this one.
 |
| first two |
Self supporting, clean, tight, and with snug fitting tenons and mortises. Happy face on. Went 4 for 4 on the mortises and 2 for 2 on the dadoes.
 |
| hmm...... |
The mortises are not long enough to get a router to do the depth. I had to do them with just a chisel. It turned out not to be the nightmare movie I had floating around in the brain bucket. Did them by chiseling lightly and then scraping the mortise flat with the same chisel. Check the depth, wash, rinse and repeat until it was a 1/4" down.
 |
| dry fit |
All the joints were snug and I was able to seat everything with some gentle mallet blows. There is something about doing this - layout, chopping, and fitting that revs my motor. Seeing what I did by hand fitting up as it should is incredibly satisfying no matter how many times I do it.
 |
| small cutout |
There wasn't much room for a cutout but I had planned for it. This cutout is about 5/8" at the highest point but it still has 4 small feet.
 |
| glued and cooking |
Started at 0800 and it was glued up before lunch time. A pretty good AM session IMO.
 |
| first time (dry fit) |
I have had these bessey corner clamps for almost 20 years and this is the first time I have ever had a miter close up in it. I had four of them but one crashed and burned during its first free flying lesson many, many moons ago.
 |
| sigh |
The miter broke way too easily. This is one of the miters I glued up yesterday that was going to be a setting jig that I didn't use. My miters are getting better but what isn't improving is the glue bond. I didn't size this but that doesn't seem to matter.
 |
| glued and cooking |
I got a good tight fit on the miter, toe to heel. The experiment is to see how well the glue bond is. You're saying maybe I should try hide glue. I have and the results were the same as with yellow glue. I will find out in the AM how this one turned out.
accidental woodworker
Miles's desk is done.......
 |
| out of the clamps |
Both frames are laying flat on the tablesaw with zero rocking. The 5x7 frame is spoken for and the larger one is in stand by. My wife changed her mind on buying the map but it is ready for whenever.
 |
| none worked the best |
I used all of these gizmos to screw in the table top clips. The four clips under the drawer guide rails were the worse. I had to use the offset screwdriver to do them. Those four took me a bazillion years to do.
 |
| this one took the longest |
This one was the most awkward one to do. I just couldn't maintain downward force along with a good grip on the offset screwdriver. Note to self - on Leo's desk screw the top on before I do the drawer guides then unscrew it.
 |
| glamour pic #1 |
This is based on the desk I use everyday. The only quibble I have with mine is that it is too small. But with a bigger desk top I would just have a ton more crappola on it. This should be more than adequate for an eight year old.
 |
| glamour pic #2 |
I really like spindles/slats. Thinking ahead to Leo's desk maybe I should do a wide center slat like I did on the back, on the sides.
 |
| glamour pic #3 |
I am glad now that I got the epoxy filled knot hole facing out. Now that it is done it compares favorably to the epoxy fill knot hole on the desk top. IMO it looks like it is a natural occurrence in the wood.
 |
| final glamour pic |
I am going to give Miles the bookshelf along with the desk. If Miles doesn't want to keep it on his desk that is his choice.
 |
| hmm...... |
Too big for the desk, it eats up a wee bit too much real estate. However, after seeing this, a gallery with drawers might work. I am making another cherry desk for Leo but I don't like giving the boys the exact same desk. Thinking now of making a gallery for his desk. Just something a little different between the two.
 |
| spline groove |
Working on the two new pic frames. Got the spline groove done on each corner. I used cherry for the splines because I didn't have any poplar.
 |
| back frame |
Nailed and glued the back frame on. This creates the rabbet for the glass, mat, and pic to sit in. I like having whatever is framed set back toward the rear of the frame. I don't like having the pic up close to the front face of the frame.
 |
| chamfer |
I hadn't planned on doing a chamfer on the frame but I had to. The small frame fell off the bench and one corner got dinged. The chamfer removed it.
 |
| shellac |
Thinking of leaving the frames natural to highlight the cherry splines. If I don't like how they look I can paint them. The shellac can be a primer coat for the paint.
accidental woodworker
Miles's desk pt XXIII.........
Getting awfully close to the finish line on the desk. The slats are done and I got 4 coats on the base. I'm happy with how it looks with that many too. After dinner tonight I'll get the final coat on. In the AM, first thing, I'll attach the top to the base. I'll be done with it by sunday at the latest (fingers and toes crossed).
 |
| done |
Got two coats of shellac on the frame. I brought it to the Frame it Shop after lunch today. Don't know when it will be ready but no one is holding a gun to my head on it neither.
 |
| shoulda, coulda, woulda, but didn't |
I have this miter frame clamping gizmo and I forgot all about it. This could have been used to clamp up my wife's map frame. hmm.... since I am waiting for the base to dry I might as well try this while I'm standing around giving everything my best goofy looks.
 |
| hmm...... |
First thing that shook hands was what a PITA it is to spin the wing nuts down the threaded rod. I was tempted to cut the rods down but I resisted. I don't make the same size frames so that wouldn't advantageous. I got the rods set loosely to the size of the frame I just made.
 |
| new frame |
My wife mentioned that she was thinking of buying another reproduction map so I'm getting ahead of the curve. Made another frame and shot the miters on the shooting jig. Now I'm running into a storm of hiccups.
There is going to be a bit of a learning curve on how to use this type of clamping setup. I fiddled and faddled with it for almost 30 minutes and nada. I couldn't get the frame to square up. This set up is not self squaring as far as I can see. It has to be square to what is being clamped up and each corner tightened individually but in unison. I got a wee bit frustrated with it.
 |
| not aligned |
This was the 3rd time I tried to dry clamp this frame and failed. So far one corner has been off on the toe to heel. One a brighter note this was the best I did so far. I kind of figured out after this about getting the clamp frame kind of square before tightening it down.
I gave up on trying to get the clamp frame work. The frame came together dry almost perfectly. So it should have clamped up without any hiccups. I even set the clamp frame by measuring the diagonals to be the same. That worked but I still couldn't get one corner's heels and toes to align.
I'll try this again because I refuse to let it win. I bought four 1/4-20 slip nuts from McMaster-Carr (~$12 each) and I should have them monday or tuesday. Slip nuts will definitely speed up getting the nuts on/off the threaded rods.
 |
| hmm...... |
Clamped up without so much as a whimper in the Sears Craftman clamps. This 2nd one looked better then the first one I did yesterday - all the miters were tight and gap free on both sides.
 |
| my band clamp |
This clamp can be fussy but I was able to clamp it and get all the miters closed up. It has the same problem I had with the threaded rod clamp but this one was easier to get and keep the miters aligned toe to heel.
This frame came from the off cuts from the frame above. It is big enough for a 5x7 pic.
 |
| helping hand |
This clamp tends to pull up on one corner - one closest to hand screw. Placing a heavy thing on it flattens it and keeps it that way while it cooks.
 |
| getting there |
I put the moving blanket on the workbench to keep the base clean. I had noticed that my dirty workbench top was getting on the legs. Should have done this before I first put it on the bench.
 |
| oh.... |
I didn't think this all the way through. The intent was to put a spline across the miter face. My spatial thinking said this would work. I was wrong and I blame the spatial hiccup. This is going to be a jig for positioning the table top. This is part one and part two will be two pieces of plywood that will set the offset between the base and the outside edge of the top.
 |
| ready for the last coat of shellac |
One more on the bottom of the legs and then the legs and rails. Happy face on. The base looks good and the slats don't look any different the rest of the base.
accidental woodworker
Miles's desk pt XXII........
 |
| ready |
The frame has been sanded smooth, front and back, and it ready for paint. It is laying dead flat on the workbench - no rocking at any corner.
 |
| needed |
The spray shellac is working fine. It is laying down smooth and drip free on the slats. However, the aerosol spray lingers like a fog in the shop. The fan does a good job of airing out the shop in just a couple of minutes. Glad for that because is it sill only in the middle 40's F/7C outside.
 |
| 4 coats |
I should be done with the slats today. The can says it dries in minutes which I assumed was 4-5. It stayed tacky for almost 20 minutes and not dry to the touch for almost an hour. I got time but I'm getting impatience waiting until I can apply the next coat.
 |
| missed it |
Glue squeeze out and it isn't the only spot I missed. I started applying shellac to the base because I didn't want to leave the shop. The shellac made it pop, because without it the glue blended in with the cherry. I removed it here and 2 other spots with a chisel.
 |
| the base |
There aren't any glaring differences between the spray shellac and the batch I mixed. There is only one coat on the base, 5 on the slats, but they look the same.
 |
| 2nd coat |
On the first coat I tried to paint the whole frame. That kind of worked and kind of didn't. The biggest headache was holding the frame to lay the paint down. Decided it wasn't worth it and I only put a 2nd coat on the back of the frame. After dinner I'll put a 2nd coat on the front and that should do it.
 |
| 2nd can of shellac |
Got my answer on how much shellac per can before it is empty. I got four coats on the slats from one can. Noticed that the weight of the can went down after each spraying and it was as light as a feather after the 4th coat.
Getting real close to getting a check mark in the done column with this desk. I should be done with it next week hopefully. Won't be too soon and I'll have to motor up to Highlands to get cherry for Leo's desk.
accidental woodworker
Miles's desk pt XXI.......
 |
| hmm....... |
To my eye it looks like a design element of the desk. (the little doo hickey things on the underside of top rail against the legs). It hides the end grain of the front rail from being seen. Note to self - on Leo's desk make all the top rails the same width .
 |
| happy face on |
Out of the clamps and all is fine in Disneyland. All the miters are tight heel to toe on this side. On the opposite side it is the same except one miter is a 1/2 of a frog hair open at the top. Overall happy with the outcome and the frame withstood me scraping the miters on both sides.
 |
| )(&@%)Q&@*_Q |
Made the first batch of splines too small. Only one might have been usable but it had zero wiggle room. Made a new batch oversized more than I allowed on the first ones.
 |
| not my fault |
I know this spline was loose because I checked it dry. When I applied glue it froze about 1/8" shy of bottoming out. Glued in a shim from each side to close up the hole. Clamped all the splines and set it aside to cook.
 |
| PITA |
Got the rails and legs sanded and ready for paint without any hiccups. However, the slats are proving to be a massive PITA. I had planed all of them before gluing them to the rails and now after the first sanding with 120 all kinds of ugly tear out are popping up to shake hands.
I worked on resolving that until the dinner bell rang. Got one side and the back done but left side still needed attention. I dealt with that after I filled the pie hole.
 |
| better |
Got 6 spray coats on the test piece and it matches the top pretty good. Even the depth of the finish looks about the same. It looks like 6 spray coats on the slats will do the job.
 |
| prepping the frame |
Used the #3 to smooth and flush the miters. I am keeping the frame as is. No chamfers or any other molding edge detail. The map is a formal document and the frame will match it.
 |
| back rabbet frame |
Glue and nailed 3 sides first. Then I fitted the last one to it. Filled in the nail holes with putty. I'll be painting it black in the AM - not milk paint but a latex black paint.
 |
| hmm..... |
First spray coat on the slats. I did that so I could if any spots of tear out were missed. Cherry is a pretty wood with a finish applied. I will spray on 6 coats before I brush shellac on the rest of the base.
accidental woodworker