Hand Tool Headlines
The Woodworking Blogs Aggregator
“Glory to God in the highest heaven, and on earth peace to those on whom his favor rests.” - Luke 2:14
Norse Woodsmith Blog Feeds
Front carving mostly done.

Front carving mostly done. Mortice and groove the back of the stiles, for the side panels and rails, groove the back of the bottom rail, for the floor boards and then ready to drawbore and join.
finally.......
Ta da, the 3 mini japanese toolboxes are done. No drips or any other warts appeared to my eyeballs when I checked the finish on them. Glad to finally put a check mark in the done column. Which works in my favor because my sister is returning home to Indiana a week early. Saves me from having to mail them to her.
 |
| only one glamour pic |
I have four more of these needing a good home. Asked my two other sisters today at a picnic and both had zero interest in them. They will collect dust in the boneyard until someone adopts them.
 |
| the errant nail box |
This one is almost done. It needs one more coat of shellac before it is 100%.
 |
| cell phone holder |
I gave this to my sister Donna. I think it is borderline being too large but for a dedicated purpose it is ok. I had to explain to her how to use it. The notch sailed over her head like a helium filled lead balloon.
 |
| quick run to Lowes |
Got the correct cord this time. It was only 97 cents a foot and the two conductor switch cord I bought in error yesterday, was $1.12 a foot. Go figure on that one.
 |
| they fit |
I had no problems getting both cords through the romex connector. No oil and no excessive cursing required to get that done.
 |
| wired |
I had plenty of room to fit the wiring without having to squish and flatten it. One last visual check of my wiring before playing with the on/off switch.
 |
| $13 male plug |
This was a pleasant surprise - the plug lights up when there is juice applied. Wasn't expecting that at all. I like that because it is an indication of power available up to this point.
 |
| contact |
The moment of truth came and there was much rejoicing and dancing in the streets of Mudville. No sparks, fire, or explosions when I said contact and flipped the switch. The new motor purred liked a content kitty and it sounded a lot better then the 1/2HP original motor.
 |
| one last check |
Installed the cover the cover and loosely tightened the motor down on the bandsaw. The last check - motor rotation - the blade has to go downwards.
 |
| had a 50/50 chance |
Big negative on the correct rotation of the motor. The blade is spinning upwards. The odd thing was it was still cutting the test piece of pine both in rip and crosscut. Don't understand that. Maybe it was cutting due to the set of the teeth?
It is simple to reverse the rotation of the motor. All it involves is switching the hot and neutral. That will have to wait until tomorrow because I had to get ready to leave for a picnic. This is the first time all the surviving kids (all four of us) have been together in over 5 years. I'll do the reversal of the wires in the AM.
accidental woodworker
the joy of working wood.....
I believe that no matter the skill level you have as a woodworker, there are going to be times where you will have to take a giant step backwards. This AM I thought I would be putting a check mark in the done column for at least 3 of the japanese toolboxes. Well boys and girls I'm here to say it ain't so. I saw waterfall drips at the corners on all three of the boxes. A real big sigh and more rework after taking the giant step backwards.
 |
| waterfall drip work |
Sandpaper or steel wool isn't enough alone to remove the drips. First I scrape them off with the mini card scraper. Then I follow that up with a good rubbing with 4-0 steel wool.
 |
| Lowes road trip |
Bought 8 feet of tool cord, a male plug connector, and some spade connectors.
 |
| failed the bounce test |
Removed the plastic cord connector and got disappointed that the romex connector didn't fit - about a 1/8" too small. The hole diameter is small and there really isn't much room to enlarge it.
 |
| possibility |
This is the bottom of the cover and it could work for a romex connector. I may use this if I can't get two cords in the romex connector.
 |
| time to enlarge the hole |
Before I took this off I wrote down where the wires went. Speaking from experience it can be a nightmare trying to figure out which group combination of 3 wires are.
 |
| done |
Forgot that I had this step drill. This is my 2nd time using it and the first use in several years. Worked a treat with enlarging this hole - a wee bit too large but it will work.
 |
| 2nd headache |
The hole is too small for two cords too past through it. I drilled out the romex hole with a 5/8" drill bit.
 |
| hmm...... |
It is a tight fit but I'll be able to pass both of them through the hole with a little help. I think if a lube them with a bit of oil I'll be able to pull both of them through.
 |
| ugh..... |
I had checked this wire before I bought it. I saw two wires and assumed a third one was buried under the paper insulation. This two conductor switch cord. The stuff I want is 3 conductor - one black, white, and green wire. I'll be making another run to Lowes tomorrow.
Checked the waterfall drip boxes in the PM and all of them looked good. All of them now look like they have a finish on them. I will do the final check tomorrow before signing off on them.
The other four boxes got a 2nd coat of the tung oil finish. Never made it back to the shop after dinner yesterday. Tung oil does not pop at all on pine. It looks the worse on white and becomes a little discernable on darker or figured pine. Either way these last four are getting two coats of tung oil and two coats of the hard paste wax.
accidental woodworker
Woodworking perspective

Listed Building Consent application drawing.
In England, working on Listed Buildings often needs Listed Building Consent. This is a good thing and means that our heritage buildings are protected from ill-advised building practices by law. Conservation officers are there to advise on best courses of action and help to protect our historic fabric.
Part of the Consent application is providing scale drawings. I was lucky to have been at school at a time when technical drawing was still taught. Technical drawing as a separate subject in English schools was merged into the larger Design and Technology national curriculum in 1989, which was a great shame I think. I have used CAD software, but still get great pleasure from producing measured drawings by hand.

I was good with more academic subjects also (I was being pushed in the direction of becoming an architect), but my favourites were Art and technical drawing. When I finally went to college it wasn't Architecture but 3D design(Exhibition Design) with stage and Museum design, that I studied. Lots of opportunities for visualization, modelmaking and more drawing. We had fantastic workshops at college, and I was able to explore my love for woodworking, metalworking and sculpture. I delved quite deep into lots of woodworking traditions, and more often than not I could be found in the workshops, not the design studio.
Later on I got into framing and carpentry and building; I am glad I took the more practical route; understanding buildings from actually building them, working on them and caring for them. It gives you knowledge, which you just can't get from Architecture college, and hours spent in front of some CAD program. Yet again, doing things by hand, you notice things which machines and computers get in the way of. Stuff Artificial Intelligence, give me real Knowledge any day.
And a hand drawn drawing....
a wee bit toasty again........
 |
| 37C |
Came close but peaked at a two digit value. Sweltering with an oppressive, wet blanket slap to the face humidity. It was uncomfortable doing the post lunch stroll today and I cut it short with a shortcut on the return trip to the barn.
 |
| Mr Darcy |
He turned 18 this year and has been an indoor cat since we took him home from the animal shelter. He usually jumps up on this chair around 0700 and doesn't stir until dinner time which is around 1700. He is oblivious to the heat.
 |
| nope |
I have 4 coats of the hard paste wax on these and nada. It looks like bare wood to my eye. Using the hard wax only on eastern white pine is a bust. I want some kind of indication that there is a finish applied.
 |
| shellac |
I know that you can use shellac over wax because Don Williams finishing DVD told me I can. This is the second time I've applied shellac over a wax. The appearance of a finish was evident after the first coat of shellac. Three coats and I'm calling these done.
 |
| next four |
These will get hard paste wax too but first they will get two coats of tung oil.
 |
| done, almost |
Got three coats of shellac on them and once that is dry, I can call it 100% done. My sister said she is giving these to her grandkids for xmas this year. Plenty of time to the shellac to set and harden.
The box at the top right is the one with the errant nail. It is getting three coats of shellac then a check mark in the done column. I'll keep this one for me to use in the shop somewhere.
 |
| one coat of tung oil |
First one on post lunch stroll. The second coat might go on after dinner. Don't know what I'll use these for and I'm already thinking ahead to another run. Those I will make a little differently by putting in 'handles'.
I didn't make the Lowes run this AM. Inside I ran a couple of errands and after them I went to the shop forgetting all about it. Good thing no one is holding a gun to my head, I'll try doing it tomorrow AM.
accidental woodworker
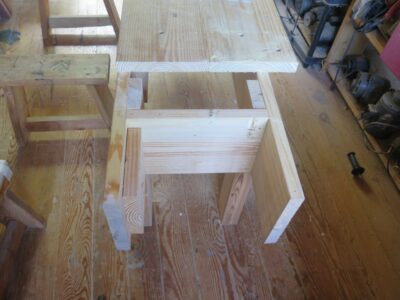
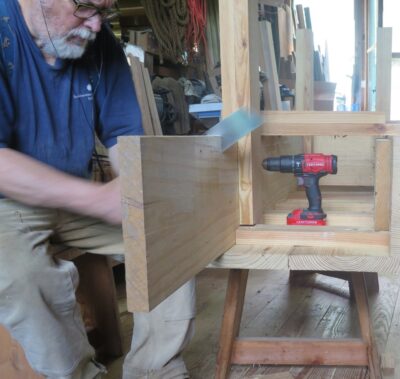
Dining Room Table: Jointing
So, in the little free time that I seem to have these days, I’ve been building the obligatory dining room table. It’s to be in solid red oak, a no-leaf design, and fairly large: about 7′ long. (That’s roughly 2100mm for those who measure in sensible.)
Lengths that long make things unfortunate. I’m not using really thick stock, so there will be battens and such underneath to keep things straight, but just finding clear boards that aren’t excessively bowed has been a problem. In any case, I’m getting somewhere:

Now, the length introduces another problem, that when edge-joining, you’re going to have a really hard time getting everything to line up. Even if you were somehow to find perfectly straight boards, they start flexing around a bit at that length, so managing it is annoying.
There are several ways around this, such as creating index battens to clamp to the faces while gluing up, but in the end, I’ve decided just to index with inserts. In this case, sort of small loose tenon things, and matching mortises for them to fit in.
Even though I recently bought a mortiser (blasphemy, I know), this stuff is so hard to manage that I decided that it would just be easier to do it by hand. And since I wasn’t really in the mood to whack it out with my normal mortise chisels, I went for the old “clamp a guide to the face” method:

Essentially, mark the edge away from the face with a marking gauge, clamp on the guide/jig/whatever, drill out most of the waste (a brad-point bit is helpful in this small size), and excavate with the chisel up against the guide. It’s surprisingly quick.
When finished, a board looks like this:

I don’t bother to put much (if any) glue to affix the loose tenons during glue-up because it’s a hectic time, and the edge-glue joint all around is much stronger anyway. But it really does help tremendously to keep everything behaved while getting the work in the clamps without worrying about if things are flopping around or sliding into the wrong place. Sometimes I’ll also put small F-clamps over the very ends to bring those into alignment, if necessary.
This is one of those times when you are tempted to buy a biscuit joiner or something like that because it might save a little bit of time (or at least seem easier), but I really don’t want to buy another tool. (I guess I have a doweling jig for some reason, but dowels make me go meh.) And really, preparing the faces and edges has been the most time-consuming thing in this project anyway. So far.
But I do wish it were as easy as the smaller table tops that you can just slap together all in one shot.
R1 Sold Out!

I learned recently that the first Roubo volume, To Make As Perfectly As Possible — Roubo On Marquetry has sold out! Plans are underway to revise the book format into a semi-deluxe edition as was done with great success for the Roubo On Furniture volume. I am currently reviewing a couple text passages that I thought might need some wordsmithing (to quote LBJ, “I reserve the right to be smarter than I used to be”), but otherwise the redesign and printing are in Lost Art Press’ hands.
Stay tuned.

almost done......
 |
| going for it |
No balls, no blue chips I say. Jumped into nailing off the top battens willing to risk any splitting. Besides, nailing off the top will strengthen the box's butt joinery.
 |
| sigh |
First box and I got a few tiny splits on 3 of 4 of the end nails. I also got 2 splits on the center nails. But it could have been worse and I can live with the teeny splits.
 |
| this sucks |
Wasn't expecting this to happen. The nail appeared to go in straight, in the middle of the end, but it came out at an angle.
 |
| lid fits in spite of it |
At least the nail isn't interfering with the lid fitting. The lid still fits in both orientations too.
 |
| simple layout |
I could have eyeballed it but the ruler wasn't in the way and stayed while I drilled the holes.
 |
| side trip |
The fence company dropped two fence pickets off. 3 pickets were loose and I was able to nail them back in place. I got permission from my next door neighbor to walk behind her fence to get to mine and put the two new ones in. I used screws instead of nails. The fence company used what looked like aluminum spiral nails - thin and flimsy looking. They certainly pulled out easy as can be - nothing like pulling spiral nails I have dealt with before.
 |
| done |
Nailed off the remaining 5 boxes. Doing it with brass nails didn't register until I was done using the cut nails.
 |
| replacement box |
This is the replacement for the box with the errant nail. I tried to back it out but it wasn't happening. I don't want to chance some young fingers accidentally getting stabbed by it. Got the first coat of the hard paste wax on it. Two more to go and it can join the other 2.
I got a third coat on all of the original 3 boxes. The final coat I rubbed on a thin coat, waited 15 minutes, and buffed them with a face cloth. I didn't bother with the soft or hard buffing pads. They weren't making any difference with the look of the finish.
 |
| hmm..... |
Two cords for this 1/2HP motor. One is the line cord and the other is for the on/off switch. I want to reuse the on/off switch on the 3/4HP motor. Should be doable without wasting too many calories.
 |
| this sucks pond scum |
The switch and the line cords are soldered - not crimped or wire nutted
together. That will make reusing this motor a wee bit involved, ie,
soldering a new on/off switch. I left the wires I snipped long so I will
be able to figure out how to do that.
 |
| old line cord |
This one has had the snot beat out of it. It still works but definitely not OSHA approved. I'll have to buy a new cord at Lowes - I think they still sell line cord by the foot. This one is a few inches over 8 feet long.
 |
| hiccup |
I'll have to wire the motor and switch before I secure the motor on the bandsaw. This cover will be up close and personal with the bottom frame of the bandsaw.
 |
| hmm.... |
This deserves a bit more than a 'hmm....'. I need to feed in two cords and that isn't going to happen. There isn't enough room for that.
 |
| might work |
There isn't a lot of extra real estate to put in a 2nd opening for a cable clamp. I'll remove this one and check if a romex clamp will fit. I should be able to get two cords in that with no problems. I don't have a good way of securing the two cords this way. And there is zero strain relief not mention it would be easy ingress for sawdust from the bandsaw.
I'll make a road trip to Lowes first thing in the AM. I rely on the bandsaw too much to have it unavailable to use. No turning back now because I can't readily swap 1/2HP motor back in service.
accidental woodworker
My Latest Substack
You can check out my latest Substack.
Be warned, it’s not a quick read, though I do give some free advice!

last step.......
Applying the finish to 3 of the mini japanese tool boxes. I am using the hard wax paste only - no hard wax oil(?) as the first coat . I am also experimenting with it on these boxes. If it works out, I'll use the same method on the remaining 5 boxes.
 |
| the 3 I picked |
These aren't totally wart free but they are the best looking of the 8. These are the ones I'm giving to Donna on sunday.
 |
| ready for hard wax paste |
The finish feels dry - it also feels smooth to the touch all over.
 |
| hmm.... |
Got the first coat on and it doesn't look like any finish has been applied. This is what I saw too on the other mini japanese toolboxes I made. I guessing that this will take a minimum of 3 coats before I have a warm and fuzzy with it.
 |
| looks different |
There is a slight difference in the look. Not the shine of a shellac finish, but nonetheless you can tell there is a finish applied. Not sure at this point if I'll apply another coat or not.
 |
| the experiment starts here |
I bought these buffing pads a couple of years ago and only tried the soft buffing pad once. I wasn't happy with how it worked - I didn't see any difference in the finish post application.
The other pads to the right I don't remember anything about them. I'm not sure if each color is a different grit or denoting an order in which they are used. Other then the color of them, they all look and feel exactly the same.
I tried the soft pad on the cell phone holder hoping to raise a higher sheen but the overall matte finish stayed the same. The only hiccup I had was the sander spit a ton of fine dust all over it. Wiped it off with a face cloth I use as shop rags.
 |
| trying a hard pad |
It had been about 10 minutes after applying the hard wax to these boxes. The pad definitely made the boxes feel a lot smoother. I didn't detect a discernable change in the sheen but I have few more applications to go. On the next one I plan to apply the wax and immediately buff it with the hard pad. The last one I apply I will buff out with the soft pad.
 |
| it is not happening |
Buffed out the bottom box (one coat) and the top one just has one coat too -not buffed out. Can't see a difference and I doubt I will. I think that the best I'll get is a matte finish that may shimmer a wee bit in raking light. However, on the bottom box I can feel a difference. It is much smoother feeling to the touch vice the top one. The top one I applied the wax and wiped it down after 10 minutes or so. It feels smooth but not as like the bottom box.
 |
| came today |
Lee Valley said these would take 7-10 days to come in. Took only 4 days. I've been tossing around in the brain bucket whether or not to nail off the top end battens on the boxes. On one hand I don't want to risk a split at this stage of the build. On the other hand, the top battens being nailed off would match the side nails. It is a toss of the coin decision with film and updates on the 11 o'clock news tomorrow.
This is all I got done today, all in the AM session. My wife's sister came to Rhode Island from New York like she does every summer. That is where I spent my PM time. I want to go see her home for a weekend maybe in september. I have a had hankering to go to the Stewart's gas station by her house for a coffee and a muffin.
accidental woodworker
Drydock pallet frame cabinet part 2
Browsing through my phone, I suddenly realized that I had forgotten to make a blog post about the pallet frame cabinet completion last year.
We ended up having a bit of a tight deadline for the completion, since it was a wedding gift for Klaras friend. Furthermore I had to remain calm and pedagogical while trying to explain that: If you want the cabinet to be completed in time - well then you need to work on it.
For some reason it was very hard to understand that you couldn't both go to the movies or go to a sauna all evening and at the same time work on the cabinet. And that realization was really hard to fathom.
But after I had explained very clearly that the clock was ticking, and that I had spent hours helping, which was why I sort of expected some effort being put into completing the project, Klara saw what I meant and worked at it.
Klara originally intended to paint the cabinet, but lack of time made this impossible. I told her that the recipient would no matter what be thrilled to receive a homemade cabinet, and that painting was one of the things that she could easily do at home without my tuition.
She also needed to decide on a closing mechanism (magnetic or latch type)
Lessons learnt:
For young people it is very hard to miss out on anything social in favour of a project that they have started themselves. So I should probably have advocated for a much less complicated project from the start. But I had been completely honest with the amount of time that it would take to build something like that, and also described how it could be achieved by a steady effort each day for maybe a couple of hours. But somehow the coupling between doing other stuff for 6 days and suddenly be short of time was not clear.
The actual build was helped a lot by the fact that we had a table saw at our disposal and also a thickness planer.
Mouldings really help giving a finished look, as does a raised panel door.
It itched in my fingers to do part of the project myself, to speed up the process, but I managed to not do it, I wanted it to be her build, and I would only make sample joints so she could see how they should be carried out.


Workbench Wednesday – Get Thee To The Shrinkifier!
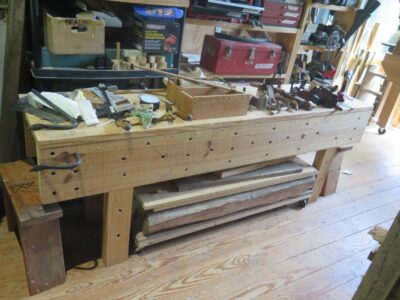
Last year when prepping for the Labor Day weekend 18th Century Trades Fair down at Fair Lawn Farm I included a stripped-down Nicholson workbench. As useful as the bench is for demonstrating and didactic exposition, it needed to be stripped down further.
What I’m subtracting is two feet from the length of the original 8-foot bench; one-half foot from one end, a-foot-and-a-half from the other. There are a couple reasons, not the least is being an 8-foot bench is a little bit much for this 70-year-old to rassle solo. Also, the larger bench took up too much space in my work area at the Fair. I also will refrain from bringing a large display table for my pile of joinery samples. Absolutely no one took a look at them so out they go, at least for this event.
The Nicholson bench has many benefits to providing a heritage work station, including simple and fast making (I can make one in less than a day), in addition to ease of both assembly and disassembly. In this case It was a piece of cake to disassemble one end of the bench and cut off 18-inches and move those legs two feet.
At the other end I just marked off six inches and sawed it off.
In the end I had the same bench, only two feet shorter.
But, I’m not just subtracting. This year I will be adding a leg vise to the workbench along with a Moxon vise.
Stay tuned
tiny japanese toolboxes pt V.........
 |
| cooked overnight |
Since I was relying only on glue to secure the fixed batten I left them clamped overnight. All of them felt secure and rock solid when I checked them.
 |
| still fits |
Had my fingers crossed that the fixed battens hadn't slipped when I clamped them.
 |
| nope |
This one must have slipped a wee bit. There is a gap and the alignment between the sliding and fixed battens was slightly skewed. I tried to plane it to fit but all I did was to make it too loose.
 |
| lid is now too long |
I had to trim an 1/8" off the lid before it fit again. Checked to ensure that it fit in either orientation.
 |
| nope |
This sliding batten isn't fitting so well neither. I made another one and after fussing with it for bazillion years, I gave it flying lessons. Then I got lucky when one of the oops sets I made yesterday fit. Smilely face on.
 |
| back to the first one |
I didn't get lucky with an oops sliding batten fitting. The first replacement and the 2nd one didn't fit. The fixed one had slipped and it was wrecking havoc trying to get a new one to fit. The problem was the fixed one wasn't square to the larger fixed batten on the top of the box. Had to deal with a double compound angle for the replacement batten.
 |
| removed the fixed one |
I tried making 3 new ones and had 3 failures. I was getting a good alignment but the fit was too loose. All 3 I was able to push out all the way across the lid. Zero resistance in spite of it looking good. Bit the bullet and knocked off the original batten.
 |
| clean |
 |
| done |
Sharpened and honed with RML shavings spitting out of each one. Finally feeling comfortable with my sharpening methods. I am getting consistent results with each and every iron I sharpen.
 |
| waiting on one |
Got these 7 done. Battens trimmed, sliding ones fitted, lids fitted both ways, they are ready for finish.
 |
| ta da |
I only need 3 of these to give to my sister Donna for her son's kids. I'll pick the best 3 and give them to her. Finished the last box after my post lunch stroll. I didn't see a lot of difference (time/effort) in making 8 at a time vice just 3.
 |
| hmm..... |
I bought a 3/4 HP motor to replace the 1/2 HP motor the bandsaw came with well over a year ago. I didn't have anything else on the dinner plate so I thought I would check out things. The center line of the shaft on the 1/2 HP and 3/4 HP motor matched. I wanted to check the size of the key next.
 |
| nice surprise |
The key off the 1/2 HP matches the 3/4 HP within a thousandth. I was expecting the 3/4 motor's key to be metric (it might be metric?). But it matched and so far the swap out was looking favorable.
 |
| layout fluid? |
This 'blue' key swapped out into the 1/2 HP motor and vice versa.
 |
| wee bit of a hiccup |
Initially the pulley wouldn't fit on the 3/4 HP motor. It would only engage about an 1/8" on the shaft and key. I sanded four sides of the key on 400 grit sandpaper and then the pulley slipped on easily.
 |
| feeling better about this |
The pulley slipped on easily with hand pressure. There was almost zero slop. I think I'll be able to swap this out in a few hours. The only potential speed bump(s) will be wiring the existing on/off switch and getting the correct rotation of the motor.
 |
| finish is next |
Branded all the boxes and no hesitation on what the finish I'll use. It is going to be the same finish I used on the cell phone holder.
accidental woodworker
Struggling with Your Hand Drill? Try This
If your eggbeater drill feels clumsy or tiring, this simple technique might change everything. No electricity, no fuss, just easy, accurate holes with full control.
tiny japanese toolboxes pt IV.........
Made a lot of progress on the boxes. I'm 99% done with the woodworking. Tomorrow I should be done with fitting the last of the lids. Just a few minor hiccups to deal with and I'll be ready to slap some finish on them.
 |
| last coat |
It has been a few days since the last application. Knowing when this is dry is/was not easy for me to figure out. That is why I waited so many days between coats. This was the 4th and final coat I'm applying. I'll wait a couple of days and slap on some wax. Fini.
 |
| first lid |
One done and 7 to go. Still have time to decide on how long to leave the sliding batten.
 |
| sliding and fixed battens |
Making the sliding and fixed battens in two pieces. These 8 are the fixed ones.
 |
| sliding battens |
The sliding battens are 2 inches longer than the fixed ones.
 |
| jig |
I thought of this while sawing out the battens. This jig is used on the bandsaw which should be easier than the hand sawing jig I made before this one.
 |
| jig 1.a |
The previous jig worked but it was difficult and awkward holding the stock while pushing it through the blade. This is better and supports both the piece I want and the offcut (no offcut support on jig #1). And as a bonus I used it to saw both the short and long ones.
 |
| sigh...... |
I should rephrase this because I did manage two sets. However, they were so thin that they were useless. First round flushed down the toilet and on to round #2.
 |
| 8 for 14 |
Finally got round two done with 8 sets. I only needed 7 but I wanted at one extra for an oops. What was so frustrating was eyeballing how to plane the opposing angles and plane it wrong not once, not twice, not three times in a row, but 4 times before getting it correct. I repeated these steps once more again. The taper and the compound angle won a couple of battles but I finally won the war.
 |
| trimming |
Used my 1/2" Record to thin the 1/4" lip - it wouldn't slip under the fixed batten on this end. I had to wash, rinse, and repeat for all 8 lids.
 |
| first lid fixed batten |
I left the fixed battens proud and I'll trim them to length after the glue has set.
 |
| love this glue bottle |
I thought this tiny hole would be a ROYAL PITA but it ain't so boys and girls. A tiny bit of glue build up on the outside of the tip but nothing like on the Titebond glue bottles. I like the small controlled amount of glue that this tip dispenses and so far no headaches or hiccups. If needed I have another glue bottle that has bigger tips.
 |
| why it doesn't clog |
This drains efficiently and doesn't clog. At least it hasn't so in the month or so of use with me.
 |
| 2nd part |
This wide openings help with the glue draining back from the tip into the bottom.
 | |
| silicone? |
There is no way that the glue will ever touch the threads on the bottom. The top part mates into the inside opening of the bottom. A lot of thought went into this glue dispenser. I think I'm falling in love with it.
 |
| hmm.... |
I won't be able to flush the overhang on the battens because of the gap between the lid and the box. The lid can shift from side to side so I'll have to guess-ta-mate the best I can with it.
 |
| for tomorrow |
I was going to sharpen these two blades but it was after 1500 and past quitting time. Cleaned the pine pitch and bits and pieces stuck on the bevel with paint thinner. These two blockplanes - LN 102 and LN 60 1/2 - are my favorites. I usually reach for them before a bench plane.
Noticed that Lie Nielsen is selling a standard angle blockplane again. An iron version of the Stanley 103 along with an iron version Stanley 102. I have the LN 103 and LN 9 1/2(?) standard angle that they no longer sell/make. I rarely use either one of these anymore.
accidental woodworker
I’m back, but not, but maybe I am.
Around fifteen months ago, maybe a month after published my last post on this account, I found out that even Captain America isn’t invincible. It was a pretty tough year, and I will leave it at that.
In the meanwhile, I made a few changes. My table saw is gone, not for philosophical reasons, but because it was too large and heavy for me to continue to use, and it was taking up valuable space in my garage. I gave away around half of my woodworking hand tools, and I may give away more, and perhaps I may even sell a few. This is not to say that I have given up on woodworking…far from it. I still have enough tools to make most of the things out of wood that I may want to make now or in the future. But for the past year I have done very little in the way of furniture making or tool restoration, save for some basic upkeep such as cleaning and sharpening. For that reason, I have not written a blog post about woodworking, or tools, in quite a long time.
The last post I wrote on this blog, which apparently detailed my attempts at restoring a vintage leather tool pouch, ironically had a mostly happy ending. I remember spending weeks trying to get that old pouch cleaned up and looking decent again. While the appearance aspect wasn’t crazy difficult, getting the funky smell out of it was a challenge to say the least. I scrubbed it with saddle soap a half dozen times. I placed teabags inside of the pockets and let them sit for a few weeks….I then placed homemade baking soda teabags inside the pockets and let them sit for a few weeks more. I used odor reducing sprays specially designed for leather. All of my efforts were only partially successful.
Eventually I patched the holes in the pouch, not perfectly I will add, but enough to where they are not noticeable. At some point in April of 2024, I hung the pouch in an open window in my garage to continue to air it out…then things happened that caused me to forget about it….and there it sat, dangling for almost seven months. Strangely enough, the open window treatment did the trick, and the pouch no longer has any odor at all, save for the faint scent of a few coats of mink oil, which I added when I was satisfied that the pouch was as clean as I could possibly achieve.
So I may attempt a blog post or two over the next few months. I’ve been messing around a little here and there, trying to get back into the swing of things. I made a few boxes…just to see if I still had it…and I was disappointed in some ways, and happy in others. Like sitting down at the piano for the first time in a long time, or picking up a guitar after many years, it will likely be quite a while before I feel somewhat comfortable again. But before I do anything in earnest, I will have to reorganize my garage to make it conducive to using woodworking tools again, because right now it is not even close. Until then, I am still here, a little worse for wear, but still here.
tiny japanese toolboxes pt III.........
Bit down hard on the bullet and sawed off all of the battens. After that I planed the top smooth and twist free 360. The previous sentences don't make much sense because the pic that proceeded vanished. Don't know how or why, just another black hole blogger mystery.
 |
| last one |
I got lucky in that all of the boxes checked twist free. Round 2 for battens was in the on deck circle.
 |
| new batten stock |
This stock is a frog hair wider than 1". Band sawn to 3/8" thickness and planed smooth down to the knife lines. I thought I had enough stock here for all of them but I was one short.
 |
| ready for battens |
The hiccup with the stock was I could only get one batten each out of all of the short pieces. The off cuts were an 1/8" short. Sigh.
 |
| the difference |
The left one is the original and the right is the new one. I am not going to nail these but that may change. I might use brass brads if I get the itch to nail the top battens.
 |
| glued and cooking |
Took a while longer to do these vice the first ones. With these I aligned one edge of the batten flush with the side. Any proud I put on the opposite side. Had to deal with the battens slipping and sliding when I first applied clamp pressure.
 |
| flushing the proud ends |
Clamped an extra batten to prevent blowout. After I planed the proud flush I sanded the sides/ends with 80 and 120 grit.
 |
| last one |
All of the battens held fast. I secured them with glue, no fasteners used.
 |
| nope |
This was the practice/test lid from yesterday. It didn't fit - not even close to it.
 |
| done |
Planed flush, sanded smooth, and ready for finish. These took a few minutes and boatload of calories to get a check mark in the done column.
 |
| new test lid |
This went surprisingly well. No hiccups, no rework, no flight plans filed, and the locking batten is long enough. Got a 1/4" under the right batten and 5/16" under the left one. Got a warm fuzzy with the lid staying in place now.
 |
| half done |
accidental woodworker
tiny japanese toolboxes pt II.........
 |
| last night |
Came back to the shop and whacked out two more boxes. Of course one of them had to split on me. I am now of the opinion that predrilling, while helpful, doesn't eliminate splitting. The wood is going to do what it wants regardless. I've looked at the grain with the splits occurred and it was all squirrely running in a bazillion different directions. And I don't think the type of wood matters neither.
 |
| one more box |
With these long sides I will now have 8 boxes. The assembly line is still working, much better than I anticipating it being.
 |
| slight taper |
This is annoying but it is way better than what I used to get resawing. It took me less the five minutes to flatten these two to the knife lines.
 |
| 2 for 8 |
Two of the eight boxes were twist free. The other six were untwisted with just a few plane strokes.
 |
| bottoms |
First two glued, clamped, and cooking. Got all 8 done and set aside to set up.
 |
| last two |
I used some 1/8" thick plywood that was used to separate a shipment of solid 1/4" and 1/2" thick wood I had bought online. Used that for the bottoms of the boxes.
 |
| cleaned up |
Planed and sanded all the bottoms flush. Battens and lids are in the on deck circle.
 |
| battens cooking |
Five here and 3 on the workbench.
 |
| lids |
Used 1/4" poplar for the lids. This is an extra for any oops of which I'm sure I'll do. I hope that it is only one oops, if any.
 |
| 1/4" plywood |
Why didn't this happen on the other japanese boxes I made? Dawned on me to test fit one lid out of plywood vice using the actual 1/4" poplar lids. And with the assembly line approach, once this fits I am good for the 8 real lids.
 |
| hmm...... |
This is how much fits under the left batten. The right batten gets a 1/4". After playing with this and 2 more test lids, I came to the realization that I should have made the battens wider. The size on the boxes is 3/4" wide (twice the thickness of the sides) which leaves roughly 3/8" for a lid to slide under.
 |
| got the length |
It is not easy to insert the lid underneath the left batten and then push it to the right under that batten. I still don't have much room under the left one but it is about a 1/16" more than the first one. I plan on doing one poplar lid first and checking it before proceeding with the remaining 7.
 |
| sigh |
The locking batten slides in to much. I made the two of them from a 1" wide piece and I was expecting the sliding batten to close up more aligned at the ends with the fixed one.
Left this here and called it quits for the day. This lid detail is kicking my arse again like it did on the other small boxes I made. It was getting to be frustrating and escalating to the free flying lessons level so I killed the lights. I'll attack it again in the AM.
accidental woodworker
Sanding has changed
