Hand Tool Headlines
The Woodworking Blogs Aggregator
“Glory to God in the highest heaven, and on earth peace to those on whom his favor rests.” - Luke 2:14
Norse Woodsmith Blog Feeds
Two Items from a Tool Show
A couple weeks ago I went to a tool show put on by my tool collectors organization, PAST. In addition to the conversations with like-minded people, there are always great things to see and play with. But I usually don't come home with anything because I just don't have the space to be a tool collector. My tools are user tools, although I will admit that I have more than I need.
Anyway, I bought a couple things at the show. The first, for a whopping $8, was a nice moving filletster plane from Sandusky Tool. Co. And second, a great book (for $3) titled "How to Build Shaker Furniture" written by Thomas Moser and with measured drawings by Chris Becksvoort.
 |
| Sandusky #68 moving filletster plane |
 |
| The front end |
This plane has a nice depth stop, but is missing the nicker. I'll try to make one someday soon. The recess for the nicker iron is dovetailed two ways. Vertically, the slot gets narrower as you get closer to the sole. And the recess gets wider as it gets deeper into the plane body. So it should just be a matter of filing a piece of steel for a good fit.
 |
| The depth stop |
 |
| It's fixed in its recess with a fat wood screw |
 |
| Here, I'm pointing to where the nicker iron should be |
The fence of the plane is made of an unknown hardwood - nothing special, I think - and it has two rectangular brass washers (not sure if that's the proper term) that the big fat wood screws bear against.
 |
| The fence |
 |
| Removed and showing the big screws |
 |
| Here's one of the brass "washers" |
The side of the fence that meets the plane's sole has marks from many years of contact with the plane's iron. I'd love to know if it was normal for a manufacturer to make a cutout here or if it just gets like this from normal use.
 |
| Showing the "recess" where the plane's iron contacts the fence |
Finally, the iron and wedge are in pretty good shape. I was able to cut a 1/2" wide rabbet without even touching up the iron. I'm sure it'll be even nicer once the iron is tuned up. Funny thing with this iron is that it's edge is not even close to straight - it's got a camber on it. I didn't measure it, but it's probably about 1 1/2" wide. The iron is skewed in the plane, so its edge is at an angle to the sides. But the cutting edge is not straight.
 |
| The wedge and iron |
 |
| Look at the camber on that iron! |
Maybe the iron is just relieved where it is almost never used (near the 3 inch mark on the ruler in above picture). It's hard to imaging needing a rabbet more than 1" wide! If anybody knows something more about that I'd love to hear about it in the comments.
The second item I picked up was this 1977 book from Thomas Moser. This looks like a tremendous book and I can't wait to dig into it much deeper and maybe even make a few of the projects.
 |
| Hardback cover, too |
 |
| An example of one of the dozens of projects in the book |
Well, that's all for now. My woodworking has been slowed lately with some knee problems, so I've not been posting regularly. I'm going to have the knee replaced in a few weeks and that'll for sure have me out of commission for a while.
Ramped Shooting Board Intro
I built this ramped shooting board by hand using hardwood offcuts. In this video, I go over the build, why I made it ramped, and what planes it’s made for. Simple, practical, and made using only hand tools.
almost done......
First thing this AM, after breakfast, I went to the House of Glass to get the lites I need for the cabinet. Closed, in fact it looked like it was a ghost town. Went home and found the next nearest 'house of glass' was over in Cranston. It was closed too when I got there. Then it dawned on me, today is Labor Day. A national holiday which explained why there was so little traffic on the roads. I'll try this again in the AM - fingers crossed the House of Glass is still in business because it didn't look like it was just closed for a holiday.
Got a shock on sunday when I went to Lowes to get the glass cut. Found out that they no longer cut glass. Gone, no more, no notice, and it has been gone for months according to the rep that told me that tidbit.
After my post lunch stroll I jumped into getting the casings for the back door done. That turned into a 3 stooges routine in a heartbeat. Spoiler alert - I got it done just before 1600 rolled around.
 |
| lock side |
I ran out of nails and I couldn't nail off the left side of the casing into the door jamb. I could have used my finish nailer but I didn't feel like breaking out the compressor and cluttering up the limited space in the back hallway. I'll go to ACE and buy some overpriced penny nails in the size I need.
 |
| sigh |
Can't get the hinge side casing in place. The horizontal board is in the way and I would have to remove it to get it in place. The other choice is to remove the door from hinges. I would have to remove the butt hinge at top on the door jamb along with removing the door. Decided that removing the board is the better choice. I always leave taking a door off as an absolute last resort.
 |
| surprise |
I brought 3 saws to do this and I got it all done with this one. I was floored that I was able to make the saw cut with it.
 |
| expended a lot of calories |
This is a carbide scraper and it took me seemingly a bazillion years to scrape this and I didn't scrape it all neither. I found where the studs were behind the board and hunted for nails or screws. News update - I found zero evidence of either one.
 |
| ta da |
Got it off finally and there were only 3 nails holding it on the wall. And one of the nails was a small piss ant penny nail that only went into dry wall. I still couldn't see where the nails were on the face side, based on where the stuck out on the opposite face.
 |
| hinge side casing |
Fell onto the door jamb easy peasy. Remember Alka Selzter - 'oh what a relief it is' - that is what this popping into place was like.
 |
| hmm.... |
A 1/4" gap here at the bottom. The right side of the casing against the hinges is straight but the left is tapered. It goes from wide at the top to thin at the bottom.
 |
| not as wide |
I'm leaving this as it is. Once all the coats go back on the board here, it will be invisible. I will fill in the gap at the bottom with backer rod and caulk. At the top I think I can get away with just caulk.
 |
| hmm..... |
Used pine for the head casing but it is not wide enough. This is tapered too with it 1 1/2" on the left side end and 2 1/16" at the right end. The top of the casing is parallel to the ceiling L to R but I don't want to use backer rod and caulk for this. It is too visible and it may pop out too much.
 |
| grabbed the wrong one |
The left end of the right one is 1 1/2" and it is the one I should have put in as the head casing.
 |
| done |
Nice fit with a much smaller gap that is parallel to the ceiling. This one will fill in smoothly with caulk and not be visible.
I'll get the hinge and top casing nailed tomorrow. I cleaned up my mess, put away my tools, and rested my hands quietly. My carpal tunnel in my right wrist started protesting and my right thumb was humming arias. Grateful it wasn't singing and I could still pick up and hold my coffee cup later.
accidental woodworker
glass door cabinet pt XX..........
 |
| the forgotten pic |
Along with forgetting to snap and post his pic several posts back, I forgot to apply glue to the back edge. The only thing holding the top down are the screws. It feels solid and I doubt it will give up the ship for a few decades.
 |
| 2nd putty run |
I sanded the first application and it didn't look that bad. With it horizontal I saw another hole underneath on the bottom round over. I think this will do and I won't need a third run. Updates and pics on the 11 o'clock news.
 |
| hmm..... |
Made a command decision and I'm cutting down the front to match the sides. I don't like that the front overhangs this much. I don't need it be as much as it is because the door will be insert.
 |
| sigh |
I got lucky on this because it is facing down and not readily visible. On the fence about whether to fill it with a shim or caulk. I have time to decide without calling a full board meeting.
 |
| done |
Planed this down to the same thickness as the pine board I'll get the hinge side casing out of. This will give up the lock side and top casings with something left over.
 |
| divot |
A chunk of this popped off when I ran this through the lunchbox planer. I can still use it and place this defect down and against the wall. I will saw out the casings I can get out of in the AM.
I struggled getting the lunchbox planer out of the back hallway and on to the stand in the driveway. I felt a couple of sharp pains from my groin and the old hernia repair site. I didn't sense/feel any aftershocks though. It looks like I might have to hire someone younger to haul it out and bring it back. I can pick up and move it but the initial lift didn't feel all that good. Oh well it is just another concession to age.
accidental woodworker
glass door cabinet pt XIX..........
 |
| ready |
Changed my mind on veneering this box. I was going to use walnut but I don't like the dimensions of this box. This one is too wide and long along with the height being too short. I cleaned the box up, planed the sides smooth and the top and bottom flat/twist free. I will try out the LAP wax on it to see if it will pop on this light wood.
 |
| new jig |
I finally found some small quarter round. I bought four, 48" long 1/4" quarter round moldings from Rockler for $7 each. I made this jig to clean the miters smooth at 45°. The moldings I have coming are supposedly a 1/4" on each flat and the groove is just shy of a 1/4" in both directions. I practiced on some 3/16" square pine scraps and I got a 90° corner. The moldings coming are birch (no pine available) which is a lot harder than pine so I will hone my chisels when they come.
 |
| need some casing stock |
Pine is (IMO) too soft to use for door casings. I am going to use this poplar board I bought a few months ago. Step one is getting one face kind of flat and thickness it with the lunch box planer.
 |
| switched |
Initially I started working on this face with my Lee Valley scrub plane along with my Stanley #6 with a cambered iron. Working this poplar was like scrub planing stone. Ornery and stubborn with swirling grain that grinned back at me.
Then I remembered that my sister had given me this Wen hand planer. I set the depth of cut between 1/64th and a 32nd and went to town with it. I had expended a ton of calories for almost and hour and I barely made a dent in half of the board. The Wen impressed me with how well it worked. I was expecting it to be a total piece of crappola but it sung a #1 hit tune eating up this poplar.
 |
| 15 minutes vs 42 minutes |
Got the board smooth from end to end with the Wen planer. The shavings are stringy but not wispy. The board is smooth but it is twisted with two humps, both on the right side edge that I had to deal with.
 |
| half done |
Because of the length of the board (82") I checked and corrected for twist in quarters. I got the first 40" twist free along with flattening one of the humps. I did all of it with the Wen. I did try going back to the hand planes but this poplar was not cooperating. I have a ton of empathy for the old guys that had to do this strictly with hand planes.
 |
| PITA half |
The first half from the top to the middle is twist free. The half from the middle to the near end gave me fits. I was seesawing until it finally dawned me that there was a 3rd hump centered around the middle to the 3rd quarter line. I got rid of that but it took a while before the twist went bye bye. I must have planed and checked my progress 8-9 times. I'm more than happy that this poplar board started out thicker than 1" because I ate up over an 1/8" flattening it.
 |
| sigh |
From the half way point to the far end I was reading twist free. In between these two I wasn't twist free. I spent 6-8 times as long removing the twist and the last hump on this end than I did on the top end. Again the plan wasn't to go anal and get this dead nuts flat end to end. I was just shooting for flat-ish surface to run through the lunch box planer. Once I got that I put the Wen away.
 |
| what a mess |
The board is twist free from end to end. I checked it first every 10", then at 20", half way, and finally end to end. All read twist free.
 |
| using it again |
Epoxy and silica filler. I like this epoxy but not the cure time. Which is ~24 hrs but you can play with it for around 30 minutes to reposition or add to it.
 |
| where it is needed |
I didn't think I would have exposed any dowels when I cut the top of the door. I packed the epoxy in the gaps at the ends of the dowels and along the tops of them. I did this because the top of the door will be visible to anyone over 5' foot tall.
 |
| clean bench and shop deck |
The shavings didn't blanket the shop like when a router is flinging its bits of wood all over creation.
 |
| tomorrow |
It has been a while since the door was installed. It has held up nicely since then through several days of rain and a few thunderstorms. No water came in anywhere around the perimeter of the frame. I also found no evidence of air leaks. Come this winter the back hallway should feel considerably warmer.
I have enough poplar for the lock side and the top. The hinge side I will use pine. It is out of the way and it shouldn't get any dings or bumps where it will be. I didn't feel like bringing the lunch box planer out this PM so I'll do it in the AM.
accidental woodworker

Bass Build Pt 3
I'm now on to the neck!
Thanks for looking, Gary
glass door cabinet pt XVIII..........
 |
| can you guess what is coming |
Decided to make the glass retainers myself and I need to make thicknessing jig first. The one I have here is for a Stanley #4 and the Lie Neilsen #4 won't fit in it.
 |
| almost done |
I had a 1/4" rattling around in the brain bucket. I made this sled a 1/4" too wide. My 5 1/2 is too wide and my Stanley Bedrock #5 is too narrow. Having it this same width as the plane is not 100% necessary.
 |
| a little help from my friends |
I glued two 1/8" thick pieces of plywood to the side walls. The plane is now a nice slip fit end to end.
 |
| glued and cooking |
I feel like I made a bridge truss. I only have 6 of these small spring clamps and the ghost strips did a good job applying even pressure against the 1/8" plywood.
 |
| hmm..... |
Here's the plan for the retainer strips. Thickness a piece of pine to a 1/4" thick and mold a round over on the top and bottom edges with a beading plane. Saw that off and a small 1/4 round molding is my reward.
 |
| Houston..... |
I like the round over but this is a 1/2 round and not the 1/4 round over I wanted. I figured it out (after minutes of giving it goofy looks) that I have to saw if off to get this and then saw this in half to get my 1/4 round.
 |
| too small |
Got my 1/4 round but it is way too small to use as a glass retainer for this door. At least I got it figured out how to make it.
 |
| 2nd attempt |
This is better size wise but it is taller than it is wide. I want both flats to be the same or within a few frog hairs.
 |
| I like very much |
I like that the height is just a frog hair below the top of the muntin bar. I also kinda of like the bit of reveal that is in front of it. IMO the quarter round is a bazillion percent better then caulking or a square retainer.
 |
| nope |
Bumped the bead up from 3/16 to 3/8. I thought I could get two from each side of this donor scrap of pine. Not going to work because the quirk (the middle flat thing) doesn't extend to the same depth as the round over does. I can only use one of them to make a quarter round.
 |
| wrong pic should be a hand plane |
This is a hand planed astragal which has the same problem as the beading plane. The quirk is not to the same depth as the 1/2 round is. But here it doesn't matter because I can only get one profile here. However, sawing this one out should be easy. I will have to set up and saw out all of them first for one saw cut and then repeat for the second one so they stay consistent.
Tried to do that and it turned out to be burnt toast. The first cut was a breeze but the 2nd one sucked pond scum. It was small and difficult to saw the second cut. It came out wavy and corkscrew like - it was burnt toast and unusable. On to plan 3A.1, rev 2, alteration 5Vii.
 |
| router beading bit and true 3rd candidate |
Same problems sawing this out as I had with the hand plane astragal. I refused to accept defeat and I entertained making a router table. The thought was to put a quarter round bit in the table and rout a round over that covers the entire edge eliminating the second saw cut. I didn't get past doing some layout on a plywood router table top.
 |
| bringing up the rear |
I made two cuts on a 3/8" dowel and it didn't come out that bad. I ended up with two sets that were pretty much the same size. However, I will need 32 retainers for the door and I doubt I would get any consistency sawing them out free hand from dowels. I would need a jig of some type to saw them out repeatedly on.
 |
| first one done |
I now have two thicknessing jigs for a #4 bench plane. This one will take either the LN #4 or a Stanley #4 and thickness to a 1/4". The older one can only be used with a Stanley #4 will thickness to 1/8".
 |
| why not? |
The plywood under the #3 I had used as a caul to glue in the 1/4" thick strips for the #4 to ride on. I noticed that it was wide enough to make a sled for the LN #3.
 |
| not quite a 64th shy |
I thicknessed two pieces of pine and they both ended up being barely a 64th over 3/16" thick. I measured the side strips and they were both a 64th over 3/16" thick.
 |
| close |
It is about 1/2 a frog hair from being dead on flush with each other. Threw it back in the planing jig and made a few more shavings.
 |
| sigh |
Needed a piece of 1/8" thick plywood and look at what I found. 6 panels of 12x24 6mm plywood. Forgot I had it and I didn't need to make two trips to Walpole to get some 6mm. Now I have a boatload and these are all different thicknesses too. But they are all pretty close to each other.
 |
| 1/8" thicknessing jig |
I needed a 1/8" thick piece to act as a stop for the LN #3 jig. I prefer these jigs to use bench planes. I've found that the LN102 will plane a high/low outside edge like it did on this one. A few taps with a plane iron setting hammer and all was well in Disneyland.
 |
| perfect fit |
A slip fit that is a wee bit below the side strips.
 |
| ditto |
The LN #3 performed planing to a 1/8" as well as the LN #4 did planing to a 1/4".
 |
| experimental box |
The hinges won't be here until tuesday. That will give some time to rethink how to make my retainers and while waiting I'll work on this box. The plan is to veneer it with whatever catches my fancy from veneer filled pizza box. What type of lid is up in the air but I'll think of something to match the veneering.
accidental woodworker
1975 Ithaca Model 37 pump shotgun
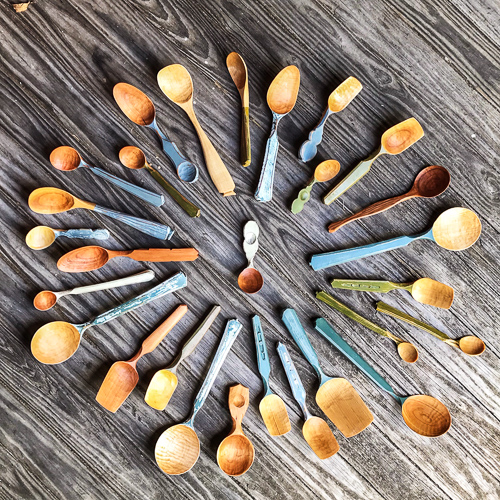
August 2025 Spoons (and Such)
Making a Joint Stool from Trees, Part 2: No-Lathe Legs
In my last post, I showed how I did the layout and joinery for my new joint stool, which is a 17th-century design that I have wanted to try out for years. I built the piece from wood taken from several logs I got locally, one of which was an oak tree that once grew on my property. I’m so happy to be giving that tree a second life in this stool.
The stool itself is designed to sit on, or really to perch on. Your feet can rest comfortably on the lower stretchers if you like. Despite the flat top, it is a remarkably comfortable way to sit. It’s a wonder this design ever fell out of favor.
It also makes a great end-table, if that’s your preference.

In building this stool, I am following a book published over a decade ago now: Make a Joint Stool from a Tree by Jennie Alexander and Peter Follansbee. This book is an invaluable guide to building this project, but the book is so much more than that. The principles and techniques they illustrate are widely applicable to all manner of furniture making.
Detailing without a Lathe
Traditionally the legs on these joint stools are turned, and they do look lovely when done well. I, unfortunately, am still lathe-less after 20+ years of woodworking, so I went with a different design plan.
The book very thoughtfully offers an alternative for those of us who don’t work in the round. It shows how to cut stopped chamfers with a lamb’s tongue detail on the legs. It was the first time I tried this kind of decoration, and I rather like it. And because you may wish to use this kind of detail on your own work, even if you never make a joint stool, I’ll walk you through the process here.

Between and below the mortises on each leg, pencil a line around the leg. Then pencil a second line about 3/4″ or 1″ further away from the mortises. The second line will be your stop, and the first line will be the beginning of the lamb’s tongue.

Use a pencil to mark the depth of the chamfer. I went about 3/8″, though I probably should have gone deeper for a bolder detail. Make a saw cut on the second line, and chisel into it to make a stop on each end of the chamfer.

I used a drawknife to carefully remove most of the waste. A chisel works too. Work right down to the layout line–and to the bottom of your saw cuts. A spokeshave is useful for leaving a nice, finished surface. That does it for the chamfer.

Now it’s time to shape the lamb’s tongue on each end of the chamfer. Using a mallet and chisel (bevel down), you start at your first line and scoop out the first part of the lamb’s tongue.

Next, with the chisel bevel-up, round over the lower part.
You can see the result here:

Use the chisel to make sure the chamfer and the bottom of the lamb’s tongue meet together nicely. Don’t get too fussy with how each one comes out. There will be little variations between them, and some will probably be cleaner than others, and that’s okay. From a distance, they’ll all look great.

It really helps to be working with stock whose grain is dead-straight.

I formed this detail on three of the four corners of each leg. The inside of each leg just got a rough chamfer all the way down.
When you need to remove layout lines, the card scraper will take off whatever the eraser leaves.
There are fuller instructions in the book, but that’s how I did it. The result is a softened, lighter look to the legs. Plus it removes the sharp edge that would otherwise start splintering as the stool gets used over the years. Always remove sharp corners on your furniture, or they will be removed for you.
In my final post, I will show how I made and attached the top of the stool.
carved chest with drawers for sale and more
A post about a carved chest and box for sale. But first, a detour to Elia Bizarri’s site – he’s put his pandemic videos he made with a bunch of us on sale for the weekend. Half-price. Dave Fisher, Curtis Buchanan, Jane Mickelborough and me. Get ’em here https://handtoolwoodworking.com/spoon-carving-videos/
……………….
The other day my son Daniel & I emptied much of the shop:
it was so we could photograph the chest with drawers I made…
 it was a nice day outside
The chest is one I’ve mentioned over on the substack site- made 2017/18, delivered and never used, never even displayed. Sat in storage until I bought it back this spring/summer.
 PF chest w/2 drawers. Oak, pine, walnut, Atlantic white cedar 2018
It’s featured in my book with Lost Art Press – Joiner’s Work. The chapter about making drawers and the section showing how I fit a lock to a piece like this. https://lostartpress.com/collections/joinery/products/joiners-work
It’s based on one I saw at Historic Deerfield years ago. The original was made either in Windsor or Wethersfield, Connecticut in the 2nd half of the 17th century. Mine follows the original pretty closely – my triangular corner plaques are walnut, I think the originals were oak. I don’t remember off the top of my head what the original moldings were, mine are Atlantic white cedar.
There’s a lock & escutcheon with two keys, made by Peter Ross, a favorite blacksmith.
 center panel
The chest is not small – H: 40″ W: 47 1/4″ D: 22″. It’s available for purchase. Email me at PeterFollansbee7@gmail.com if you’d like to discuss it. Here’s a gallery of the rest of the recent photos.
 side panel
 rear section
 open
open
 lidded till
 top drawer detail
 side hung drawer
 interior
 escutcheon & key
 end view
front view
center panel
end view
front view
center panel
………………………..
The other piece is a recent carved box w/carved lid.
 PF carved box w/carved lid, Aug 2025
Made with a Spanish cedar lid and base molding with what I thought was a Spanish cedar body – but is probably a type of mahogany. Iron hinges. Mitered dovetailed corners, based on an English box from Exeter, Devon. Lidded till inside.
another gallery:


H: 7” W: 22 1/8” D: 14 3/4”
price is $2,600 including shipping in US.
Email me at PeterFollansbee7@gmail.com if you’d like to purchase this box…you’ll have to dust the lid…
SALE: Spoon, Bowl, and Fan-Bird Videos
I don’t carve many spoons, but spoon carving is in the air this week. Yesterday I went to the log yard to get a white oak. What looked like the best log had metal in it – a problem for sawmills, but not for riven chair parts – so Junior gave the log to me for free. “Just make me a spatula,” he said as I left. (I split the log open yesterday and didn’t find any metal, just lots of hidden knots). Then today I hauled out my roll of sloyd knives in preparation for a friend’s bachelor party in which one of the events is carving a spoon in my shop.
So in honor of carving, and labor day, and maybe a labor-day spent carving, I’m running a 50%-off sale all the spoon, bowl, and fan-bird-carving videos that I did with Curtis Buchanan, Jane Mickelborough, Peter Follansbee, and Dave Fisher. Plus, a milk paint video with Curtis that has a lot of info on painting spoons.
More info about the videos here.
Happy carving!
The post SALE: Spoon, Bowl, and Fan-Bird Videos first appeared on Elia Bizzarri - Hand Tool Woodworking.glass door cabinet pt XVII..........
 |
| stopped chamfers |
I used the router butting against the stop to set the stopped chamfer. Added bonus is I get somewhat of a lambs tongue at the end.
 |
| attaching the top |
Eight holes - the back one three are 5/32" (same size as the screw) with the middle two and the three at the front 11/32".
 |
| pan head machine screws and fender washer |
The back screws will keep the back edge of the top flush with the back of the cabinet. The middle and front holes are oversized and will allow for expansion and contraction of the top. The fender washers span the 11/32" holes and they are not that readily visible. I bought 1" machine screws because ACE didn't have any 1" wood screws with a round head.
 |
| 2nd use |
I have 6 of these bar clamps. I had bought the pipe and the heads 30 years ago when I was going to make a bed. Didn't make the bed and only use one of the six clamps once before today.
It took me a bazillion years to get the top on, aligned, and dry clamped. Incredibly frustrating as a tap in one direction caused another to go OTL (out to lunch). Finally got it and I'm still sane and the cabinet didn't get free flying lessons.
 |
| the winner |
I bought a box of 12 of these from Lowes on the clearance shelf a few years ago. You can't go wrong with shiny brass. Even after having these for a couple of years there is zero evidence of tarnish on any of them.
 |
| found the glass knobs |
I don't like any of these for this cabinet. These knobs are quaint and artsy fartsy IMO. My daughter gave these to me for xmas. Still haven't find a project for them.
 |
| poor man's miter box |
Attaching the cove moldings on the base and I needed a miter box. I am getting better at sawing the miter saw kerfs. Still not exactly spot on vertically - I don't seem to have a problem getting the 45° dead on.
 |
| dry fit |
This was a PITA doing. The miter work was fine but the up down and fighting gravity sucked pond scum. My ceiling is too low to put this on my set up table so I had to do up/down clown routine.
 |
| switched |
I was trying to nail on the moldings and only succeeded getting one on. Kneeling and holding the brads with needle nose pliers wasn't working and I quit on trying the first nail on the second molding. I broke out the 22 gauge pin nailer and got the last 3 on easy peasy.
 |
| gap filler |
I glued in this strip of pine to fill a gap at the left front. I thought of using caulk to fill it in because I'm painting it but decided to fill it with wood because it is on the front. There is a gap at the back that I will fill in with caulk.
 |
| top molding |
Maybe a boo boo but maybe I dodged a bullet. I made the side overhang one inch. What I forgot to do was to add 3/4" to that for the molding. As it is now there is a 1/4 space on the sides and 3/4" at the front.
 |
| ugly looking |
I think this is going to take a few rounds of putty work. The first one didn't hide/fill in everything.
 |
| sigh |
Wasn't expecting this happen. I think this will be up against a wall but in case it doesn't, this gap can't be seen.
 |
| the gap cause |
This was misaligned and I used the 4x24 belt sander to flush it. In order to do that this outside edge got rolled down a bit leaving the gap in the above pic.
 |
| glass measurements |
This is the second measurement list, the first one is MIA. My usual place to get glass closed last year. I will check on line to see if there are any other glass houses and if not I'll get it from Lowes.
 |
| plywood edge cover |
For just in case - I'm going to put a thin piece of pine to hide the plywood.
 |
| chamfered |
I don't think this looks that bad. It doesn't look like it is applied but is for a purpose. The plywood is covered and I dead ended it a 16th into the ends of the side moldings.
 |
| glued and nailed |
accidental woodworker
Bowl Carving Instructional Video Sale
glass door cabinet pt XVI..........
Yesterday I ordered some goodies from Lee Valley. Today I updated it because I inputted my credit card number wrong. So my order will be delayed and I doubt I'll get this week now. Which will delay finishing the cabinet. I bought a new set of brass extruded hinges and I paid $51 for them. That was the price I saw (+/- $5-$7) checking various web sites. Sure hope they are worth the shiny brass they are made out of.
 |
| got lucky |
When I had eyeballed this a week or so ago, I thought I would only be able to fit 2 frames across but I got 3. There is 1/2" gap around the middle frame and the two outside ones are tight against the corners.
 |
| 6 of 7 |
Ran out of room to get the 7th frame here. I have another tool frame at Maria's being done with two more to follow. I'm doing those one at a time. I have the two walls (R/L) to populate with those along with the orphan 7th Stanley poster one. Plus I have additional real estate for more.
 |
| got lucky again |
I figured out the R/L length and this back stop is only about 1/8" longer than the top. I can easily blend the ends of the stop flush with that.
 |
| checking for square |
Penciled in the new outline and rasped and sanded it down to the lines. I'm getting better at eyeballing work like this for square. The right side is a wee bit high - that is usually the case. The lead in side that I rasp from tends to be higher than the exit side.
 |
| sizing the top |
The molding wrapping the top is 3/4" thick and I made the overhang plus 1". The last step was to sand the end grain ends with my sanding sticks.
 |
| bisecting to find the angle |
The last time I did this was when I was doing baseboards. One corner of the cabinet (right side) isn't square. It runs inward from the front to the back a couple of degrees.
 |
| glad I'm painting this |
I don't have a shooting board that will let me shoot an angle more/less than 45. This isn't off much but enough that I have to allow for it. I was expecting gaps and some misalignment to come.
 |
| top is sized |
I put the top on and placed a molding at the front and it overhung too much IMO. I changed it so that it overhung the molding by 3/4" vice 1". I left the sides overhanging 1".
 |
| 1/4" round over |
I wanted to break the square edge look of the stop. I ran a 1/4" round over on just the front face. I left the back squared off.
 |
| molding fitting time |
Cut the miters with the Ryobi saw. I wasn't trying to get a perfect fit off the saw. I was prepared to chisel, sand, and fill in with putty to do them. A couple of coats of paint will hide all my sins.
 |
| front one first |
This is the side that was off square and the fit off the saw was much better than I expected it to be. Two down and one more to go.
 |
| 42 degrees |
The angle on the front molding was 48 degrees. I checked them with a fancy protractor I had bought a couple of years ago. It was the first time I used it and I didn't have to make this jig. Forgot to snap a pic of that.
 |
| last one |
When I shot this on the shooting board the profile torn out crazily. I had to trim it a bit on the backside to close up the toes. I might use epoxy on filling the gaps on the miters.
 |
| back stop |
Glued and cooking. I will rout the chamfer on the sides and front after it has set.
 |
| the base |
It was a bit tricky attaching the base. The first 3 screws missed and came out the sides. No glue and only four screws to keep it in place.
 |
| hmm...... |
I have been running paint colors through the brain bucket over the past few days. Thinking of painting this with two colors - black for the base and back stop and a teal for the rest.
 |
| sneak peek |
The door doesn't seem to fit as well as it did yesterday on the width. The top to bottom is ok. Still haven't found a knob I like for the door. I have some but 99.9% of them are too small. I have some antique glass and colored glass knobs but I don't remember where I hid them.
I'll have time to hunt for them because I'm basically dead in the water now with this. I need the hinges before I can finish this up and they are delayed now. I don't want to use the hinges I bought from Horton Brasses because they take #4 screws. I don't want to risk hanging a heavy door like this with screws that size.
accidental woodworker
It's Here Because It's Here Because It's Here!
I am thrilled to finally be writing this blog post! 15 years after having an idea; almost 3 years after starting intensive development of that idea; and many trials and tribulations later, we are pleased to announce that we are finally taking pre-order deposits for the Gramercy Tools Treadle Lathe.
Last Sunday night we sent out an email to our mailing list of people who signed up to be notified of the lathe's progress and almost immediately sold out the first batch. So we added a second batch at the same pre-sale price so that more people could lock in their place in line.
We are still not quite at the point of shipping actual lathes, but being comfortable with offering a pre-sale is a huge milestone for us.
I must admit that I originally envisioned this projects milestones as more reasonable and attainable. The lathe has turned out to be the most complicated project of my career and possibly the most complicated hand tool manufactured in the United States since WWII (or WWI).
Our saga begins with the notion that a treadle lathe would be fun to use - and the unfortunate realization that I didnt have space for a lathe, so the lathe would need to be folded up. The other realization was an acknowledgement that if setting the lathe up and putting it back were too much work, I would not use it. I may be lazy but at least Im honest!
I ended up being willing to work hard to circumvent the downsides of my laziness. (Paradoxical, I know.) Good thing I wasn't alone in this. I want to acknowledge and thank everyone at Tools for Working Wood who contributed to the project. Kris Pastuszka was the engineer who designed the folding mechanism and a multitude of other details. Naomi Baxter, who is the shop supervisor, and Joel Sena (yes, we are a multi-Joel enterprise), run production in our shop and are responsible for making all the parts of the lathe that we directly produce. Which is a lot of parts! Our friend and woodturning wizard Alan Dorsey has been a source of invaluable inspiration and advice throughout the project. You can see Alan using the lathe here. Thank you as well to the numerous well-wishers at the Amana Hand Works show who gave us feedback and encouragement after trying out a prototype of the lathe, and more recently, visitors to our Brooklyn showroom who have seen the real deal.
We have a lot of advantages over the 19th century, including ball bearings and aluminum. I'm looking forward to spending time on the treadle for exercise and actually producing something at the same time. The most exciting thing is I feel like I can finally help people who live or work in tight quarters, who have the desire to make something but don't have space for a standing shop.
We expect to be delivering lathes by the end of 2025 with a second batch in early 2026, although I wouldnt be shocked if it would be a little later depending upon when all our parts arrive. There are over 100 parts in this lathe and the logistics involved with sourcing, identifying and keeping track of them has been mind-boggling. The final cost of the lathe will be $3,600, though we are offering the pre-order opportunity to pay $3,400 for the lathe, secured by a refundable $500 deposit. If you opt for the pre-order cost, when your lathe is ready to ship we will contact you for the balance of $2,900, which you can either pay or request your deposit back. This offer will be available until we either sell out this current batch, or start delivery. (This cost does not include the shipping charge.)
We encourage you to come by the shop if at all possible and play with the lathe prototype in person. And once the lathe is available to take home, we encourage you to do that in person as well. Your gratification has been delayed long enough!
Thanks to everyone for their support and encouragement on this long and winding journey.
glass door cabinet pt XV..........
 |
| hmm...... |
I'm kinda liking this reverse look of the base. Cleaned and sanded smooth, ready for the oohs and aahs.
 |
| nice |
I just realized looking at this pic that I had screwed up. The follow up to this was to rout a 45 ° chamfer on the front and up to the back stop. As I was envisioning that I saw that I hadn't trimmed the top to its final size. I don't think I'll be able to redo the pattern on one end. If not, I'll save it for a future use and make another one.
 |
| cleaned up |
The epoxy didn't like being rasped so I did most of the smoothing with sandpaper starting with 80 grit. I was able to smooth/flush the epoxy on the knot with my violin plane.
 |
| warm and fuzzy |
I added two more screws (total of 5) to each of the bearers. The weight of the cabinet and its contents will be felt on the four of them. Feel better knowing I added the extra ones. No glue - just screws.
 |
| something is awry |
I checked the front rail and it was square to the sides when checked from the R/L. I checked the door and it was not square. How that happened I am clueless. I had checked that the layout line was square but I missed it somehow. Easy fix and I had some wiggle room to square it off again.
 |
| got lucky |
Squaring off the top proved to be exactly what I needed. The margin at the top and bottom is perfect. Both the top and bottom margins are consistent and even from R to L.
 |
| working the long sides |
The door was a hair over a 1/4" wider than the opening. I ran both long sides through the tablesaw taking a wee bit less than a 1/8" off each one. That left the door a few frog hairs shy of fitting the opening. On the first plane and check run I planed 3 shavings off of each long side.
 |
| 2nd run |
Got a snug fit after the first plane run. Got a slightly better but still too tight of a fit on the 2nd run. I only did 2 shavings this time. 3 times was the charm again.
 |
| almost there |
The margin R/L isn't consistent top to bottom. The left side (which will be the hinge side) is good until the top 6-8 inches were it is tight against the side. I planed that area and checked it again - good margin top to bottom. The left side has about a 16th gap and the right is tighter. I am going to leave it as is for now until I get the hinges installed and door hung.
 |
| home depot |
I bought 13 feet of this molding this AM. I couldn't find any of the small moldings that I could use for glass retainers. The smallest quarter round available was too big - that I what I wanted to use. This molding appears to be maple and it is for underneath of the top.
I was looking to buy a large cove molding but the selection at HD is smaller than what Lowes offers. I have to go there to get the glass cut so I'll check what they have for any large cove moldings.
 |
| profile |
This is a baseboard cap molding and it was cheaper than I expected. 13 feet cost me $25. It is also 1 3/4" wide and the top rail is 2 1/4" wide. This will break up the wide flat expense of the top front rail and the top rail of the door.
 |
| I was wrong |
I thought I wouldn't have room for the pins and cups. I was hung up on the insert door sticking in too much but I now can see just how much room I have to play with. I am also playing with the idea of making adjustable wooden shelf supports. That is something that I haven't done before.
 |
| shelf pin drilling guide |
I have a couple of these already but they are all too short. This one is 41 inches high. The lowest the bottom shelf height can be is 10" and the highest the top shelf can be from the top is roughly the same.
I will need 64 cups and 12 pins for this. I ordered some from Lee Valley along with a new set of shiny brass hinges. Hinges are getting expensive and the ones I bought from LV don't come with screws. I bought 40 #6x5/8 flat head brass screws because I didn't have any this side. I'll need these for the hinge leaf attached to the side which is 3/4" thick.
 |
| almost done |
I gave the first couple of coats of finish a few days to dry before applying this hard wax to the box. I like how it looks on the darker wood but the white wood still looks unfinished to my eye. After a couple of days I'll mail this out to my sister.
accidental woodworker
glass door cabinet pt XIV........
I've been thinking about the shelves for the glass door cabinet. At first I was going to use shelf pins but I'm shying away from that now. There is a space limitation due to the insert door and the groove for the panels. Instead I'm now thinking of using fixed shelves - 2 definite and one maybe. News and updates on the 11 o'clock news.
 |
| bad oops |
I tried to cut too tight of a curve with the bandsaw and this chip popped off. I tried to glue it back on with superglue first but that failed. Used yellow glue this time and I glued this yesterday and gave it 24 hrs to cook.
 |
| glad I'm painting this |
The kerf says it all. If I left it off the hump would have been smaller than its sibling on the other side.
 |
| both sides |
I had to do the layout on both sides of the long base sides. The throat on my bandsaw isn't wide enough. The good thing is it turned out pretty much dead on both sides.
 |
| cleaning and smoothing |
Doubled up and did the front and back as one. There is no way that any of the sides can be compared to each other.
 |
| sigh |
I soaked this knot with super glue a couple of times yesterday. Today it seems to be tight and solid. Unfortunately I thought this was going to be on the back but it ended up on one of the short sides. A headache to deal with.
 |
| epoxy and silica dust |
Using this to fill in the saw kerf, add some to the hump, and slather all over the brown knot.
 |
| insurance |
I put it on with a wooden stick and then pressed it down into the knot as hard as I could with a putty knife. I put epoxy on the two sides and the top of the knot.
 |
| rethinking the top |
Initially I was going to wrap the top (all four sides) with a molding. Instead I'm going to only do the sides and the front. I will wrap the bottom with a cove molding.
 |
| hmm...... |
The top now overhangs each side 1 1/2". I don't need it at the back and it is probably too much for the sides/front but it offers some wiggle room. It is still possible that I might make a left hand turn on this again.
 |
| hmmm..... |
This is interesting turn of events. I ordered these hinges from Horton Brasses and got a shipping notice from John Wright and the package came from Amazon. I thought I had ordered bright brass hinges and these are satin. And I just noticed that I didn't get any screws!!
 |
| forgot one |
I didn't do the short leg with the epoxied knot because it hasn't set up yet. I'll do that one in the AM. I thought I had done this short side - duh.
 |
| no twist |
I flushed the four corners, top and bottom, and checked both for twist. Where I was expecting some due how much I had to plane off one corner, there was none.
 |
| bearers |
Screwed the bearers in with 3 screws in each one. I may add two more to the long ones but for now this will do. No glue, just screws, in case I want/need to revisit this.
 |
| fits |
I set the bearers down from the top 5/16" and with the cabinet in place the base covers about half of the 1/2" plywood.
 |
| the cove molding |
The cove molding completely covers the 1/2" plywood bottom with a reveal in the bottom front rail.
 |
| using gravity |
There is still a considerable amount of glue left in this bottle. I will leave it as is to drain down and I'll empty it in the AM.
 |
| came back for this |
I had killed the lights and I was going up the stairs when I thought of this. Invert the pattern and trace it on the back stop for the top. If I don't like I can think of something else. But I do like the look of the penciled layout.
accidental woodworker