Hand Tool Headlines
The Woodworking Blogs Aggregator
“Glory to God in the highest heaven, and on earth peace to those on whom his favor rests.” - Luke 2:14
Be sure to visit the Hand Tool Headlines section - scores of my favorite woodworking blogs in one place.
General Woodworking
Miles's desk pt XIII & Leo's dresser.......
 |
| clamps off |
There weren't any stresses in the desk - as the clamps came off nothing groaned or shifted. Sawed off the dowels and flushed them with a chisel.
 |
| hmm....... |
The back drawer rail is 5/16" off the front drawer rail. I hadn't thought about this when I made the front rail wider to accommodate a bigger drawer - depth wise. It took a few to wrap my head around how to deal with difference. Sometimes my spatial visualization ain't too good.
 |
| test piece |
I think I resolved what had to be done at the rear drawer rail to make it level with the front drawer rail. A 5/16" tongue on the back of the drawer in/out guide was the trick. The test piece lap was too deep but it put me on the right road.
 |
| depth setting jig |
My 18" combo square worked just as well as this would have had I not broke it.
 |
| drawer in/out guides |
Glued the guides and set them aside to cook. After lunch I added 3 screws to them because I didn't want to rely solely on glue.
 |
| front drawer rail |
No glue for this, just 5 screws. If need be any repairs/replacement will be easy.
 |
| didn't want to break this out |
The back drawer rail install didn't go smoothly. Initially I had screwed one end and the rail had shifted downward. Unscrewed the rail and filled in the errant screw hole. I then nailed the rail flush with the back top rail. Part of the problem was there wasn't any where to apply a clamp. The nails were sufficient to hold the rail flush so I could screw it off.
 |
| in/out guides |
Since I had the nail gut out, I nailed the guides with one nail at the front and back. After I make the drawers and fit them, I'll add a screw at the front and back to each one.
 |
| drawers |
The plan was to start the drawers in the AM. I stopped working on the desk here and turned my attention to Leo's dresser.
 |
| no paint today |
Got the dresser and all the drawers sanded and ready for paint. However, I blew off a big chip on the front of the dresser. I glued that back on and once it has set I'll have to do some putty work. One part of the blow off went MIA.
 |
| hmm...... |
Made a test groove for the plywood I plan to use for the bottom of the drawers. This fit is not snug but it isn't sloppy loose either.
 |
| done |
Got the depth and inset from edge dialed in. I was going to use drawer slips but I am now plowing grooves for the plywood in the front and sides.
Laid out the tails on both drawers and set up my Moxon vise. I'll start on the half blind dovetailing in the AM.
accidental woodworker
Some More Tool Finds
My name is Matt and I've got a problem. I just can't seem to help myself. About 4-5 weeks ago I visited a couple of estate / garage sales and found a few cool things. I just can't stand the thought of these things going to the dump if nobody takes them. Or the thought of someone else finding these things and not knowing what they are and mistreating them. Well, I guess the first step to recovery is admitting I have a problem. I'd rather think of it as charity for the old tools.
First, at one garage sale I found a nice partial set of auger bits. These were #4, 5, 6, 7, 9 and 10 bits. A shame the set didn't go all the way up to 16, but beggars can't be choosers. I can't recall, but I probably paid no more than $10 for them all. They cleaned up easily with wire wheels in a drill. And they were easily sharpened, too. Full length cutting spurs.
 |
| The Irwin bits in size order |

Logo upper: IRWIN

Logo lower: U S OF A
 |
| The file is pointing to a ruined spur |
Then a week or two later, I found this group of tools at another sale. This group cost a measly $20. And I got to the sale late! Who knows what I might have found if I had gone early!
 |
| Spring clamps, more auger bits, a 6" brace, saw set and "parts" plane |
This group of auger bits had an 8/16" size, so after cleaning it up, I added it to the earlier set to fill in that missing size. The bits' sizes and logos were as follows (a slash indicates a divider between lines in the logo; a ~~~ symbol means unintelligible markings).
- 1 1/2" (#24) TEMPER / TESTED
- 1" (#16) U.S.A. HSB & CO. CHICAGO (Hibbert, Spencer and Bartlett)
- 1" (#16) THE IRWIN BIT / MADE IN U.S.A. / MAINBOR
- 5/8" (#10) Jennings / Pattern
- 1/2" (#8) ~~~ Bit / ~~~ S. Pat. Off.
- 3/8" (#6) ROCKFORK ILLINOIS GREENLEE / MADE IN U ~~~
- 3/8" (#6) IRWIN / U S OF A
I gave this group of bits a bath in rust remover and then wire wheeled them with a drill. They look really great now. One of the 1" bits went into another set I've got that was missing that size.
 |
| Lookin' good! |
The is a 6" sweep brace made by John S. Fray. I didn't have a 6" brace, so this was a nice pickup. There were some interesting things about this brace, so I think I'll write about it separately.
 |
| 6" sweep brace |
 |
| THE JOHN S. FRAY CO. (other side says BRIDGEPORT, CONN U.S.A.) |
The plane is what's left of a type 9 (1902-1907) Stanley #3. I wish I could have found the missing parts, but even if I had, the frog had been broken (or cut) above the depth adjusting yoke, and a piece of brass had been riveted to the inside of the left cheek. I wish I knew what the prior owner was trying to do with this - maybe making some sort of nicker, judging by a corner of it placed at the plane's mouth.
 |
| Stanley #3 with frog broken or cut |
 |
| This brass was "riveted" to the cheek using a peened nail |
I got the plane to use for parts. For a couple of bucks, how could I go wrong. But I would really have loved a useable type 9 #3.
Last on the list was this saw set. The only marking on it was J. M. KELLAR and I'm thinking that was an owner rather than a maker - I found nothing about Kellar with a quick internet search.
 |
| The saw set |
 |
| The only marking |
 |
| Front end with anvil dial settings |
It looks like a fully functioning saw set, but I've yet to try it out. The first pic of the set shows the lower screw that "squeezes" a saw plate to the anvil, similar to some other sets I've seen. I might have to see if I can take it apart and clean it up. More on that later if I do.
Miles's desk pt XII & Leo's dresser.......
 |
| hmm...... |
My set up thing-a-bob is several frog hairs short. I thought I would definitely need it for the back rail to set the bottom drawer guide rail.
 |
| the fix |
I glued a thin piece of cherry to the guide to build up the depth of it. Planed it until it was dead nuts but all for nothing. I broke the jig rendering it into kindling.
 |
| center drawer guide |
I'm not crazy about the width of the maple at 5 1/2" wide but it will work. Thinking that I will use only screws to assemble it, no glue. I'm pretty sure that I used glue and nails on the drawer guides on my desk.
 |
| before I broke it |
With the guide in place and the bottom drawer guide rail butted against it, the top of it was flush with the bottom of the drawer opening.
 |
| hmm...... |
Upcoming hiccup to resolve. The front drawer rail is 5 1/2" wide and the back one is a little more than 5". The in/out guides will be sitting atop the front and back drawer guide rails. I will have to half lap the in/out guides on the back drawer guide rail.
 |
| nope |
There isn't enough room to drill the Miller dowels in at 90°. I won't be drilling them at at an angle. Instead I'll drill them at 90° from the outside.
 |
| cooking |
Hiccup free glue up of the base. Happy that clamping pulled the twist out of the left side that was twisted. The base isn't rocking nor does it look like it is twisted. The diagonals on the top were less then a 16th off.
 |
| maybe |
The dust panel is proud on the left side. I'll find out if it will be a hiccup when I install the drawer.
 |
| needs a paint touch up |
All the drawers fitted, easily pulling in/out without any hiccups. I went to Benjamin Moore paint store and they had a record of the paint I bought for the dresser in june of 2024 - Smoke Gray. The important thing is that drawers slide in/out and the rails I glued are rock solid now.
 |
| top drawer unit |
This is good to go. No dings or 'white' spots on it anywhere. I'll screw it back down to the top after the painting is done.
 |
| haul from the paint store |
Dresser paint, 4-0 steel wool, and two empty quart cans for shellac.
 |
| paint prep |
Sanded the drawers and the dresser first with 220 and followed that with a card scraper. Filled in the dings, etc with wood putty. Tomorrow I'll sand those spots and paint it. Hopeful that it will only be one coat but I don't think it will be so.
 |
| Miller Dowels |
This was it for today. I'll have to cool my heels and let things cook until the AM.
accidental woodworker
Spring Update

Goodson Woodcraft
by Eric Goodson on March 31
Hi everyone,
The snows have melted and the daffodils are emerging here in Newbury, MA after an especially icy winter. I wanted to send around a quick update on upcoming events that might interest you.

Gatherings
There is simply no better, cheaper, or more fun way to continue your craft practice than to join others in creative camaraderie. Here are a few upcoming events, both near and far, that might interest you. For more information about these and other events, feel free to email me.
“Sloyd Social”, Sunday April 15th, 2-5pm, at my shop in Newbury, MA/
Come join other burgeoning craftspeople for a little pot luck, carving, turning, weaving, whathaveyou gathering. It is a cozy affair, usually just a handful of folks, and a great chance to meet other creatives in this area.
“Spoon Camp NJ”, May 1-3 in West Milford, NJ.
Held at camp Vacamas in the woods of western NJ, this is a really delightful event (pictured above). Free, with donations to the camp encouraged. You can stay in the cabins, which have bunkbeds, hot showers, and a communal kitchen where we cook family-style dinners, or you can camp out if that is your thing. Folks come from as far away as North Carolina, Delaware, and Maine for this event. I will be heading down Wednesday to help set up, and you can come early too. Come hang with a bunch of spoon nerds.
“The Spoon Gathering” in Milan, MN, June 5-7, with pre-classes starting on Tuesday the 2nd.
The oldest gathering of its kind in the US, if not the world. Over 200 people descend on this tiny Minnesota town once a year to camp out, carve spoons, and connect with other folks passionate about greenwood carving. This is such a spectacular event. I went for the first time last year, and will be returning to teach an “Intermediate Spoon Carving” class during the pre-festival. I know it is a hike, but well worth the trip.

Courses
This year is shaping up to be a big teaching year, surpassing the sixty class days I held last year and ranging from Maine to Minnesota. Here are a few highlights:
Introduction to Spoon Carving at the Newburyport Art Association, April 11th.
A one-day intro to spoon carving in a beautiful gallery space. Come visit scenic Newburyport for the day–carve some spoons, walk the beaches at Plum Island, and maybe end the day with a nice dinner in one of the many restaurants in the area.
Woodturning Two Ways at Snowfarm in Williamsburg, MA, May 10-15
Spend a full week exploring a wide range of woodturning projects in western MA. Snowfarm is a wonderful craft school, with a vibe that feels like summer camp and food to die for.
Week of Slojd at the Nantucket Historical Association in MA, July 20-24
What could be better than enjoying the island life on Nantucket and taking a week of sloyd classes at the Historical Association? We will cover spoon carving, chip carving, kolrosing, and even heddle making. I will also be teaching kids classes and an adult turning class if you are on the island.
Bowl Turning and Tool Forging for the Pole Lathe at Historic Eastfield in East Nassau, NY, Aug 31-Sept 4th.
Spend a week forging your own hook tools and then turning bowls with your hooks in this unique hybrid course. Co-taught with blacksmith Beth Holmberg, you know you will get first-class instruction all around. Oh, and lodging is free in the renovated 19th century tavern, but you have to bring your own candles!
For a complete list of classes, see my webpage.
Latest Work


I am shifting my craft focus a bit, producing fewer product runs and instead spending my time on gallery items. I am especially focusing on skruvask, or locking-lidded boxes, and how to expand the form and design of these unique vessels.
I just published an article in the latest edition Spoonesaurus Magazine on spoon gatherings. It is a small quarterly magazine put out by fellow-carver Emmet Van Driesche. I am also working on an article for American Woodturner, which should be submitted soon. Finally, I continue to write on craft and craft pedagogy on my blog.
That is all for now.
As always, thanks for your support, and feel free to reach out with any questions.
-Eric

Goodson Woodcraft
Miles's desk pt XI & Leo's dresser.......
 |
| dust panels |
Happy with the rails. They are secure, tight, and appeared to be glued good this time. One sharp rap with a mallet and the rails just giggled at me. However, the dust panels didn't fit - they were about a 16th too wide.
 |
| dust panels |
One panel I was able to drop into rabbets. The other didn't have rabbets. When I made the rails I brain farted and put the rabbets facing down rather than up on two of the rails. The panels aren't structural so I was able to glue the 2nd one in place along with nails.
 |
| been a while |
Been a couple of months since I last posted a blurry pic. This one is for the center divider. I flushed it with 80 grit sandpaper. I will have to slap on at least one coat of paint to cover this and a few others spots.
 |
| leveled |
This is the epoxy filled in knot hole after 99% of it has been leveled. No pin holes from bubbles so far. You have to be careful with the pigment because even dry, it will stain the wood. Like an idiot I mixed the epoxy and stain on this board. Note to self, don't do that again.
 |
| cute |
Went to Lowes and bought a 4 foot length of 1/2" maple for drawer runners. Saw these miniature 5 gal pails on the way in and bought two of them. Food safe too. Absolute no idea why I bought them because I don't need them.
 |
| wee bit of a panic |
Got the bottom of the slats in with no hiccups but I couldn't say that for the tops. The dry fit went off without a hitch but with glue in the equation I couldn't solve it. Had a devil of a time getting the first three slats started. After several frantic minutes I got them going and then slats 10,11, and 14 had a major hissy fit. They finally fell into place. What took me 3 minutes to do dry, took me almost ten with glue applied.
 |
| sigh |
Put the center stile in upside down. The cathedrals point down. I brain farted and put it in the bottom rail with a the labeled top facing up when it should have been facing down.
 |
| dry fitted |
I didn't glue the base up here. I wanted to leave it dry because I was going to dry fit the drawer guide assembly. Wasn't sure if I could do it with the base glued and cooked.
 |
| sizing the top |
I barely had to saw more than a 1/8" off either end. Not something I had any confidence in sawing with a handsaw.
 |
| happy face on |
The overhang on all four sides was dead on.
 |
| sigh |
Couldn't find the slat I used to make the dutchman for the missing part of one of the legs. Could have sworn I saved it.
 |
| table clip slots |
I didn't brain fart on the table clips. I got all four inside edges done correctly.
 |
| ta da |
Found the dutchman. I'll get it installed after I glue the base up. Until then I'll keep it here on the base.
Didn't get any time in the PM session. On a trip out to the recycling bins, I tripped and did the bounce test on the back door stoop. I slammed into the cobblestones and ripped a pound of flesh off both my knees. I'm sure that I'll be feeling it in the AM.
accidental woodworker
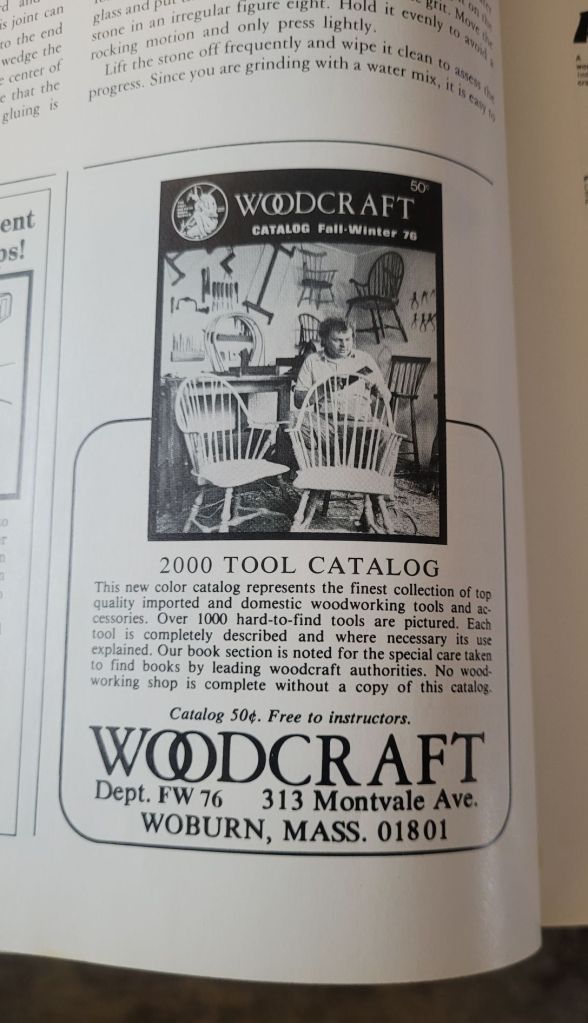
Fine Woodworking’s first 10 Issues
This weekend I had the opportunity to buy the first ten issues of Fine Woodworking at an antique mall in Northern Ohio. When I saw them laying on a magazine rack, I couldn’t believe what I was looking at. Even more so was the price of each issue. A mere $0.50 each. Unbelievable!
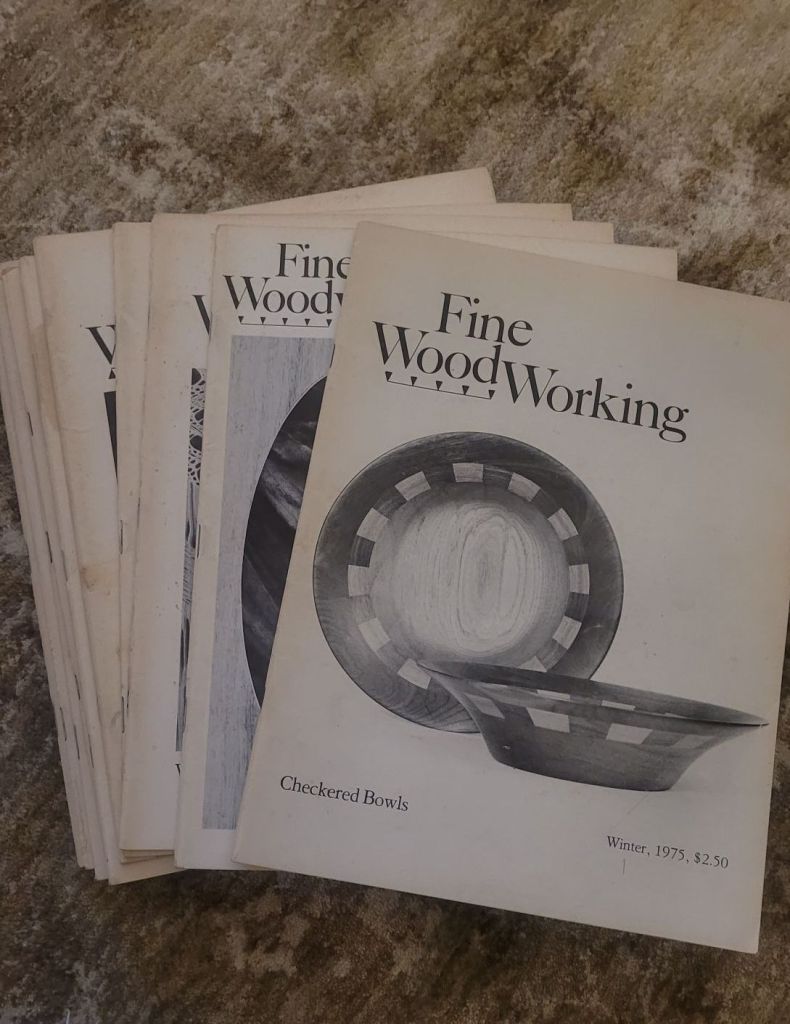
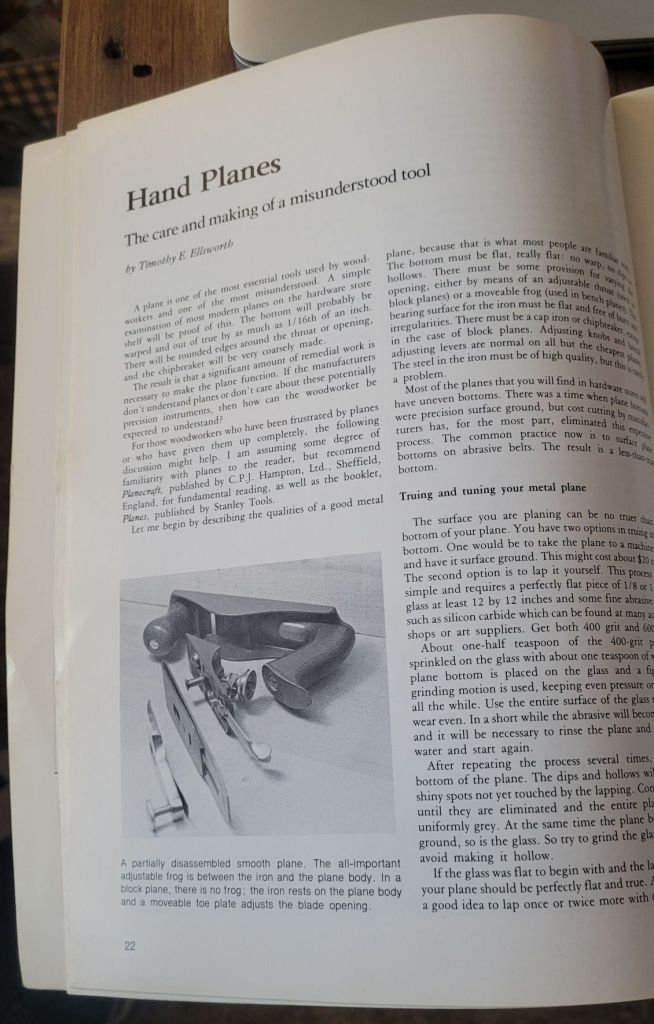
When I got home, I looked through the issues and read some of the articles. The first issue of Fine Woodworking had an article near and dear to my heart. Hand planes, with the caption “The care and making of a misunderstood tool.” This shows you how this was the very beginning of a magazine dedicated to woodworking if the common woodworker thought of a hand plane as being a weird foreign object.
Scanning the issues, I saw Tage Frid was an early contributor with several articles he wrote in first few issues.
Along with Frid, there are articles by James Krenov, Jere Osgood, and Bruce Hoadley. A basic who’s-who of 20th century woodworkers.
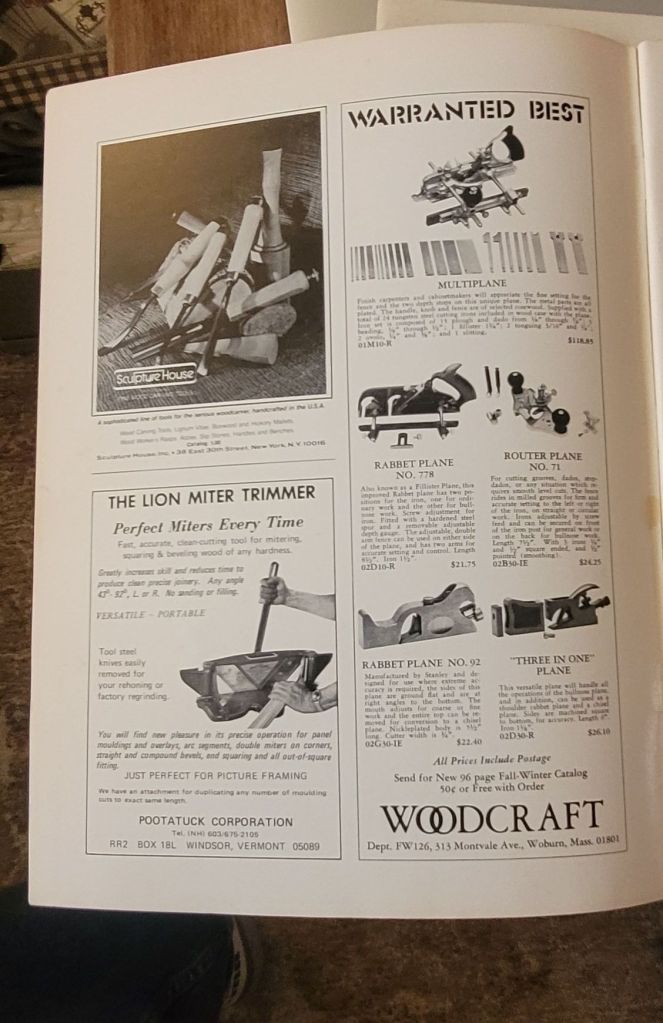
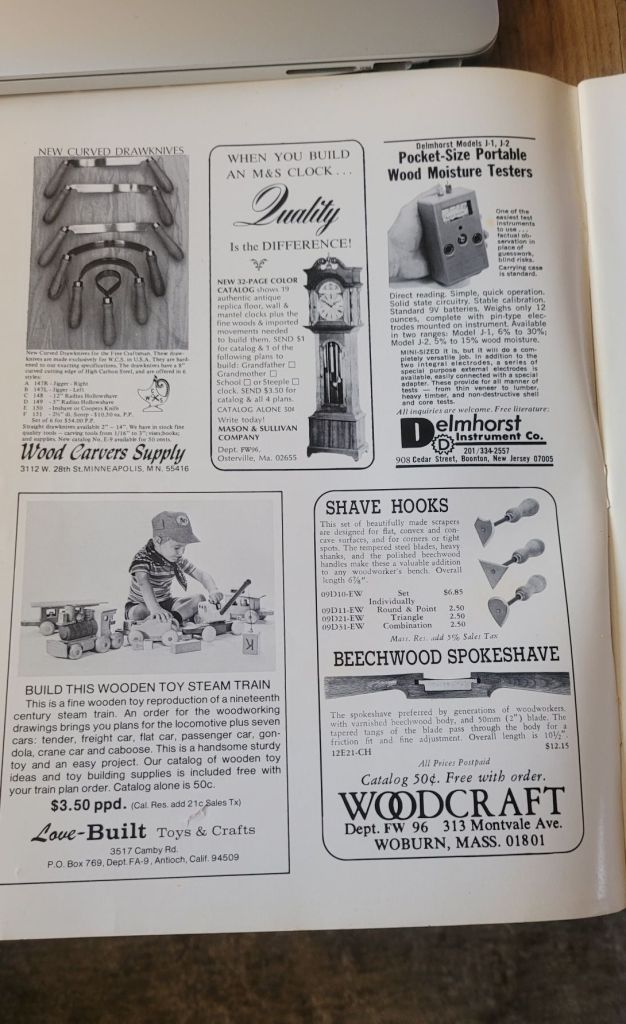
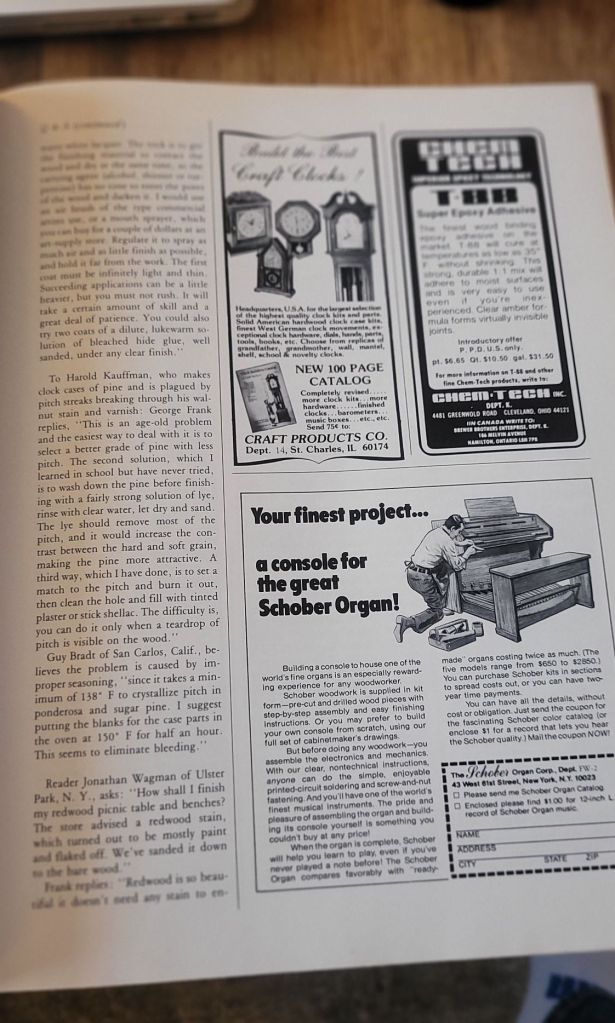
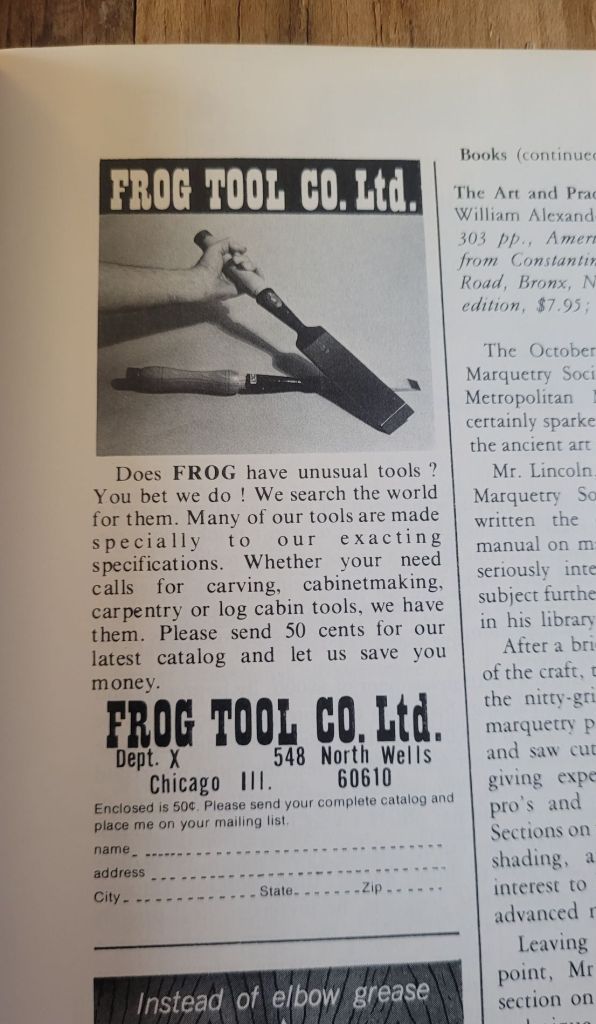
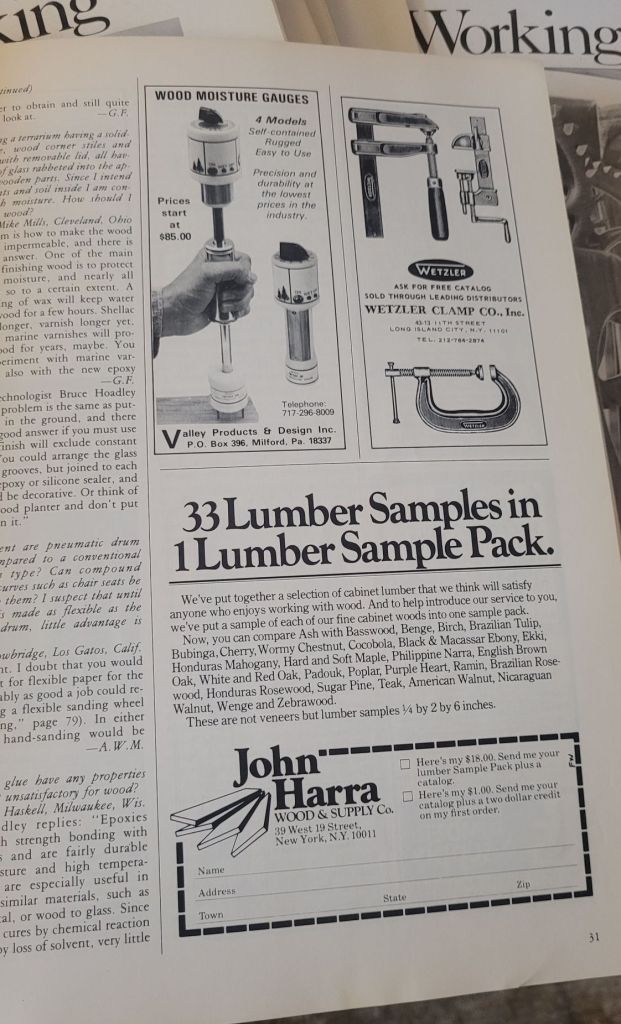
The first issue had very few advertisements, but the magazine quickly grew thicker in a couple of years as woodworking companies saw the opportunity to reach their audience by placing an ad in their pages.
It’s interesting, but a bit sad to see the companies that were thriving 50 years ago, only to go bankrupt or be acquired over the years. The issues are full of now defunct woodworking companies.
I’m still in the process of reading all the articles, but there is a wealth of knowledge with these issues. The one thing I did notice is back in the early days, the magazine focused a lot on wood carving and occasionally had articles on blacksmithing. Something that you would rarely find in today’s issues.
I checked eBay to see what these magazines might be worth. They’re actually worth a lot less than I would have thought. You can currently buy the first 12 issues for around $40.00. Of course you can buy all the issues of Fine Woodworking online if you don’t mind having a digital copy. I’m old school and still like holding a magazine in my hand instead of on my phone.
Miles's desk pt X......
 |
| hmm....... |
I don't remember it, but I can see how I did the drawer guides for my desk. I kept it simple and easy. I'll be replicating it for Miles's desk and Leo's later on.
 |
| center drawer divider |
I've been using this desk for years (10 or more?) and the drawers still work flawlessly. the guides (red oak) show almost no wear at all. No worn drawer bottom grooves at all but I won't be using red oak on either for the grandson's desks.
 |
| Miller dowels |
I pinned the sides with Miller dowels on the inside faces. The dowels worked perfectly as they were a 16th less than the width of the legs. The back I might have to do the doweling from the outside face. I'll deal with that when I glue the desk together.
 |
| table top clips |
I am going to attach the top to the base with these clips. I chopped the mortises for them with a 1/8" chisel. Three each on both sides.
 |
| back top rail |
Put five in the back rail - I didn't think 3 would be sufficient.
 |
| filled in |
The actual hole is smaller than what you see here. It got larger when I hit the epoxy with a heat gun to pop the bubbles in it. If I don't like it after it has set up I'll move on to plan B which is a dutchman.
 |
| hmm..... |
Wasn't sure if I was going to do the table top clip mortises in the front rail. I was a little gun shy after screwing up the back but I bit the bullet. If I did them wrong it would be easy to whack them out correctly. As a bonus the errant mortises will be hidden with the drawer guide rail.
 |
| hmm........ |
Whacked out a jig to help with setting the front drawer guide rail. The top edge of it will be flush with the bottom of the drawer opening. This simple jig will ensure it is even across between the legs.
 |
| fingers crossed |
Scraped the ends of the rails and the housings as best I could. Glued and installed the rails again. They will cook at least until the AM and maybe longer.
 |
| top rail |
I didn't have any problems getting the top rail and the center divider out. The dovetail detail was on the thin side and a small splinter stayed behind from the bottom of the divider. Scraped what I could and glued it again.
 |
| sigh |
The ends of the rails seated flush and snug. The center divider was a PITA. I tried frantically for several minutes but I couldn't get it flush. The screw holes for the drawer guides lined up but the center divider is proud of the rails. After the glue has set I'll see what I can do to flush it.
 |
| drawer set up |
There is a bottom bearer on the front and one on the rear. The drawer guide will be screwed to it. Underneath it will be a board that drawer will ride in/out on.
 |
| center divider |
This is an idea of what the whole thing will look like. The white wood is maple which should wear well as the drawer will be moving in/out over it. I don't have enough of it to do all three so I'll be making a Lowes run tomorrow.
accidental woodworker
Miles's desk pt IX.......
Went to the shop this AM with one goal in mind. That goal was to get all the slats installed on the back rails. Spoiler alert - made my goal with 12 minutes to go before the quitting bell rang.
 |
| hmm...... |
Split the outside face chopping a couple of mortises. I let them cook while I chopped the mortises on the other rail.
 |
| almost done |
It would seem that my calibrated eyeballing needs a reset. Two of the mortises were not deep enough. Fixed them and made them a few frog hairs deeper than 3/8".
 |
| done |
Got the wide center rail fitted into the top rail. The next batter in the rotation is slat #1.
 |
| planer snipe gone |
Three of the legs had some snipe and I planed it off. This was the 3rd and last one to be done. All of the snipe was placed on the outside faces.
 |
| yikes |
How did this happen? Missing a big chunk at the top of the mortise. It won't effect the rail tenon to mortise connection. However, I will fill in the missing chunk and I'll probably use epoxy due to the shape and location.
 |
| fitted |
I will do this after I glue up the desk.
 |
| sigh |
I would have bet a lung that I had double, triple checked this but something wandered out into La La Land. I really wanted this to face the inside but it ain't so boys and girls. I'll be filling this in with epoxy and black pigment dye.
 |
| it was almost lunch time |
Went dead in the water here. I needed to dry fit/clamp the base so I could measure for the length of the back rail slats. I had planed both of the back rail edges so I knew they wouldn't be the same length as the side ones. It took 6 shavings to clean/smooth the top rail edge and 5 on the bottom one. I had to give this rail at least an hour to cook before unclamping it.
 |
| 5 extras for any oops |
Picked through the remaining slats and got lucky. I was able to get 16 slats that had straight vertical grain. The center wide rail has cathedral grain.
 |
| this is finally toast |
Been well over a week since I mixed this batch and I can say it is now toast. It is still liquid and there was a lot of settling at the bottom. It was mixing in but it smelled like a sewer hole.
 |
| hmm....... |
Clamped it enough to get a measurement for the back rail slats. They were a 1/8" less than the side rails.
 |
| the back bottom rail |
Checked the depth of all the mortises and 3 were too shallow. I didn't want this surprise to shake hands with me when it was being glued up.
 |
| hmm...... |
Should have thought of this when I did the side rail slats. Ganged and clamped 8 slats at once and planed a chamfer on the four edges. A bit of a PITA but it did work. The slats slipped by some while planing and the first 2-3 on the plane lead in did not develop the chamfer like the others. I had to go back and give them special attention.
 |
| sigh |
I shouldn't be griping about this but gaps make me go postal and nutso at the same time. These 4 gaps -slats 1 to 3 and 6- I'll fill in with cherry veneer when I glue them up. Not that bad considering I had to chop 70 mortises.
 |
| looks good |
Sneak peek on the dry fit with all the slats fitted and shaking hands.
 |
| side view |
Thinking about chopping four more mortises to decrease the space on the sides. I'll have to see how difficult it will be to layout them out to match the others.
 |
| sneak peek with the top on |
This will be a good student desk for Miles (Leo will get one too). Initially I was going to put 2 vertical drawers on the right side but nixed it. I don't have that feature on mine and I don't miss it nor do I feel a need for it.
 |
| another head scratcher |
The top of the desk is square within less than a 16th. The bottom is out square almost a 1/2". I thought the legs at the front not having a bottom rail was the cause. Not so, the measurement between the legs at the bottom of the top rail and bottom of the legs was dead on the same. Could be twisted but the desk isn't rocking at all. I'll play this some more in the AM. Killed the lights and headed topside here.
accidental woodworker
Miles's desk pt VII........
 |
| maintenance pit stop |
These are still sharp but they needed a touch up to chop these remaining mortises. Cherry is harder than pine and wears the chisels down quicker.
 |
| hmm...... |
The chisel blade is too short to be used in the LN honing guide. With it in the guide, it is over an inch short of reaching the 25° angle setting.
 |
| nope |
I surely thought that this guide would work but it ain't so boys and girls. The chisel blade isn't that thick and the screw hold down is a more than a 1/4" from touching it.
 |
| nope again |
Same problem with this one as I had with the LN guide. The chisel blade is too short to reach the 25° angle setting.
 |
| didn't want to |
Had to sharpen the 1/4" chisel by hand. It had a small chip at the toe and it wasn't square. Started on the 120 grit runway to remove the chip, square the edge, and raise a burr. The bevel doesn't have the same consistent shine as the bevels on the other two chisels. It is sharp and ready to chop regardless.
 |
| one down, one more to go |
Got this one done just before quitting time. I had expected to get both done today but it didn't happen. Feeling a wee bit out sorts. No aches or fever, just a blah feeling. That translated into a lowered work output.
 |
| 3 down, 14 to go |
I was able to whack out 3 on the last rail before the quitting bell rang.
 |
| hmm...... |
Noticed a hump there when I slid the mallet across the bench. I think the last time I planed the bench was about 6-7 years ago. It is due for a clean up plane job.
 |
| hmm...... |
The jack wasn't cleaning up much. I got just as much new wood peeking out with the #80. I'll finish this up in the AM.
accidental woodworker
Miles's desk pt XI.......
 |
| ready to go |
Changed my mind on the installation of the slats. I'm going to do the two sides first, get them glued and cooked, while I work on the back slats.
 |
| last one |
Last slat fitted in the last mortise for the bottom rail. Wash, rinse, and repeat for the top rail.
 |
| first dry fit |
The only hairy part of this is fitting the slats into both rails. It wasn't that bad and there wasn't even the smallest hint anything would get flying lessons. I had to do this one more time (for each side) when I glued it up.
 |
| hmm....... |
Before I installed the slats I had dry fitted the rails again and checked the diagonals to get the measurements. Dry fitted again with the slats and the diagonals were off over a 1/4". It took a wee bit of effort with a 4 foot clamp pulling the long diagonal before I got them to agree with what I had without the slats.
 |
| 2nd side slat installation |
First step was to plane a chamfer on all four edges. After that I took two shavings off all edges and progressed from that until the slat fit snugly.
 |
| 2 dry fitted sides |
Looking at the two sides dry fitted, I think I should have gone with two more slats. The gap between the legs and the outside slats is almost 4".
 |
| glued and cooking |
Got both sides glued and I'll let them cook until tomorrow. Survived both glue ups without any hiccups.
 |
| left turn |
Changed my mind on using walnut for the center wide slat on the back rails. I sawed off a length to get the slat from. I don't have enough cherry in my stash to make another desk so being miserly with it doesn't matter. I'll use the rest of this board to make the slats for Leo's desk.
 |
| 2" wide slat stock |
The plan was to get the 2" slat from board where the knot was. It doesn't go through all the way through the board.
 |
| made a story pole |
There are 17 slats on the back rails. One 2" wide (actually 1 7/8") centered R/L and 16 3/4" wide slats. The gap between the last slat and the leg is around 2 1/2" wide. Made a story pole to transfer the layout from one rail to the other.
 |
| success |
I double, triple checked myself on this layout a bazillion times. I got it right this time or at least I think it was right the four times I checked myself. I'll chop these mortises starting in the AM.
accidental woodworker
Miles's desk pt X........
 |
| almost |
Got all the mortises chopped for the slats. Slats are cleaned and smoothed on all four edges. They will be individually fitted to their specific mortise. I'll do all three sets of them at one time.
 |
| dead nuts |
Both diagonals said hello with 37 7/16". The other side came in with the exact diagonals.
 |
| numbered |
I numbered the bottom of each of the nine slats and the inside wall of the top/bottom rail mortises. I resisted the urge to get the slats installed on this but I'll wait.
 |
| sigh |
Another brain fart. I started the mortises on the wrong edge, again. I didn't want to flip it and do the mortises on the top. These mortises would be visible on the underside of the rail - it is the bottom one. You would have to flip the desk over or get on the floor to look at them.
I was able to flip it 180 and switch which tenon went into the legs. No haunches to worry about as there are none on the bottom rails. I had to take a few shavings on one of the tenons to get it to fit - it was too snug.
 |
| the correction |
I did have to plane a bevel on the opposite face so the two rails will have space in the mortises where they meet.
I have one more rail to chop mortises in and the sides will be done. I am making a change to the back slats. I'm going to put one 2" wide slat centered on the rail L/R. I am leaning towards using walnut for it. I really don't want to use any of the cherry stash I have left to get one slat from.
Didn't get a PM session today. My PCP called and said there was a cancellation and I was able to get my echocardiogram done at 1400. I had a student from the local community college do it. She did pretty good with most of it and had to hand it off to the tech for one portion of the test. It took a wee bit longer than having a tech do it but we all have to learn how. No problem with that because when you're retired time isn't a big deal, at least not with me.
accidental woodworker
Seek and Ye Shall Find (perhaps)
 E. Hoppus, "Mr. Hoppus's Measurer", London, 1777
Before the internet, finding things in a book could be challenging. A library with a good librarian could be essential for success if your topic was obscure. But even with the book in hand, a table of contents only got you to the general neighborhood and you might need an index for the actual item. Library indexes date from ancient Greece and Egypt but the indices at the end of the books are a thirteenth century innovation. Tool catalogs really are a late 18th century invention (not entirely). In the picture at the top, we have an 1777 edition of "Mr. Hoppus's Measurer," a book mostly of tables and formulas for computing the value of timber and other items. But the back has a more narrative look at some useful items likes saws and their prices. Hoppus also has a table of contents at the beginning of the book - but no index.
Why am I thinking about the quest for knowledge? It's because I think all time how hard it is for people to find us, and how hard it may be for them to find the things they want from us. My favorite job at Tools for Working Wood is interacting with customers in person. Unfortunately I don't spend most of my time doing that. My main jobs are as follows: paying bills, doing all the bookkeeping, figuring out how to make tools, designing tools based on what I figured out, writing a blog, and caring for and maintaining our website.
I realize I am no damn good at some of these tasks - as many of you know, when you are a small business owner, you still have to do a task even if you are no damn good at it - but Ive actually developed competence at some of them. Competent enough? Its hard to know. We occasionally hear from customers when something really really good happens, but we always hear from some customers when something bad happens.
Bad can mean a lot of things, both to our customer and to us. The nature of complaining is that most complaints are aired to people who cant do much about them - typically whoever is there at the time. As a merchant, I know we are probably not going to hear complaints from people who are new to our site or casual browsers. They will just leave if they cant find what they want.
So the thing I am concerned about and we don't really hear from you enough about is, can you find the things you want to get on our website? We are particularly attuned to this topic because we just changed the websites search engine. (This is why the words enhanced by Google now appear in the search box in the upper right hand corner.) The search engine covers products for sale as well as information in the blogs. So I have a question for you: when you look at our website, can you find what you're looking for? I mean either by typing in a product in the search box, or by drilling down in the list of departments or links from products to products? When you get there, do you find what you're looking for? Between tariffs and high fuel costs, we are out of certain items, and Ashley Iles and Ray Iles products have always been a challenge to have in full stock. But we do have a lot of items that you nevertheless cant find and you may just think we don't stock it. It is those items that concern us the most. We are also interested in products you wished we carried but dont. (Customer requests are literally why we carry Odies Oil, Pica pencils and Fastcap; we look into all customer suggestions but sometimes the wholesale terms are too unfavorable to a little guy like us to consider.)
So we welcome your thoughts about how to make search better. Please add your comments below. And we - and many strangers - thank you.
The picture below is from the index at the end of Randle Holme's 1688 The Academy of Armory (York, England). Not a catalog but full of useful information. The index is invaluable. 19th and 20th century tool catalogs moved the index to the front so you could easily find what you were looking for.
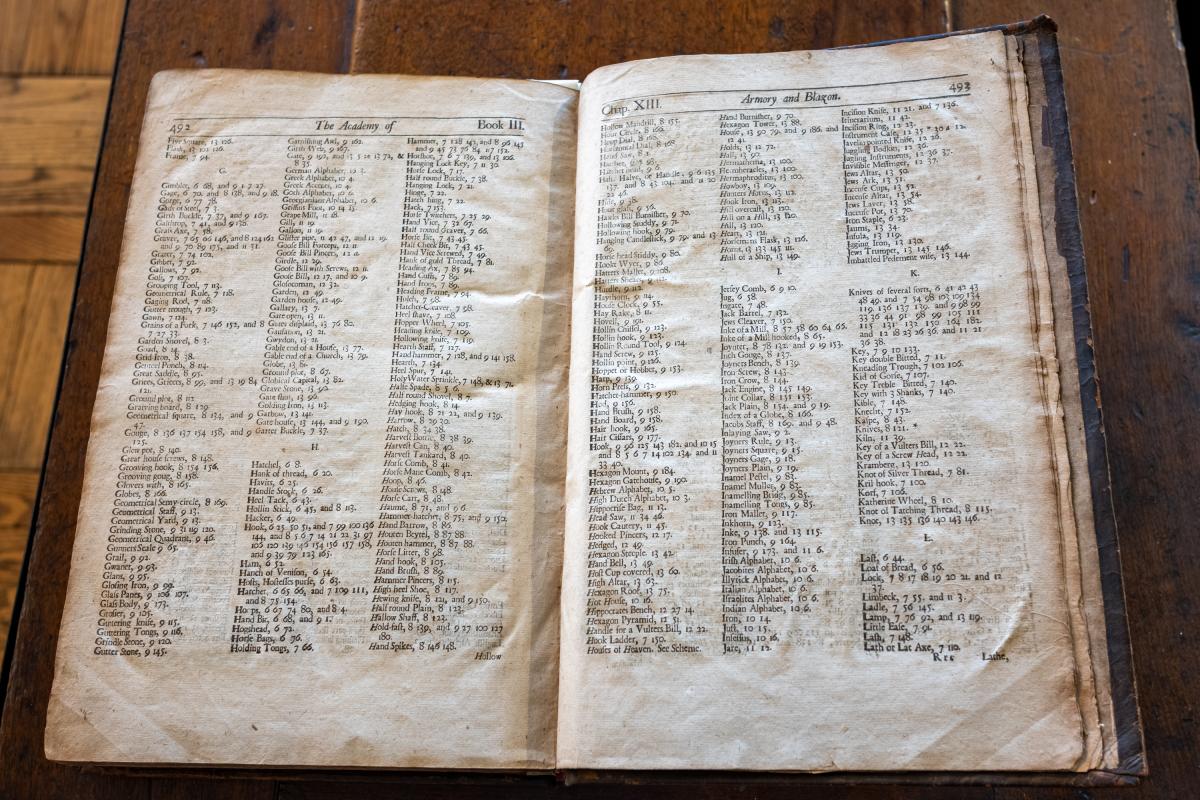 Randle Holme, "The Academy of Armory," York, England, 1688
Miles's desk pt IX........
What a day, what a day. Glad it is over as it was very frustrating at times but I showed a lot of constraint with nothing being broken or enjoying free flying lessons. I started this journey by going to the VA in the AM to make an appointment. The West Roxbury VA put in an order for an echocardiogram but they scheduled it for May and the CT guided biopsy is in april. Defeats the purpose of the echo needing to be done before the CT biopsy.
Normally this would have been an easy thing - just sign into health evet and message my PCP. Have her get me an echo here at the Providence VA. The rub? I couldn't sign into health evet. But I was able to talk to the clinic rep and she left a message explaining the hiccup to my PCP. Now I wait until they call me.
That didn't that long and I was back at the barn a little over an hour later.
That was errand #1. Errand #2 was dropping off a pair jeans I needed to have taken up. I have short legs and Wally World doesn't sell jeans in my size which is a 28 1/2" leg. Finally wised up and on the way home I stopped at the tailor I used before and they are no more. The location (which is conveniently close to my house) is closing. They are permanently moving to another address.
No biggie, I went to the other location and they aren't open yet. The windows were papered shut and there was a building permit on the shuttered front door. It is going to be a while before they will be open for business.
Found another tailor and it is one my wife had used for a long time. $10 to get my inseam taken up to 28 1/2". I'll find out on friday if it pays off. BTW Lands End sells jeans in my size and it is the only mfg that I know of that will do custom sizes. However, Wally World jeans are $20 and Lands End are $50 plus.
After I was done with errands #1 & #2, and getting gas, I started to deal with the login dot gov hiccup. This is where the frustration exploded. The security associated with these sites makes me nutso - my wife left to go shopping while I did battle with it. I endured and the reward I got was being able to log in finally.
Fixed my health evet login and it worked. Signed in/out four times to make sure it wasn't a fluke. Got my IRS 1099Rs from the last two retirement accounts. Found out that one of my retirement accounts is still intact. I never set it up after I retired from the VA. Not looking forward to the fun setting that up will be. Lost $2317 last year. On a brighter note, since 2021 (when I retired), it has grown over $21K.
I got to the shop after 1300 and I didn't get a lot of time on the pond. Puttered mostly muttering to myself before killing the lights and going topside.
 |
| hmm...... |
Chopped the last mortise in the bottom rail. The chip out is visible and gluing it back down did diddly with hiding/blending it in. At least it is on the bottom and won't be a flashing neon sign hiccup.
 |
| hmm..... |
I thought I had made this mortise (the chip one) wider but I hadn't. The slat is wider in both directions then the mortise is. Big smiley happy face on.
 |
| Houston we have a problem |
I laid out the mortises on the wrong side of the top rail. I had put the rails into the legs to make sure that mortises were in line from the bottom to the top rail. Couldn't do that because there were no mortises on the underside of the top rail. The flip side of the coin this turned out to be lucky for me. The errant mortises will never be seen once the top goes on.
 |
| I'm an idiot |
Checking the other side and what to my unbelieving eyes did I see. The same hiccup with the mortises laid out on the wrong edge.
 |
| the why |
At least I know why I had a serious brain fart twice. Hopefully I'll remember this when I go the two long back rails. Anyway, I saw top labeled on the rails and that is where I did the mortises. Didn't think that all the way through twice.
 |
| getting frustrated |
I must have had a ton of residual nutso energy from straightening out my log in issues because I screwed this up. The front rail should have been flipped 180 with no mortises laid out on it. Oh well it was still a semi productive day for me.
 |
| came today |
Trying a new shellac for me. I usually get blonde mostly because this wasn't in stock when I need to order some. The blonde has a hint of tint to it and I'm curious as to how clear this shellac will be.
 |
| two things for me in one day |
Feels like xmas almost. I already read one of the articles and it calmed me down. I'll probably finish this by tomorrow at the latest.
accidental woodworker
New Model Mandolin: 2
I would have bent my first set of sides during my first year at the London College of Furniture (1976/77) and I’ve bent a fair few bits of wood since. It never ceases to amaze me what you can do with a drop of moisture and a bending iron. I wasn’t 100% sure about the extreme bending that this new shape would need but as you’ll see (spoiler alert) it all went well. So, in part two, I make the rim of the mandolin: bend the sides, fit various blocks, linings etc and use my radius dish for fitting the back. Also, I get the neck blank made too! Quite a lot to take in, so get yourself a cup of tea.
Cheers Gary
Miles's desk pt VIII.......
 |
| sneak peek |
Dry clamped the base and set the top on it. I haven't that got to its final size yet but I wanted to check that I got it right. Spoiler alert, I did.
 |
| dry clamped base |
This is looking good IMO. Simple, plain, and functional. Thinking about doing something with the bottom of the legs - maybe a small taper?
 |
| hmm....... |
Three of the four legs have cracks in them at the top. The tenons all fit snug and a few were obviously too snug. I'll glue the cracks and set them aside to cook until tomorrow.
 |
| glued and cooking |
Just to be sure I'll keep these clamps until tomorrow. On the fourth leg I tried to open any hidden cracks in it with a chisel leveraged against the mortise walls. No cracks or even the slightest hint of any.
 |
| slats |
The slats are slightly over 3/4" x 3/8". The mortises are a frog hair under 3/4" x 3/8". The plan all along was to plane each slat to fit. I want the tenons to be gap free in the mortises.
 |
| ain't happening |
I haven't used this mortise machine in over 5 years? The switch is toast and I had to replace the starting capacitor. It still turned on (switch is now plug it in/out) without any sparks and ran smoothly. However, the widest rail is too tall to fit under the mortising chisel. The shortest one barely fit, there was barely a 32nd of clearance. Scratched the idea of using the machine to chop the mortises.
 |
| first step |
I have done slats in this manner 3 or 4 times already. I found that taking a chip on all four inside edges first helps a lot. It greatly helps with keeping the top of the mortise clean and defined.
 |
| first mortise done |
It shouldn't take more than one or two swipes of a plane to clean up and fit the slats to the mortise.
 |
| more 3/8 and less than a 1/2 |
I am eyeballing the depth of the mortises. I want them roughly to be 3/8-1/2 inch deep. The slats are not structural so there isn't any need for the mortises to be deeper than this. It is also the same depth I did on previous slat mortises.
 |
| sigh |
Had two boo boos chopping the mortises on the first rail. The first was a big chip blew out on the 3/8 width. Super glued that back down ok. The second one was a split/crack that said hello when I chiseled down on the long mortise wall. Glued that one back together with yellow glue.
 |
| sigh, again |
After waiting 30 minutes I started chopping the mortises again and another split/crack shook hands with me again. Glued that one and the first again because it wanted attention too. Clamped it and set it aside to cook.
 |
| ready to chop |
Got the other 3 rails ready to chop the mortises. I went with 9 slats on each side. After eyeballing the layout adding another 2 slats (11 total) didn't make much of a difference. I might add extra to the back though as it is several inches longer than the sides.
accidental woodworker
Miles's desk pt VII..........
 |
| surprise |
The glue bond from the PVA so far has been very easy to break with just a few gentle taps of a mallet. I tapped the bottom of the vertical divider first, then a few on the back of it. I was surprised to see that I had used the same dovetail joinery that I had used on the rails.
Before I can see if this will come free, I'll have to unscrew the drawer guides at the front. Fingers crossed that I'll be able to break it free intact then reglue it hiccup free.
 |
| one more |
I thought this was done but it ain't so boys and girls. Workshop dust settled on the shelf and if felt 100 grit sandpaper. I rubbed it down with 4-0 steel wool and applied the last coat of shellac.
 |
| splitting the cheeks off |
None of the cheeks ran into the center of the tenon. For the most part they split straight down with a few running out toward the outside face.
 |
| done |
Quick and easy to whack this out. It took me about 45 minutes to do all 7 rails.
 |
| first one |
Haunch not done, just fitting the tenons to the mortises first.
 |
| fitting the top front rail |
I have to fit and dry clamp all the rails first. Once that is done I can layout and do the spindles on the sides and the back.
 |
| dry fitted |
I hadn't realized that there was such a color difference between the front drawer rail and the legs. However, the grain pattern I like a lot and it will be a focal point of the desk once it is done.
 |
| ugh |
Got a gap on the left bottom side. I fiddled and faddled with it for almost an hour trying to close it up.
 |
| closed up |
I fettled this in small increments which is why it took so long. I used my shoulder plane to knock down the back shoulder - from eyeballing it, it was tight on the back and a gap on the front. (oops it would appear upon editing that I didn't post the correct pic)
 |
| first dry fit |
This looks a bit bigger than my desk even though this one is few inches smaller in both directions. No gaps anywhere - I was able to close up all the shoulders tight with the clamps.
 |
| last two rails |
I got the first 5 rails fitted by 1457. Decided to stay past quitting time and fit the last two. Got those done by 1546. Shut the lights and headed topside.
I had a few hiccups along the way. Nothing that caused a shutdown but required a few minor tweaks. I did the haunch wrong on two rails - neither boo boo will show once the rails are glued and cooked. The last one was the back top rail.
 |
| sigh |
I wasn't paying attention and when I fitted the tenons and the knot hole ended up on the outside face. Got lucky and I was able to reverse the tenons into the opposite mortises. I had to thin one tenon to get it to fit. It was too snug and split the leg. I'll have to glue them up before I do the rails.
accidental woodworker
Miles's desk pt VI & Leo's dresser pt I........
I had 3 things on the 'A' to do list and two were good and one went south on the express. The express one was frustrating and I wish I could have reached out and grabbed and gave it free introductory flying lessons. But I digress so on with the keyboard diarrhea.
 |
| the first good thing |
I was determined today to at least get all the mortises done for the desk. I had to add this piece of a 2x4 for the router. Without it was getting tippy while at the end of the cut. All of the top rails will have a haunch and this facilitated making that easier and safer.
 |
| yikes |
On the last mortise the router bit gave up the ship. Got lucky that it broke off and didn't go nutso and chew up the mortise walls. I finished getting to depth with a solid carbide 1/4" diameter up cut spiral bit. Cleaner and nicer finish then the broken router bit did.
 |
| outside mortise wall |
The plan was to make the tenon a wee bit wider by chiseling the outside wall. I had set the router bit a few frog hairs off the outside of the layout line.
 |
| hmm..... |
I took off a strong 32nd on all 12 mortises.
 |
| dips and dings |
All of the dips and dings happened on the outside mortise walls. Chiseling didn't remove them entirely, but enough. The shoulders on the rails will hide all of the dips and dings.
 |
| done |
It took a while and it wasn't until the 3rd leg that I hit my stride and developed a rhythm doing the mortises. Got the mortises completed a lot quicker than I would have if done with a mallet and a chisel.
I think if I use the router again for mortising that I will make a cradle for the legs. Doing it on the workbench was a PITA due to the vacuum enclosures thing a ma bobs on the router. I got a wee bit frustrated with them and I ended up breaking them off with a mallet. After they were gone things progressed a lot smoother.
BTW I tried to remove the vacuum hood/enclosures but I couldn't figure it out. It looked to me that they were a permanent things. I don't think that I will miss them because I had no way to hook up my vacuum to it anyways.
 |
| erasing the layout lines |
Used my high frog 4 1/2 to plane off the layout lines. I didn't have any issues with squirrely reversing grain tearing out.
 |
| interesting |
I had forgotten about this black milk paint. When I stirred it there was some bottom settling but I had no problems stirring it up and getting it lump free. I painted a scrap of pine and the adhesion seemed to be as good as the first time I used it. I am clueless as to what bad milk paint would look like, smell, or what the consistency should be.
 |
| shoulder work |
Mortises done - ends squared off and the outside walls chiseled. Next up was sawing the shoulders on the 7 rails. I didn't think I would get them all done today but I did. I sawed the last one at 1505.
 |
| LN tapered carcass saw |
This is the 3rd time I used this tapered LN carcass saw. I bought this when I had sent my other LN carcass saw to them to be sharpened. I didn't want to be without one while it was being sharpened. I bought the tapered one because the straight blade carcass saws were out of stock.
 |
| done |
Tomorrow I'll start on the tenons. The plan is to chisel the cheeks and plane them to fit the mortises with my rabbeting blockplane.
 |
| hmm....... |
I hadn't planned on doing this but the rail came off with gentle persuasion with a block of wood and a mallet. The fit of the rail is snug and I'm thinking now of using yellow glue - tite bond - to secure it.
 |
| hmm...... |
I found the can of gray paint but it didn't look so good. It is almost two years old and had skinned over on the top. I got it from Benjamin Moore and I'm sure they have it in my customer data base.
 |
| hmm..... |
I remember now how I rabbeted the back of the rail. I glued & nailed on a strip of pine but the 'rabbet' stayed attached to the plywood. I'll have to figure out how to attach the plywood to the back of the rail.
 |
| kept going |
Popped off the third rail and this time the 'rabbet' came with the rail. I pulled it off, scraped the old glue off it and the back of the rail and glued and nailed it back on. The dust panels aren't structural and aren't necessary to be glued/secured to the back of the rails.
 |
| glued and cooking again |
Used the same nails to register and secure the 'rabbet' again. I stuck in the vise to ensure a good glue bond this time.
The dresser is almost fixed now. It went a lot quicker and easier than the nightmare scenarios I was running through the brain bucket. Maybe I can talk my wife into painting it when I fix glue failures.
I spent over an hour on the southern express trying to log into my government accounts to get my IRS 1099 forms. It was an absolute shit show. There are too many accounts and all are different. The problem is I only log into them 2-3 times a year and they have expirations on the time for passwords. It seems they system forgets you and you have to start from ground zero to verify and log in again. I got two 1099s and I have two more to get. Not looking forward to that happy time.
accidental woodworker
The Japanese Gennou & Handle Part 23 – Finishing the Job
A man in love is incomplete until he has married. Then he’s finished.
– Zsa Zsa Gabor
This is the last article in our series about designing and making a handle for a Japanese gennou hammer.
In previous articles in this series Beloved Customer completed designing, shaping and fitting the handle of your gennou hammer and attached the head. Then you tested it and perhaps made adjustments. Assuming Beloved Customer is satisfied with the results of those adjustments, at least for now, the time has come to sand it and apply a finish.
Finishing Options
There are a couple of approaches your humble servant might propose on the subject of finishing tool handles. The first is perhaps the oldest, and easiest, and that’s to do nothing. After all, tools are made for hands not museums, and flashy finishes too often make otherwise workmanlike tools look silly.
In addition, most woods (except for those that might cause allergic reactions) perform just fine unfinished, thankee kindly. In this “au natural” approach, you may choose to leave tool marks on the surface of the handle without sanding them into oblivion, lending your handle undeniable gravitas and dignity, even character.
An unsealed, unfinished handle will, however, unavoidably become stained and discolored, and it’s head may not stay attached as long as a well-sealed, well-finished handle. I say this from experience.
A good light-duty finish material for an au-natural handle is a quality non-slip floor paste wax like Johnson’s well-known product in the yellow metal can. Does it seal the wood? No, but it does help keep the handle looking cleaner. Why floor paste wax? Some waxes, for instance those used to polish furniture and automobile paint, are intended to provide a slick surface that encourages water to run off and to which dirt doesn’t adhere well. History has shown that slippery waxes used on floors will result in slips, falls, and a transfer of wealth to the legal profession. For the same reason, carnuba automotive wax is not ideal for tool handles, while non-slip floor wax is.
And then there are the chemical finishes such as linseed oil (BLO), milk finish, tung oil, shellac, varnish, lacquer, polyurethane, etc. To one degree or another, these chemicals tend to seal the wood reducing the penetration of dirt and oil, and (sometimes) slowing the movement of moisture into and out of the wood.
But what chemical finish is best suited to a gennou handle? It is far beyond the scope of this humble scribble to properly describe, much less evaluate, the many varieties of finish applied to wood, so I will simply provide a few comments.
Linseed oil and BLO, a by-product of the flax plant, are organic materials used for centuries if not millennia as a traditional finish in Europe. It was once used widely for paint and, until it was replaced by rubber and later petroleum products, flooring and waterproofing materials. Have you heard of “linoleum?” Of course, this was back in the day when lead was a common ingredient in paint and makeup. Linseed oil no longer has any value as a finishing material for wood because it never really dries without adding problematic, even toxic, chemicals called “driers,” it seals poorly, collects dirt, and discolors badly over time. But because it’s constantly mentioned in old writings, which many people trust just because they are old, linseed oil products are still in-use today. To advocates of linseed oil products I say “make sure you soak your oily rags in water and dry them outside well away from any fuel (like your house).”
I am a fan of the modern milk paints, but do not like it for tool handles. Nonetheless, it’s a valid option.
Tung oil is an ancient finish, but the price nowadays far exceeds its value, assuming you can even find an unadulterated source.
Shellac creates a beautiful surface coating but it’s far too delicate for tool handles.
Standard synthetic varnish, nitrocellulose lacquer, urethane and polyurethane are readily available, easy to use and can create a beautiful, durable finish, but when used in the traditional manner, the surface film coating they produce eventually chips and cracks with time, exposure to ultraviolet light, and expansion and contraction of the wood to which they have been applied. And every scratch accelerates this degradation.
Why is degradation of film finishes the a problem you say? The obvious downside of a once beautiful finish looking ratty aside, every defect in a surface film finish promotes the movement of moisture into and out of the wood, and of course increases the swelling and shrinkage of the wood it’s intended to protect. What most people don’t realize is that, as time goes by, the solvents and compounds in film finishes intended to provide flexibility in dealing with expansion and contraction of the wood dissipate causing the finish to gradually become more brittle, and break down and crack at a ever-increasing rate, independent of dings and other defects.
In modern times, the use of latex rubber in water-based paints has greatly reduced this problem, but such paints are not especially durable as a tool handle finish.
Sanding
If the au-naturel approach appeals to you, I recommend erasing marks left by files and rasps and replacing them with crisp marks and cleanly cut surfaces left by sharp edged tools like knives, carving tools, and spokeshaves. Unless a chemical sealer/finish material is applied afterward, a plain sanded finish is probably the worst surface treatment possible, whereas a surface cleaned with sharp blades will serve you better. I often use this texture for the endgrain butts of my hammers and saws.
If, on the other hand, you prefer a smoother finish, and are prepared to apply a chemical finish, then by all means sand away. But please do not sand the tenon. If you decide to sand the handle before installing the head, please apply masking tape protection to the tenon.
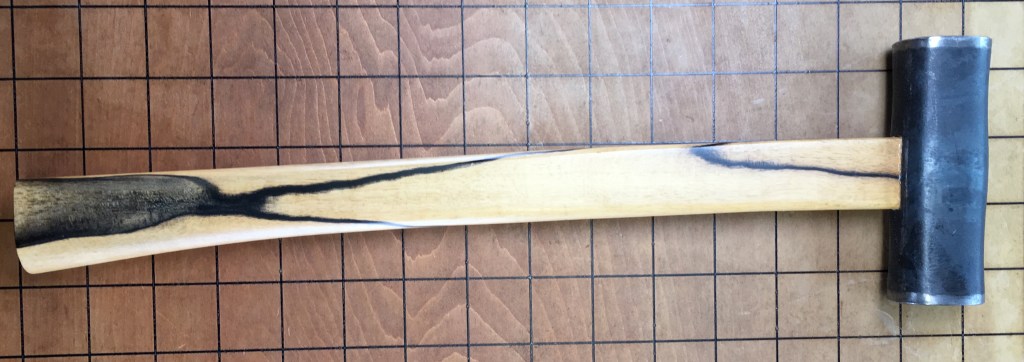
How fine should you sand your handle? I think 600 grit is fine enough, but I’ve gone as high as 1200 grit on fine-grained, hard woods like black persimmon. Did using such fine sandpaper make a difference? Nah.
After you’ve sanded the surface to where you like it, the next job is to eliminate hidden hairs. No, this does not involve applying hot wax to delicate areas of the body and then violently ripping out body hair so that you look delightfully-sleek in your new sequin string bikini, but rather it’s the job of encouraging the naughty ends of wood fibers still connected to the handle, but currently pressed flat onto and into the handle’s surface, to stand up so we can cut them off using sandpaper.
Dealing with these fiber is always important when finishing wood because, with time and moisture, they may pop up over time creating rough patches in the finish encouraging degradation. Once they are standing and no longer hidden, we can cut them off at the base with sandpaper to create a durable, smooth surface long-term even when exposed to moisture and sweat.
Although it’s not used much nowadays, sanding sealer was originally a shellac product developed specifically for this purpose.
To raise hairs, lightly wet the handle’s surface (but never the tenon) with water and allow it to dry completely. Some hasty people like to dry the wood quickly with a forced-air blower or even propane torch at this point to make any loose fibers stand up immediately in preparation for the next sanding pass. But simply allowing the wood to dry naturally is effective too.
This is an ancient, very effective technique. Please do this at least twice, after which you can apply the finish material.
 Kanō Hōgai, Two_Dragons_in_Clouds (1885), ink on paper. Philadelphia Museum of Art. Father and son dragons are depicted playing in the clouds.
The London Finish
There’s a durable wood finishing technique I learned from custom gunstock makers that I wrote about in an earlier article about handplanes called the London Finish. This is the finish I recommend for hammer handles too. It can be as subtle or as flashy as you like.
A pretty handle is nice, but the key objectives for applying a finish to your gennou handle should be (1) to moderate swelling and shrinking of the tenon during seasonal and climactic changes in humidity; and (2) to prevent oil and dirt from penetrating the wood making it look grubby. This matters because such swelling and shrinking can cause the head of your gennou to loosen and do naughty, acrobatic stuff at inconvenient times. And a greasy, dirty handle is no way to treat a friend.
If the head is attached when applying the chemical finish of your choice (I recommend it be so), please tape it well to keep finish off the metal. Apply masking tape to the hammer head on all four sides of the eye, but leave the end of the wooden tenon exposed.
Tape the rest of the head well with masking tape.
Soak the finish material (flat varnish or polyurethane thinned 100% with high-quality thinner) into the eye and the butt as deeply and thoroughly as possible. Plan for three or four applications allowing time for the material to soak in and dry.
Do no use low VOC thinners as they contain politically-correct compounds of water, acetone, emulsifiers and other counterproductive substances the State of California’s poorly-educated but thoroughly-conflicted and richly-corrupt lawyers have determined will save the polar bears, but that will weaken the finish.
If you faceted the butt and want to keep it that way, you must be careful when sanding it or the facets will disappear. This is a matter of personal preference.
Of course, be sure to apply lots of finish to other surfaces of the handle, and wet sand them well as described in the article linked to above. Don’t allow a surface film to dry except for the first time as described in the webpage linked to above.
Hammers are lifelong tools, but too often handles are not. You can help your gennou’s head stay tight longer, stay cleaner, and look better longer by applying a London Finish instead of a thick surface film finish.
YMHOS

If you have questions or would like to learn more about our tools, please use the questions form located immediately below or email us at Covingtonandsons@gmail.com. Please share your insights and comments with everyone in the form located further below labeled “Leave a Reply.” We aren’t evil Google, incompetent facebook, or gossipy X and so won’t sell, share, or profitably “misplace” your information. Promise.
A list of our gennou heads: C&S Tools – Gennou Hammer Head Pricelists & Photos
Previous Posts in The Japanese Gennou Hammer & Handle Series
- Part 1 – Introduction
- Part 2 – Ergonomics
- Part 3 – What is a Gennou?
- Part 4 – The Varieties of Gennou: Kataguchi, Ryoguchi & Daruma
- Part 5 – Kigoroshi
- Part 6 – The Ergonomic Anaya
- Part 7 – The Unblinking Eye
- Part 8 – Head Style & Weight
- Part 9 – Factory vs. Hand-forged Gennou Heads
- Part 10 – Laminated Gennou Heads
- Part 11 – Decorative Gennou Heads
- Part 12 – The Drawing: Part 1/6
- Part 13 – The Drawing: Part 2/6
- Part 14 – The Drawing: Part 3/6
- Part 15 – The Drawing: Part 4/6
- Part 16 – The Drawing: Part 5/6
- Part 17 – The Drawing: Part 6/6
- Part 18 – Wood Selection
- Part 19 – Laying-out the Handle
- Part 20 – Making Sawdust
- Part 21 – Installing the Head
- Part 23 – Finishing the Job
The front page.
A lot of work has gone in so far. It's good to be appreciated.

On the front page, and more inside.


another one bit me on the butt.......
About 4 years ago (?) Tools for Working Wood sold a white PVA glue. I bought a small bottle to try and I liked it. I liked it a lot and I bought a gallon. No problems with it and it worked differently then yellow tite bond. However, things went south with the last gallon I bought. Things I glued up with it were falling apart. Glue joints were going south in droves. TFWW gave me a refund on the gallon I bought and as far as I know they don't sell it anymore.
I made a lot of things and I am not sure of what I made with this glue. So far 5 projects I glued up with it have failed. I was able to reglue them with tite bond without any hiccups. When my wife got back from North Carolina she brought another glue failure home. The dresser I had made for Leo was coming undone. I'll be fixing it along with all the other things I have on my plate now.
 |
| almost there |
With the exception of the end grain tops of the ends, this bookshelf has 5 coats of shellac on it. I only have to get as many on the tops of the ends. I've been searching for hole to stick this in and so far nada. I really want to keep this and the books in the shop somewhere.
 |
| sigh |
It doesn't look that bad from 8 feet away. I unscrewed the drawer enclosure on the top to make it easier to bring it down to the shop. Amanda told me that it was getting impossible to open and close the drawers.
 |
| right side |
All of the cross rails came loose on the right. On the left side only
two are loose and two are still secure. Or at least I couldn't jar or
move them with gentle taps of a mallet.
 |
| hmm..... |
This was encouraging - I was able to easily clamp the ends of the rails tight tight to the sides. I think I'll use epoxy to secure them this time. I'm not sure that I'll be able to remove the rails, scrape the bad glue off, and reglue them. I don't know if the white PVA glue will loosen with heat and moisture.
 |
| dust panels |
I don't remember how I secured the dust panels. From feeling the underneath of the rails it I think the dust panels are in a rabbet and not a groove. The glue bond there wasn't good enough to keep the rails in place.
The back rails are still secure - they don't have the dovetail joinery that I used on the front rails. The back rails are secured with screws from the back plywood panel into the rails. It makes sense that the screws are keeps things secure and tidy on the back.
 |
| one done |
I am rusty with using a big boy router. I made a couple of dings on the mortise walls. I had to push the router against the rotation of the bit. A little hairy trying to keep the edge guide up tight against the stock. I like how clean and precise the mortise came out. Instead of doing anymore I'm going to wait until the AM.
Getting the dresser out of the car and down into the cellar took a toll on me. I'm feeling my age because it took me a lot longer to get into the shop then I remember getting it out of the shop a couple years ago. (finished this in 07/2024) Not feeling sore yet but I do feel like taking a nap big time.
Ordered some shellac yesterday and with S/H it came to $72.95. It has gone up again but I'll keep buying it because it is my favorite finish. I have been looking for something called a 4 part finish. Shellac, linseed oil, beeswax, and ????. I read an article about it (no recipe) and it was the finish valued by old masters. Still hunting down what the ???? part is, maybe it is alcohol?
accidental woodworker
Leave a comment Cancel reply